Every car enthusiast wants to operate his car without serious repair costs. Everyone makes a dissatisfied expression on their faces when they hit a pothole in the road, and as soon as something makes itself felt in the chassis of the car, we go to the garage to replace parts, without fail visiting an auto shop along the way.
This applies to the suspension, but we will not appreciate the depreciation of the mechanisms hidden from our eyes. We are talking about the gas distribution mechanism (GRM). The main rule in car maintenance is that the timing kit changes depending on the mileage traveled.
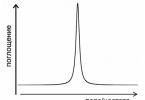
Important! Do not forget that the belt is a rubber product and tends to dry out. This can lead to its breakage during a sharp acceleration of the car.
The algorithm of actions for replacing the drive belt with your own hands is described below using the example of a 2007 kia rio jb car with a G4EE engine.
The manufacturer prescribed a timing belt replacement for the Kia Rio every 60,000 km. mileage or once every 4 years (in a car after restyling from 2010 and 2012, the frequency of replacement is prescribed for 90,000 km.).
I will never dare to check the reliability at the cost of bent valves and, as a result of expensive repairs. We will follow the recommendations of people who know the resource of their components.
You won’t need any special tools to replace the timing (the Fiat will not be marked without a special tool, and the belt simply won’t fit on the Ford). On kia, everything is much simpler.
A set of wrenches, a set of sockets, a flat-blade screwdriver, a Phillips-blade screwdriver are a standard set in every garage.
Interesting! To replace the timing in rio 2010 and 2012, the preparation is the same, because the engine design has not changed (therefore, the difference in the frequency of replacement is embarrassing; on restyled Kia Rio, it would still not be superfluous to replace the timing unit at least after 75,000 km run).
The condition of the water pump will also become clear when it is removed. And when replacing with Rio 2010 - 2012. with a frequency of once every 75 - 90 thousand km. pump run certainly does not go double term.
Its leak will force us to perform the same procedure for replacing the timing (we must not allow the process fluid to get on the belt, this will lead to its slipping by several teeth), and the jammed pulley will break the power belt.
Attachment belts and rollers can be replaced based on their condition. If you decide to leave the old belts on your kia, then the new ones will not interfere at all in the trunk of the rio. And they will come in handy just on a long journey.
We also purchase crankshaft and camshaft oil seals, because it is impossible to assess whether there is an engine oil leak until the timing belt protective cover is removed. It is also necessary to stock up on sealant and the necessary amount of antifreeze (leakage when replacing the pump).
Below are the main necessary spare parts according to the original kia manufacturer numbers and the corresponding analogues of the manufacturers that are suitable for the Kia Rio and are suppliers of components for the assembly line of many well-known car brands.

The sequence of actions when performing work on a car kia rio (2007, 2010, 2012):
Although replacing the timing belt does not involve disassembling the entire Kia Rio car, but performing it for the first time, a person will spend about 5-6 hours of his time. An experienced master can do it in 1.5 - 2 hours, regardless of the 2010, 2012 or 2007 release car. But if there is a desire to know the scope of kia rio jb repair, then the information presented will come in handy. All the best with your repairs.
Engine Kia Rio 1.6 has 4 cylinders and a 16-valve timing mechanism with a chain drive. The power of the Kia Rio 1.6 engine is 123 hp. Structurally, the 1591 cm3 engine differs from its counterpart, the Kia Rio 1.4 liter engine, only with an increased piston stroke. That is, the crankshaft of the motors is different, although the pistons, valves, camshafts and other parts are the same.
power unit Gamma 1.6 liters replaced the Alpha series engines in 2010. The design of outdated engines was based on a cast-iron block, a 16-valve mechanism with hydraulic compensators and a belt in the drive. The new Kia Rio Gamma engines have an aluminum block consisting of the block itself and a cast pastel for the crankshaft, see the photo below. The new Rio engine does not have hydraulic lifters. Valve adjustment is usually carried out after 90,000 kilometers, or, if necessary, with increased noise, from under the valve cover. The procedure for adjusting the valves consists in replacing the pushers that stand between the valves and the camshaft cams. The process itself is not easy and expensive. The chain drive is very reliable if you monitor the oil level. But the manufacturer recommends replacing, after 180 thousand mileage, the chain, tensioners and dampers. To this is usually added the replacement of sprockets, which is generally not cheap.

When buying a Kyo Rio with a high engine mileage, consider these facts. Extra noises and knocks from under the hood should seriously alert. After all, you, in which case, then sort out the engine. The Kia Rio engine is assembled exclusively in China at the Beijing Hyundai Motor Co. factory. Therefore, carefully choose even a new car, so that later you do not have to adjust the valves under warranty by replacing the pushers.
The big disadvantage of the almost completely aluminum Kia Rio 1.6 liter engine is oil consumption. If zhor has begun, do not be lazy to check the level more often and, if necessary, add oil. Oil starvation is fatal for this motor. Excessive noise is usually a sign that the oil level is low. You can't drive for that long.
If you feel unstable operation of the motor, this may be the cause of the chain stretching. To calm your soul, you can see if the marks on the crankshaft pulley and camshaft sprockets match. Photo next.

The timing marks of the Rio 1.6 engine in the photo are the top dead center for the first cylinder (TDC). We decided to replace the timing chain ourselves, then this image will be very useful to you.
The rather good power of the 1.6-liter engine, which is branded G4FC, is determined not only by the 16-valve mechanism with overhead camshafts (DOHC), but also by the presence of a variable valve timing system. True, the actuator of the system is only on the intake camshaft. Today, more efficient Gamma 1.6 engines have appeared that have a phase change system on two shafts, plus direct fuel injection, but these engines for Kia Rio are not supplied to Russia. Further, more detailed characteristics of the Rio 1.6 liter engine.
Kia Rio 1.6 engine, fuel consumption, dynamics
- Working volume - 1591 cm3
- Number of cylinders / valves - 4/16
- Cylinder diameter - 77 mm
- Stroke - 85.4 mm
- HP power – 123 at 6300 rpm
- Torque - 155 Nm at 4200 rpm
- Compression ratio - 11
- Timing Drive - Chain
- Maximum speed - 190 kilometers per hour (with automatic transmission 185 km / h)
- Acceleration to the first hundred - 10.3 seconds (with automatic transmission 11.2 seconds)
- Fuel consumption in the city - 7.6 liters (with automatic transmission 8.5 liters)
- Fuel consumption in the combined cycle - 5.9 liters (with automatic transmission 7.2 liters)
- Fuel consumption on the highway - 4.9 liters (with automatic transmission 6.4 liters)
It is worth noting that in the new generation of Kia Rio 2015 with a 1.6 engine, only a 6-speed manual gearbox or a 6-band automatic is installed. With a less voluminous 1.4-liter power unit, an outdated 5-speed manual and a 4-band automatic are combined. Judging by the numerous customer reviews of Kia Rio 1.6, the real fuel consumption is higher, especially in urban mode.
Now I’m also getting smart with other people’s thoughts, like many here!
What parts are original?
All over the world there are factories producing certain parts for cars. Some of them have a fairly high quality products and receive orders from automotive companies. Let's say Volkswagen-Audi AG ordered ten thousand shock absorbers from the BOGE factory. Of these, seven thousand will be installed on cars. The remaining three thousand are for "after-sales service" i.e. repair. They will be packaged in boxes with the VW badge and will go to the warehouses of regional Volkswagen dealers to wait in the wings. Such spare parts are called original. But the story doesn't end there. The BOGE plant, having completed the order, continues to produce these shock absorbers and makes another two thousand. They are packaged in boxes labeled "BOGE" and sold to wholesalers. At the same time, the quality is, of course, the same, and the price is 1.5 - 2 times lower. In addition to BOGE factories, they are produced at SACHS sites, which are part of the same production group. In addition, the BILSTEIN plant also buys documentation from Volkswagen and begins to produce high-quality shock absorbers, the resource of which, for example, is higher than that of BOGE, and, consequently, than that of the original ones. True, until recently, car manufacturers issued a license for the production of competing shock absorbers only a few years after the start of selling the original ones, but in recent years there has been a trend of “tacit consent” to parallel sales of non-original ones. In addition, some factory, let's call it GUNESH, without buying any documentation and licenses, begins to produce the same shock absorbers. All these shock absorbers are non-original, i.e. parts sold through the manufacturer's channels.
Is it true that the original is better?
The answer follows from the previous one - a non-original part can be better than the original one (BILSTEIN), completely identical (BOGE), equal in quality (SACHS), or worse (GUNESH). Moreover, as a rule, all of them have a price lower than the original. At the same time, the original one is the one that was installed by the factory on the assembly line.
Gates Corp. (Belgium)
Gates supplies components not only to major automotive and machine builders, but also to the aftermarket. By working closely with these companies, Gates maintains its leadership in design and manufacturing technology. Each product is characterized by durability and consistent performance. In the global automotive industry, the Gates brand has become synonymous with high-quality products and services that solve real-world problems and add value. It is difficult to find an automotive manufacturer in the world that does not use Gates products. Gates belt drive systems are manufactured to OEM orders for many manufacturers around the world, allowing Gates to offer replacement factory components for aftermarket service.
Complexity
Pit / Trestle1 - 3 h
Tools:
- balloon wrench
- screw jack
- Car support
- Open-end wrench 10 mm
- Open-end wrench 12 mm
- Straight box wrench 14 mm
- Straight box wrench 22 mm
- Extension
- Collar for end nozzle
- Nozzle on the crank 10 mm
- Nozzle for crank 12 mm
- Nozzle on the crank 14 mm
- Nozzle for crank 22 mm
- Large flat screwdriver
- Screwdriver flat medium
- Mounting blade
Parts and consumables:


Notes:
In accordance with the manufacturer's recommendation, on a Kia Rio car, the timing belt is replaced after 60 thousand kilometers or every four years of operation (whichever comes first).
At the same time as replacing the belt, replace its tension roller, as its resource is reduced, and if it fails prematurely, it will damage the new belt.
Perform work on replacing the timing belt on a viewing hole, overpass or, if possible, on a lift.
The Kia Rio 2 timing belt must be replaced if the following defects are found on it:
- traces of oil on any surface of the belt;
- traces of visible wear of the toothed surface, cracking, undercuts and folds, as well as visible detachment of the fabric from the rubber massif of the belt.
- cracks, folds, depressions and bulges on the outer surface of the drive belt.
- fraying and delamination of the end surfaces of the belt.
1. Remove the right front wheel.

2. Remove the right side of the engine mudguard.

3. Remove the alternator and water pump drive belts as described.

4. Remove the A/C compressor belt as described.

5. From the bottom of the car, next to the exhaust pipe, remove the five bolts (marked white) and remove the bottom cover of the clutch housing. Do not unscrew the adjacent crankcase mounting bolts (red) by mistake.

6. Stop the engine crankshaft from turning, for example by inserting a screwdriver between the ring gear and the clutch housing.

7. Loosen the engine crankshaft pulley mounting bolt.

Note:
The operation of unscrewing the crankshaft pulley is more convenient to carry out with an assistant.
8. Completely unscrew the fixing screw (1) , and then remove it and remove it together with the washer. Remove also the crankshaft pulley Kia Rio 2 (2) .

9. Remove spacer.
10. From the engine compartment of the vehicle, unscrew and remove the four bolts securing the alternator and water pump drive pulley to the water pump shaft and remove the pulley.
11. Remove the bracket for the right suspension bracket of the power unit.

12. Turn out four bolts of fastening of the top cover of a belt of a drive of the gas-distributing mechanism and remove a cover.


13. Turn out three bolts of fastening of the bottom cover of a timing belt drive and remove a cover, having removed it downwards.

In the photo, the lower drive belt cover has already been removed.
14. Set the piston of the 1st cylinder to the TDC position of the compression stroke and check the alignment of the alignment marks on the camshaft and crankshaft pulley.
Useful advice:
You can turn the crankshaft when its pulley is dismantled by the following method: turn on any gear in the gearbox and turn the suspended wheel until the marks match.
15. Loosen the adjusting bolt (B) and a bolt of an axis of an arm of a tension roller (A).

16. Insert a screwdriver between the tension roller bracket and its axle bolt, turn the roller bracket counterclockwise, loosen the tension of the timing belt, and then remove the belt from the crankshaft pulley.

Useful advice:
If the tensioner will not be removed from the engine, for the subsequent installation of the camshaft drive belt, tighten the bracket axle mounting bolt in a position in which the belt tensioner is displaced counterclockwise for the maximum distance.
Warning:
After the timing belt has been removed, it is forbidden to turn the shafts (crankshaft and distribution). Otherwise the pistons will damage the valves.
17. Remove the belt by pulling it towards the engine compartment.

18. Remove the ends of the tension roller spring from the tides of the oil pump housing by prying them with a mounting spatula.

19. Unscrew and remove the two fixing bolts of the tension roller to the engine oil pump housing and remove the roller along with the spring.
20. Check for smoothness and ease of rotation of the timing belt tensioner roller bearing. If the bearing is sticking, replace the idler pulley assembly.
21. Install the tensioner pulley and timing belt in the reverse order of removal, bearing in mind the following:
- install the timing belt first on the engine crankshaft pulley, then on the intermediate pulley, then on the tension pulley, and finally on the camshaft pulley.
- the branch of the timing belt opposite the tension roller must be tensioned.
22. If the tension roller was not removed, loosen the mounting bolt of the axis of its bracket. In this case, the roller will take the desired position with the help of the force of the spring, and the timing belt will stretch.
23. Turn the crankshaft two full turns, and then check the alignment of the alignment marks of the crankshaft and camshafts (the camshaft mark is visible through the red hole and is aligned with the green one. On the pulley, the mark in the form of a risk should be at the level of the letter T). In the case when the marks do not match, it is necessary to repeat the installation of the timing belt.


Camshaft marks

Mark on the crankshaft
24. Tighten the adjusting bolt and the idler pulley bracket axle mounting bolt.
25. In order to check the tension of the timing belt, grab the tension roller with your hand and squeeze the tension branch of the belt with some force (about 5 N). If the belt tension is adjusted correctly, its teeth should reach about half the radius of the head of the adjusting bolt securing the belt tensioner.
26. Tighten the adjusting bolt and the mounting bolt of the timing belt tensioner pulley bracket axle.
27. Establish all earlier removed details and knots in sequence, return to removal.
28. Adjust accessory drive belts as described.
The article is missing:
- Tool photo
- Photo of parts and consumables
- High-quality repair photos
Withdrawal
1. Disconnect a wire from the negative plug of the storage battery.
Fig.1. The sequence of parts removal when removing the toothed belt
2. Loosen the power steering pump bolts and nuts. Turn the pump to loosen the power steering pump and A/C compressor drive belt.

3. Remove the power steering pump and/or A/C compressor drive belt.
4. Loosen the alternator mounting bolts and alternator drive belt tension adjusting bolt.
5. Turn out bolts of fastening of the generator.
6. Remove the water pump pulley.
7. Turn out bolts and remove a pulley of a drive of hinged units and a directing plate of a gear belt from a cranked shaft.
8. Turn out bolts and remove the top and lower casings of a gear belt.

9. Turn the crankshaft so that the alignment mark on the crankshaft timing belt drive pulley is aligned with the pointer on the engine block.
10. Check that mark I on the inlet camshaft pulley is aligned with the pointer on the cylinder head cover and mark E on the exhaust camshaft pulley is aligned with the pointer on the cylinder head cover.
After combining the marks with the pointers, do not rotate the camshafts and crankshafts.
11. Loosen the bolt securing the toothed belt tensioner pulley.
12. Protect the toothed belt with a clean cloth.
13. Remove the tension roller.
14. Remove a gear belt from the engine.
Mark the direction of rotation of the toothed belt to reinstall it in its original position.