During operation, worm's work surfaces, roller, bearings, and a tower shaft, bronze bushings, adjusting screw heads, washers and T-shaped grooves of the tower shaft are wear out. As a result, gaps appear in the steering mechanism, which can be the causes of the knocks during the movement, the vibration of the front wheels, the loss of car stability and other harmful phenomena. The indicator of the appearance of the gap is the increased free course of the steering wheel. Increased clearance occurs primarily in the engagement of the worm and roller, and then the axial movement of the worm increases (along with the steering shaft). These gaps as they occur should be eliminated by adjustment.
In addition to the wear of the listed parts, the reasons for the increased free stroke of the steering wheel may be attenuating the fastening of the tower on the steering shaft or fastening the steering mechanism to the frame, as well as increased gaps in the hinges of the steering and the front suspension. Therefore, before adjusting the steering mechanism, check the condition of the steering of the front suspension, eliminate the gaps in the hinges and pull the weak fasteners.
The steering mechanism does not need to be adjusted if the free step of the steering wheel when moving in a straight line does not exceed 25 mm (about 8 °) when measuring it on the rim.
A greater free course remaining after suspenders of weakened connections and eliminate the gaps in the hinges, indicates the need to adjust the steering mechanism.
The axial movement of the worm and the side gap can be adjusted without removing the steering mechanism from the car.
The steering mechanism needs to be adjusted in such a sequence:
- Check if there is no axial movement worm. To do this, applying a finger to the steering wheel hub and to the rotation pointer switch, turn the steering wheel several times to the small angle to the right and left. If there is an axial movement, the worm finger will feel the axial movement of the hub of the steering wheel relative to the case of the switch.
- To eliminate the axial movement of the worm, you need to turn the worm to the right or left for about one and a half of the turnover and then turn it to some angle in the opposite direction so that the roller ridges do not touch the threads of the cutting and engaging the worm and roller was a fairly large side gap. After that, it is necessary to unscrew on two or three threads a locking nut 1 and tighten the adjusting nut 2 so that the worm is easily rotating and did not have axial movement. Then, holding the adjusting nut with a key from turning, it is necessary to tighten the lock nut and make sure that there is no axial movement of the worm and whether it is easily rotated.
- If, after adjusting the axial movement, the worm will leak oil on the thread of the adjusting nut, then under the locking nut it is necessary to put a cardboard or aluminum gasket with a thickness of 0.1-1 mm. Then you need to check the magnitude of the side gap in the engagement. To do this, you need to install the wheels in the ride position in a straight line and depart the left ball finger of the middle steering traction from the bump.
- In order to avoid damage to the thread on the finger, it is necessary to pre-hit several times with a hammer over the side surface of the body head or move the finger from the place with a special puller. After that, while maintaining the position of the bay, corresponding to the movement in a straight line, and swing the tower behind the head, determine the magnitude of the side gap in the engagement. Within the turn of the worm at an angle of about 60 ° from the middle position (3 ° 32 'the turn of the bump) to the right and the left of the gap in the engagement should not be.
- If there is no volatile engagement or a volatile engagement is felt on the sections more than 60 ° turning the steering wheel from the middle position, it is necessary to adjust the side gap in the engagement of the worm and roller. To do this, unscrewing the nut 27 of the thawel loading screw 30 by 1-2 turnover and inserting a screwdriver into the slot to the roset, to install a non-free engagement within the twist of the worm at an angle of 60 ° from the middle position to the right and left. Then, holding a screwdriver an adjusting screw from turning, tighten the locknut and check the adjustment.
- Making sure the adjustment of the adjustment was correct, it is necessary to check the steering wheel from one extreme position to another and make sure that in the entire turn of the steering mechanism there are no jams or tight rotation.
- When adjusting the axial movement of the worm and the side gap in the engagement, in no case cannot be made an excessive tightening, as it will lead to excessively tightened bearing worms to their premature wear, and excessive tightening (worm and roller) can lead to the wear of the roller and worm or Even the destruction of their working surfaces. In addition, with an excessive tight rotation of the steering mechanism, the front wheels will not strive to return the weight of the front of the car to return to the position corresponding to the movement in a straight line when the car exits from rotation, which will significantly worsen the resistance of the car.
- At the end of the adjustment, it is necessary to combine the ball finger of the steering tag with a compound and check the correct control of the steering mechanism when the car is moving.
- The adjustment can be considered complete if the free move of the steering wheel with fixed front wheels mounted on a straight line (in the absence of gaps in the steering joints and the front suspension and reliable fastening the steering mechanism on the frame), there will be no more than 10-15 mm when measured by Obstruction of the steering wheel. Before removing the steering mechanism from the car must be considered; that it is removed only through the bootable space down, when the steering wheel shot 58, the lever 52 of the transmission change control mechanism and handle 79 of the rotation pointer switch.
The steering mechanism after disassembly and adjustment is installed in the reverse order and in the same completeness. It should be noted that when connecting a bump with a steering mechanism, it must be installed on the labels available on the end of the cushion head and the end of the threaded end of the tower shaft. The sump should be hoping so that the risk at the end of her big head coincides with the label (core) on the end of the threaded end of the shaft tree.
The inappropriate rink will lead to the steering steering stop in the steering mechanism, which is very dangerous, as it will entail an insufficient turn of the front wheels into one of the sides and, possibly, breakage of the steering mechanism.
With the existing 36 slots, an error at least one slot when installing the binder will give a decrease in the possible turn of the bump into one of the sides by 10 °.
The longitudinal axis of a properly installed compartment in the middle position should be parallel to the axis of the steering column and is located ahead along the car, and the tower should be freely rotated from the middle position to the right and left at an angle of 45 ° to each side (a little more than two steering wheel speeds). The sizes of the sowing of the pendulum lever and the steering levers, as well as their mutual location, are chosen so that for the rotation of the wheels to the right and to the left, the tower should turn around 37 °.
Thus, with fully rotated front wheels in the steering mechanism, the stroke reserve remains.
The steering mechanism should be installed on the car so that with completely tightened bolts 15 of the crankcase mounting to the spar and the steering column with a gasket 50, pressed to the support of the column 45, the holes in the mounting bracket 49 of the steering column coincide with the flange nuts welded to the mobile Plank 47 placed inside the support. There may be cases when due to the deformation of the body with an accident or long-term ride, the slave is not possible to achieve the coincidence of the holes and the application is required for installation of the steering column. In this case, it is necessary to write the inner ends of one or two spar of the sleeves 13 and 14, to which the steering mechanism is attached, and check the position of the column.
In case of deformations of the body and the submool frame of the car, there are also cases when when the steering column and tightened bolts of the steering crankcase, the column will not touch the support 45. To remove this, it is necessary to cut down the two holes in the steering crankcase or put the gaskets of the required Thickness between the support and steering column and put the elongated bolts.
Incorrect installation of the steering mechanism on the car, in which the shaft and steering column can bend, will cause increased efforts on the steering wheel and in the transmission box control mechanism, as well as loosening the fastening of the column to the carder. In addition, it will cause increased wear of the upper bearing of the steering shaft. With a large displacement, the bending of the steering shaft can cause a breakdown of the steering shaft near the worm.
When removing the steering wheel From the shaft you need to pre-make labels on the hub and the shaft, allowing you to install the steering wheel when assembling in the middle position.
To put the steering wheel on the shaft on the average position defined by its turns to the right and left, should not, since in this case the steering wheel spokes when moving on a straight will not be placed horizontally.
In order to remove the steering wheel from the car, it is necessary to first remove the lid 61 of the signal switch 59. It must be done with a thin screwdriver or, even better, the blade of the knife, inserting them into the horizontal gap between the lid and the switch about one of the ends of the cut from the side of the larger Steering wheel sectors, and subsequent lifting of the end of the cover. At the same time, one of the springs 60, holding the cover, will be recessed inside the switch, and the lid is easily removed. Then, unscrewing two screws 65, remove the signal switch and the base 66 of the signal switch, for which the three screws 70 are screwed and remove the springs 73 from the root wheel hub rectifies. After that, unscrew the nut on the tree shaft, remove the steering wheel using a special puller.
In the absence of a puller, the steering wheel can be removed by hitting the hammer, necessarily only through the copper or aluminum gasket, along the tree of the steering wheel, talked to avoid damage to the thread pre-flush with the shaft of the nut 69.
The steering wheel is installed in the reverse order. However, the signal switch covers to avoid deformation or breakage of the springs must be installed in the following order. It is necessary to wear a recess on the end of the cover on one of the springs 60, while placing the lid so that its lower end is pressed to the signal switch, and the second end would not enter the switcher's slot. Drinking your finger the second spring into the slot of the switch and, pressing the other hand to the plane of the switch and not releasing the springs, smoothly drench the lid into place.
After that, by clicking on the cover, slightly move it towards the smaller steering sector and insert the tooth on the cover of the cover in the slot switch from the larger steering sector.
Installing the cover in a place in a different sequence or in another way, for example from above, will lead to strain or even breakdowns of plate springs, and therefore it is necessary to strictly follow the order of setting the cover in the signal switcher.
The tower of the steering mechanism is connected to the tower shaft with the help of small conical slots with a small cone angle on the shaft and is tightened with a nut with a spring washer. Therefore, a special puller must be applied to remove the custa. It is impossible to remove the hammer with blows, as it will cause the appearance of a dent on the roller of the Tshaka shaft, which will further lead to premature wear of the working pair of the steering mechanism.
An enlarged handle of the steering wheel VAZ 2107 is a fairly common problem, characteristic of the whole family of "Classics". In most cases, it is possible to eliminate the malfunction independently without resorting to a complex expensive repair. It is only important to correctly diagnose and localize the reasons for the backlash in the steering mechanism.
Checking the handle of the steering wheel VAZ 2107
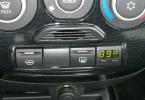
Big Wood Red Rule 207 - Blurry Concept. Meanwhile, the allowable backlash rude has set standards. For "classics" it is 5 degrees. To check the backlash, a special device is used for a service station - a luftomer. At home, you can do without it. To do this, it will take a ruler, chalk (or wire) and a partner assistance.
Check the size of the backlash is performed as follows:
- install the machine on a flat platform;
- check the tire pressure, if necessary, roll them up;
- put the steering wheel so that the wheels are directed parallel to the axis of the machine;
IMPORTANT: If the wheels are exactly, and the wheel of the wheel is disshived, it is possible to break the angles of the wheel setting, the presence of suspension and steering defects. You should adjust or repair steering and suspension.
- place the line so that it will be overlapped into the dashboard, the top of the headlight light switch and the second end, wheel rim;
- smoothly rotate the steering wheel until the partner monitors the position of the front wheels;
- as soon as the wheels begin to shift, stop the rotation of the steering wheel;
- make a chalk mark on the steering wheel opposite the ruler (or wrap the steering wheel with wire);
- smoothly rotate the steering wheel in another direction until the partner notes that the wheels began to rotate;
- apply a chalk to the steering wheel another mark or wrap it with a second piece of wire;
- emerriate the distance between the labels on the wheel rid.

The laptop 5 degrees corresponds to a displacement of 17 mm with a diameter of the steering wheel 40 centimeters.
Causes of Handle Handlebar VAZ 2107
If you have noticed an unacceptable handhel of the Waz 2107, the reasons for it can be as follows:
- the central nut of the steering wheel fastening on the axis is not tightened;
- the nut fastening nut is weakened to the gearbox;
- the worm gear of the steering mechanism is not adjusted;
- worn the sleeves of the steering mechanism;
- damaged steering thrusts or their tips are worn.
All listed problems require immediate interference. Otherwise, the steering mechanism can fail and the machine will lose control.
How to remove the backlash rudder on the VAZ 2107
Start work follows from checking tightening of the threaded connections of the steering mechanism and the state of the steering (tips). Cut thrust or worn steering tip hngers are subject to replacement. To do this, you will have to use the puller and a wrench to 22. Do not try to align traction or repair tips. For security reasons, these details should always be replaced by new ones.
Next, check the condition of the pendulum and adjustment of the worm gearbox.
Worn pendulum sleeves must be replaced with new ones. To do this, unscrew the steering thrust from it (the key to 22 and the puller is used) and remove the pendulum from the car, reloading the mounting bolts. Pendulum clamp in vice, remove the pin and unscrew the adjusting nut. When the nut is unscrewed, you can disassemble the pendulum and replace the worn sleeves with new ones. When assembling a pendulum, it is necessary to spin the adjusting nut so that its bumps rotate with an effort of 1-2 kilograms.
If all parts are replaced or good, and the threaded connections are tightened, the hood adjustment of the steering wheel of the VAZ 2107 is carried out by adjusting the steering gearbox. To do this, you will need the key to 19 and a powerful slotted screwdriver. Adjustment is performed as follows:

Thus, you can adjust the play of the steering wheel of the VAZ 2107 in accordance with the boundaries installed by the manufacturer.
The service life of the steering rack (hereinafter PP) should be about 15 years, as manufacturers assured. However, it will be so only under conditions: regular maintenance, the use of recommended quality oils, car rides on good roads and / or roads for which your car is intended, otherwise you cannot avoid.
Of course, if you constantly ride only on high-quality roads without picking and pits and with a good coating, then it is possible to climb the car very rarely to repair. But, unfortunately, good smooth roads remain the unfulfilled dream for Russian motorists, therefore RR has to repair a little more often than I would like. One of the varieties of repair of the steering rail is its adjustment.
When is the adjustment?
Adjusting such a car design, like PP, is performed quite simply and does not take much time at the driver.
Before proceeding with adjustment, it is necessary to make sure that it should be done, for this it is better to familiarize yourself with possible precursors of this type of repair. But before I publish them, I would like to briefly explain the principle of the work of the rail, the knowledge of which will help to better understand possible malfunctions.
Principle of operation.
So, the principle of operation of the steering rack is to transfer the efforts that the driver applies to turn the steering wheel on the straight or the gears, installed on the bearing and entering along with the toothed rail.

Reasonable interaction of the toothed rail and gear is provided by pressure springs.
Video.
Faults of the steering rack.
The most common problems arising in the described unit is the backlash and knock. With them, adjustment may not help. After all, in most cases, they arise due to the fact that there was a simple wear (it can be seen only with a complete disassembly) of the details of the toothed rail and gears.
However, the backlash and knock can also appear for other reasons:
- there was a weakening of the mounting of the steering bump, the steering crankcase, or the fastening of the lever bracket was weakened;
- the engagement of the transmitting pair needs adjustment.
If the steering wheel began to turn harder and with the applied of great efforts, then this is also a sign that the item must be adjusted. It is also necessary to add oil to Carter Rake.
Step-by-step instruction.
The main task of adjusting the RR is to get rid of the knock, the backup and the impression of the car driving. For this procedure, you will need a friend's help, as it will be difficult to do it.
Stages of work:
- We bring a car to a pit or aleacade, and the jacks will come to the extreme. In the latter case, the front wheels need to be put straight, and do not forget to fix the jacks when lifting the car.
- For adjustment, the adjusting screw is tightened, which is located in the steering system, namely in the end cover.

- Tighten the screw is very slow. During the screw adjustment, we check the backlash, steering wheel and the presence of a knock. The backlash can be measured using a special device - a luftomer. When measuring, you need to adhere to the GOST, in accordance with which the backlash can not be more than 10 degrees.
- After the procedure should be testing the machine in motion. If there is no weight in maneuvering, then everything is tightened well, if there is such a problem, then the screw must be loosen a little.
That's all. Finally, just repeat that the tightening of the steering rack screw can not solve the problems, in such cases the best solution will be a trip for consultation to the master.
The backlash is the term in mechanics, which implies the presence of free move at the mechanical system element. It is a parameter for which one can judge the magnitude of the motion of the node mentioned above to obtain an answer from the other - managed node.
In other words, the size of the backlash is characterized as the magnitude of the rotation or offset of the controlled element, which does not lead to any changes in the object.
With reference to the car and the angle of rotation of the steering wheel, in which the car continues to move in the constant direction.
What is meant under the total handle of the steering wheel?
Another term requiring consideration is "total backlash". Under it implies a common angle, the countdown of which begins with the extreme position of the steering wheel on the one hand, when the turn begins, to the opposite position, when the car begins to move in the other direction.
To understand the principles of operation of the total backlash, it is important to understand the design and features of the management system. If we proceed from the technical component, the principle of operation of the backlash has the following form.
In the transmission of steering, there is a rod, which is fixed with a small gap in one or two millimeters.
This distance is necessary to protect the nodes of the engagement of the steering system from wear due to excessive friction.
The presence of a gap is a technological solution that allows you to keep the hook in the required position and do not touch the surface of the teeth.
For the driver, this parameter is the free step of the steering wheel, which allows you to get more accurately controlled by the car and feel at what point the direction of the vehicle movement changes.
In essence, this is the total distance that the steering wheel passes before the car goes into the left or right side.
Many mistakenly consider this phenomenon with negative and try to get rid of it. Do not do this, because the backlash player is the norm for each car. Another thing is that it should have a strictly defined value.
An interesting pattern is traced here - the larger dimensions have a car, the more high is the backlash.
In the process of measuring the total backlash, a number of conditions are observed:
- The front wheels are located in a neutral position and stand on a solid (asphalt or concrete) surface.
- Tires controlled wheels dry and clean.
- Engine car is instituted. This is relevant if the operation of the steering wheel amplifier is tested.
- The tension of the driving belt of the power amplifier pump, as well as the level of the working fluid must comply with the requirements approved by the manufacturer.
Checking the total backlash is performed by measuring the angle of rotation of the control wheel between the fixed positions of changing the movement into the left and right side.
To obtain accurate parameters, the measurement is made from two or more times.
What is the beginning of the rotation of the steering wheel?
In addition to the above, there is another term that you need to know - the start of the rotation of the controlled wheel.
Under this parameter hides an angle of rotation of the wheel by 0.06 degrees with an error of 0.01 degrees in the same side.
The measurement of the parameter is made when repulsted from the position of the straight movement.
Permissible Lufts in cars
The normative indicators of the total backlash for various cars are prescribed in the PDD. In addition, this parameter should not exceed the numbers specified in the machine operation documentation.
If there are no special recommendations in the manufacturer's papers, the backlash should be as follows:
- For passenger cars, as well as buses and trucks made on their basis - 10;
- For buses - 20;
- For trucks -25.
- For VAZ-2106, 2107, 2110, 21213 - 5;
- For Gazelle 3302 - 20 (passenger variant) and 25 (cargo machine).
Causes of big backlash
An explanation of the increase in the backlash may be changes in the structural features of the steering, as well as the destruction of their elements.
To the main reasons can be attributed:

If we speak as a whole, the backlash occurs when the chain is malfunction between the steering wheel and wheels.
To find out the reason, it is necessary to go through the entire chain and determine the "weak" places. The main thing is to make sure that we are talking about the increased free course, and not about other problems.
To other reasons, the play in the steering can be attributed:
- Wearing or improper adjustment of the engagement "worm" and roller mechanism.
- Wear axis or sleeves of pendulum lever.
- Weakening of the fastener of the crankcase.
Signs of breakdown
As noted above, it must be diagnosed to effectively troubleshoot the fault. To do this, it is enough to know the signs of the backlash in the steering control.
The main symptoms include:
- The appearance of the knock in the steering mechanism;
- Increased vibrations during movement;
- Creak when turning the wheels;
- Deviation from a given trajectory with a direct position of the steering wheel.
When setting up the steering backlash, take into account the recommendations of the manufacturer and the rules of traffic rules.
The configured parameter should not exceed the upper limit, but also to undertake the indicator is also not worth it.
The steering wheel will be too low can lead to additional discomfort and deterioration by car.
At the same time, it is not necessary to ignore the appearance of a small backlash, because over time this parameter may increase, and then it will be more difficult to deal with the problem.
And it's inconvenient to manage the machine when you constantly "catch the road" and rotate the steering wheel in the same way.
Diagnosis of the problem and applied instruments
To determine whether the parameter corresponds to the norm, it is necessary to make a small check.
To accurately make sure that the problems can be used, you can use a special device - a luftomer.
With it, you can check the overall (total) backlash in the system.
One of the options of the device is to 524 m or Isl-M, which can be applied by conventional car owners and professional professionals.
With the help of a luftomer, it is possible to determine the amount of free stroke in just three minutes, including taking into account the installation and removal of the device.
Algorithm of actions in the diagnosis of steering backlash, the following:
- Get the engine (it should work idling);
- Put the front wheels parallel to the longitudinal axis of the machine. At the same time, make sure the hydraulic amplifier;
- Turn the steering wheel into one, and then to the other side. At this point, fix the moments when the front wheels begin to scroll in the desired direction. The distance that the steering wheel passes between these intervals is called the backlash (free move).
Such a check is considered an excellent option for drivers who need accurate and fast information.
It does not matter how the problem was diagnosed. If the backlash player is greater than the norm, it must be eliminated.
How to eliminate malfunction: basic ways
To adjust the steering, you will need a standard set of tools that allow you to adjust the mount.
If manual measurement or device to 524 m showed an inappropriate result, it is worth doing the following:
- Try adjusting the screws that enhance the cardan hinges. You can find these elements on the steering shaft.
- Using the Hinker Adjustment Screw, place the required parameter.
- Check the back of the back. If the free move remained above the norm, it is necessary to look for another reason.
- Tighten the adjusting nut on the steering rake (if such is provided), it will eliminate the gaps between the gear plate and the leading gear, which may be the cause of the backup.
The next step in the adjustment can be setting steering hinges.
It is more difficult to do this in a garage, because it will take a flight, an observation pit or a lift to perform work.
With a high probability you will see that the hinges are damaged, and this indicates the need for screwing screws. In addition, it is worth stretching and steering traction.
If the methods described above cannot be eliminated, only one solution remains - to disassemble the steering mechanism and change the details failed.
In the absence of necessary experience and knowledge, you can refer to experienced specialists for a hundred.
Hello, dear car enthusiasts! Sometimes, unexpectedly sneaks the feeling of "white" envy, when in the manuals of foreign automakers, we read the words that the service life of a worm or rail in the steering rail of the car is designed for 14-15 years.
Designed and ... so it really is: the steering rail does not fail. Naturally, subject to certain conditions, such as: the recommended timing of the maintenance of the steering rack, the use of recommended and high-quality oils, and the operation of the car on the respective roads.
And, if the first two points are fully fulfilled from the owner of the car, then the third, alas, for us still remains a fabulous dream. Therefore, today we will consider the question of how to pull the steering rack with your own hands.
Adjusting the steering rack - the procedure is simple and completely under the power of any driver. Yes, and in time it takes no more than an hour with all the preparatory activities. But, first, let's remember for what, and when the steering rack is needed.
Why do you need adjustment of the steering rack?
From the type: Rake Gear: The driver's effort is transmitted to the wheels through the gear (spinless or ososophy), which is installed on the bearing and interacts with the toothed rack.
The unrestricted gear of the gear and toothed rail is carried out thanks to the pressure springs.
The most common faults: or. The causes of the backlash or knock can be:
- The fastening of the steering rack crankcase, the steering tower or the mounting bracket of the crankcase lever is weakened.
- The natural wear of the transmitting pair: the gear rail.
- Violation of the adjustment of the engagement of the transmitting pair.
- Wearing ball joints of steering tag and so on.
With incorrect adjustment of the engagement in the transmitting pair, a tight rotation of the steering wheel may be observed. It is in this case that the adjustment of the steering rack is required, and, of course, the topping or replacement of oil (lubrication) in the steering rack crankcase.


How to adjust the steering rack with your own hands?
Immediately I want to warn that the tightening of the steering rack may not solve the problem with the backlash. The fact is that the degree of wear of the details of the transmitting pair: gears and toothed racks us and you are unknown. It can only show an autopsy. We are talking about the first suspender.
If the tightening of the steering rack does not bring the desired result and the backlash or knock will not disappear, then you need to be recorded on the audience to a specialist. But, while, calling a comrade for a garage (you will need a partner for adjustment) and proceed to the suspender.
Tightening the steering rack on their own
- Adjustment is made by tightening the adjusting screw. It is in the steering mechanism (in the end cover).
- Ideal option - if you have a pit in a garage or an overpass on the territory. If not, you can pull the rack and on the jacks. Naturally, strengthening the car after lifting at stubborn "goats."
- Before lifting the body of jacks, the front wheels are exhibited at exactly (straight).
- The retainer of the steering wheel is measured by a litomer (there is electronic, and there are also primitive old luftomers). GOST RF states that the backlash helhood cannot exceed 10 degrees.
- Adjusting the adjusting screw is slowly, systematically checking the steering wheel and the presence of a backlash or a knock in the column.
- If it seemed to you that the problem was solved, then run a test. If in the process of movement, after the suspender, you will feel the "severity" of the steering wheel, the adjusting screw will have to loosen slightly.
The task of adjusting the steering rail is considered to be made if: the backlash or knock disappeared, and the steering wheel is freely returned to the central position.