Is it possible to polish paintwork by hand? - Yes. But returning the coating to its former shine and depth will take you much longer. Let's look at how to polish a car manually and using a polishing machine. Without the right tools and knowledge of technology, it is not only impossible to get a truly high-quality result, but you can also ruin the paintwork of the body.
How not to ruin the paint
There really is a risk of damaging paintwork when polishing at home. Therefore, we recommend that you take the theoretical principles of polishing presented below seriously.
Almost all cars are painted using two technologies:
The main danger when polishing with your own hands is that you can wipe the paintwork down to the primer if the part is painted with acrylic, or erase the top layer of varnish with an abrasive, exposing the pigment, in the case of a base coat. In both the first and second cases, the part will need repainting. Since the paintwork has lost its protective functions, sooner or later the rusting process will definitely begin in the area where it was rubbed. If the damage area is small, the element can be used, which in general does not cancel the depressing fact of self-made damage to the paintwork.
How can you tell which paint technology is used on your car? For the test you will need a piece of P2000 sandpaper. Lightly rub a small area of the part (no water, the surface should be clean). If there is dust on the skin white, then the part is painted using the varnish base method. If there is dust of a color that matches the color of your car, then acrylic paint was used.
Common mistakes
What defects most often occur when polishing a car with your own hands?
- rubbing down to the primer or base coat of paint, which were already mentioned above, can be called the most common mistake.

Places where there is the greatest risk of rubbing through to the base
The reason for this may be the use of an abrasive that is too coarse. Aggressive sandpaper removes too much paintwork. The situation is worsened by the fact that to make the surface shiny after this kind of grinding, you again have to remove a large layer of paintwork. Rubbing can also appear if you stay in one place for a long time, working with an abrasive or polishing the surface with a machine with a hard polishing wheel. The degree of risk of making such a mistake depends on the initial thickness of the paint. If the part was re-painted, ignoring technology, and then polished several times, then the risk of rubbing is quite high. That is why, when polishing a car with your own hands, it is necessary to constantly monitor the surface. Most often, wiping is allowed if it is necessary to remove deep scratches or restore badly worn paintwork at home. Indeed, in this case, you have to use sandpaper before polishing. If we are talking about restorative polishing, when the main goal is to remove the “cobwebs” after washing and hide large scratches, then the risk of rubbing is small. Mainly in this case, it is necessary to monitor the edges, since the polishing machine most easily “scrapes off” the varnish and paint in such places. It is extremely difficult to wipe down during cosmetic polishing by hand;
- overheating of the paintwork, which manifests itself as clouding. The polishing machine heats up the surface quite strongly, so you can’t stop in one place for a long time. The temperature can be controlled by touch. If you do experience overheating, you can try to remove the cloudy layer of varnish with P2000 sandpaper, then polish the car again until it shines;
- uneven processing. Poor-quality restoration polishing with your own hands can result in the fact that after 1-2 car washes you will find matte areas. This means that you have unevenly polished the first, most aggressive stage of body polishing, in which the top layer of paintwork is removed with sandpaper. Initially, this defect is invisible, since the polishing paste gets clogged into the pores, hiding the refraction of light;
- holograms that remain after polishing dark colors(mostly black). The wheels and the surface of the machine must be clean, since debris or dried polish leaves micro-scratches during the polishing process. To remove holograms when polishing yourself, you must use an anti-hologram polishing paste and a soft pad as the final step.
- thoroughly clean the surface from dirt and bitumen deposits;
- walk over the entire surface with P2000 sandpaper, which must first be left in water for 3-5 minutes. or Trizact abrasive. Make sure that the surface remains wet at all times;
- wash off any sanding marks. The surface should be uniformly matte;
- Use a medium or high abrasive paste with a hard or medium polishing pad. Rub the paste over the part and only then increase the speed of the polishing machine to medium. Of course, when polishing with your own hands, most likely, you will only be able to change the gradation of the polishing paste. You need to manually polish the paintwork in a circular motion;
- Gradually change the abrasiveness of the polishing paste and the hardness of the wheels. Do not allow the surface to dry out or the polishing paste to dry out or roll off;
- Periodically wipe off polish residue with microfiber to assess the uniformity of the treatment.
Preparation
To do everything right, only theoretical knowledge will not be enough. You will need:

We have already looked at this, so we will not dwell on this in detail. Let us just remind you that the process of polishing a car consists of moving from the most abrasive materials and coarse-grained pastes to the finishing stage using a soft wheel and a fine abrasive composition.
Polishing
Let's look at the stages of restorative polishing, which will help both polish paintwork that has been faded by the sun and lost its original shine, and remove moderate defects. We suggest reading in more detail about this in special articles.

So, do-it-yourself polishing:
WITH big details It’s most convenient to work if you conditionally divide them into zones.
Polishing a car with your own hands allows you to give vehicle beautiful appearance with minimal costs. The procedure itself is not particularly complicated, but in order for everything to go as expected, you must follow the instructions exactly.
Important! If, due to carelessness, you overdo it with polishing, then only repainting will help.
Polishing your car yourself allows you to hide minor defects. Despite its simplicity, the procedure takes a lot of time. Therefore, in the car dealership its cost is at a fairly high level. As a result, most car enthusiasts give their car shine on their own. In addition, this requires a minimal set of tools. Paste is most often used as a consumable.
Tools needed for polishing
Most modern tools have multiple uses. Do-it-yourself car polishing equipment was no exception. For example, the tools you will use while working are also suitable for polishing plastic products and even rubber.
There are specialized devices designed for do-it-yourself car polishing. The main tool in the set is a sander. The first thing you need to pay attention to when purchasing equipment is the number of revolutions; it should be in the range from 1000 to 3000 rpm.
You can take a machine with a battery or on a cord. The former are not particularly popular among car enthusiasts, as they require frequent recharging. Usually polishing wheels are included with the device, but sometimes they need to be purchased separately.
If you don't have the opportunity to buy a grinder, you can use a drill. Special polishing wheels are commercially available. In most cases, you will have to purchase an adapter.
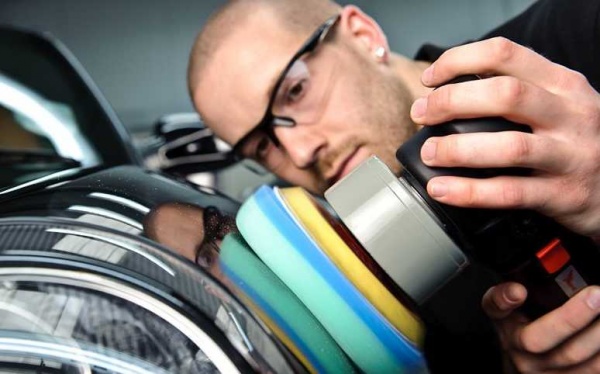
Polishing wheels can be felt or foam. When purchasing, special attention should be paid to rigidity. More precisely, the hardness of the paste must fully correspond this parameter circle. Otherwise, you will not be able to create a smooth and shiny surface. The hardness of a circle can be easily determined by its color; there are three options:
- white - maximum level rigidity;
- orange - great for any paste;
- black - for soft types.
The key to high-quality car polishing with your own hands is that the grinding wheel matches the paste.
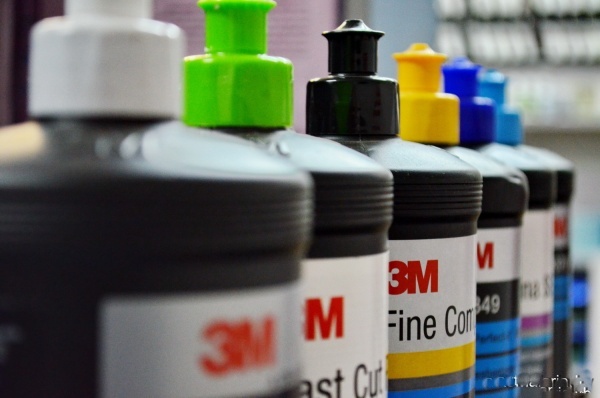
Types of polishing pastes
Choosing the right car polish plays a huge role. Conventionally, all substances of this type can be divided into abrasive and non-abrasive. The first ones are used when it is necessary to remove the primary paint coating. Their use is justified only in cases where the surface of the body is really in terrible condition.
If you are using an abrasive polish, it is important to use extreme caution. You can't focus on one place for a long time. The capabilities of this substance literally allow you to wipe a hole in the surface.
Abrasive pastes are divided into two subclasses: coarse and finishing. The first ones are used if the car has an old, tarnished coating. Application of rough abrasive paste justified when there are abrasions and scratches on the surface of the body.
Finishing pastes for cars are used in cases where a good paint layer needs to be restored to its former shine. They will also allow you to mask scratches that remain after working with a coarse abrasive.
Special class car polishes are non-abrasive pastes. The basis of these substances is wax. You just need to rub the paste with your own hands using polishing cloths on the surface of the body. As a result, a thin film is formed that will enhance the existing shine.
Non-abrasive pastes for cars can be easily applied with your own hands. They serve to protect and enhance shine, and also help increase the resistance of the polish layer to washing and precipitation.
To achieve the desired result, a combination of substances is often used. For example, if the body is covered with a network of small cracks, then you need to purchase an abrasive polish and a mixture with a small amount of grinding particles. Polishes are also classified according to their release form:
- Polish in paste form. This is what is most often used when polishing a car with your own hands. It has a thick consistency and is easily applied to vertical planes. The paste also provides high color saturation.
- Liquid polish. The main disadvantage of this product is the difficulty of applying it to vertical surfaces of a car with your own hands. This type Most often used to treat the roof, hood and trunk. The advantages include minimal harm caused during polishing. Thanks to this, you can work without fear of causing damage to the car.
- Aerosol. It is easy to apply it to your car with your own hands. The composition of the product includes a propellant and a solvent, which is why the amount of polishing agent in the can is extremely small.
Typically, car enthusiasts, when polishing a car with their own hands, choose a paste. It is easy to use and very effective.
How to choose a good car polishing machine

A do-it-yourself car polishing machine will allow you to complete all the work at a professional level. Price fluctuates from 2,000 rubles to 20,000. Device good quality costs at least 5,000.
When buying a car polishing machine with your own hands, it is best to focus on the model famous manufacturers, such as:
- Makita,
- Sparky,
- "Bison"
- Bosch,
- AEG, etc.
In appearance, the DIY car polishing machine resembles a grinder with an unusual attachment. A special disk is screwed onto the spindle, the diameter of which varies from 120 to 180 mm. Of course, you can find more copies, but online stores rarely purchase such products due to low demand among customers.
The power of the device reaches 1600 W. The minimum indicator is at 120. In principle, a power of 1200-1300 W is enough to polish any car with your own hands.
When purchasing, you should pay attention to the number of revolutions. The device should also have a regulator that will allow you to choose the rotation speed yourself. The most primitive devices have one speed without the ability to change.
To ensure high-quality polishing of a car with your own hands, the machine must produce at least 3000 rpm. The most powerful models capable of giving out about 5000, but you need to know how to handle them.
DIY car polishing process
Preparatory stage
The success of all work depends on compliance with the instructions below. First of all, the car is washed thoroughly. Before applying the coating, the body surface must be perfectly clean.
Do-it-yourself car polishing is carried out indoors under artificial lighting. There must be good ventilation inside the box. The fact is that during the polishing process a lot of construction dust is generated, which can interfere with work. You also need to use goggles, a mask and gloves.
Important! During polishing, do not allow sunlight to fall on the treated surface.
Pay special attention to artificial lighting. It must be multipoint. This will help you correctly evaluate all the work and make additional polishing where necessary.
Before you start polishing your car yourself, you should smooth out all the dents. If there are deep scratches on the body, they need to be sealed. You also need to deal with chips. ABOUT minor defects Don't worry, polishing will hide them.
Important! The last paragraph concerns only surface polishing of a car with your own hands. During deep processing, there are methods that allow you to completely hide chips and scratches.
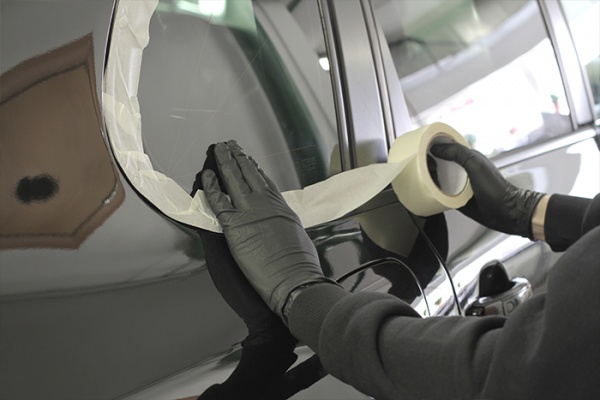
Before starting work, cover the plastic structural elements, glass and headlights. This will prevent polishing material from getting on them, which is then almost impossible to wipe off.
Polishing after painting

This DIY car polishing is only possible when the body surface is perfect. There should be no defects or chips. At the very beginning, the polishing compound is applied to the body. The polish is placed on a napkin and spread evenly on the car. Wait until it dries a little to a white coating. Only then start polishing.
Advice! Fifteen circular movements are usually enough to give the area a shine.
This polishing lasts for a month. Then the procedure must be repeated. Immediately before the process, you must read the instructions for the product. This will allow you to do the job as efficiently as possible with your own hands and minimize the possibility of causing damage to the car.
Deep polishing and scratch removal
Do-it-yourself deep polishing of a car is used if you need to get rid of scratches. This technique is incredibly effective when you need to eliminate all body defects at minimal cost and give it an ideal look.
The work is carried out using an abrasive polish. To achieve good results, you need to use several sandpapers. Car owners often ignore this recommendation, working with only one.
Good results when using deep polishing can be achieved by using P2000 and P2500 sandpapers in combination. You will also need a rubber block to wet the surface. Use these items to sand the scratched areas.
Important! When working, it is better to use cross-shaped movements. They are extremely effective and will help save a lot of time.
The essence of deep car polishing with your own hands comes down to the fact that large scratches are first polished with P2000 sandpaper, and then the entire space around is processed with P2500. The result of this treatment is a homogeneous surface.
Important! If there are many defects and scratches in one area, divide the work area into several parts. Once one part is finished, move on to the next.
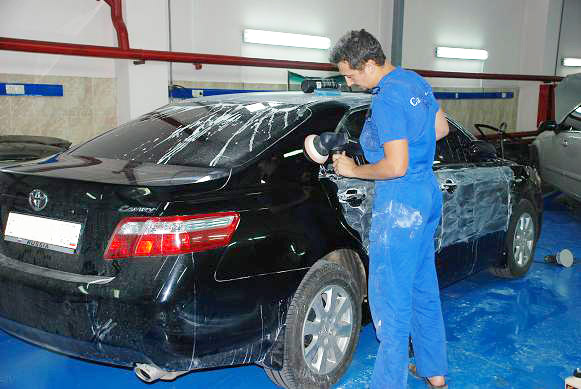
After the work with scratches is completed, you can carry out the second stage of deep polishing the car yourself. For this you will need a special machine. Before use, the surface is moistened and the paste is applied.
At first it is better to work at minimum speed so as not to damage the body. In addition, this will allow the paste to be evenly distributed. The machine must be moved smoothly from right to left. You can’t sand one place for a long time. This can cause significant damage to the car. And will render all polishing useless.
Headlight polishing
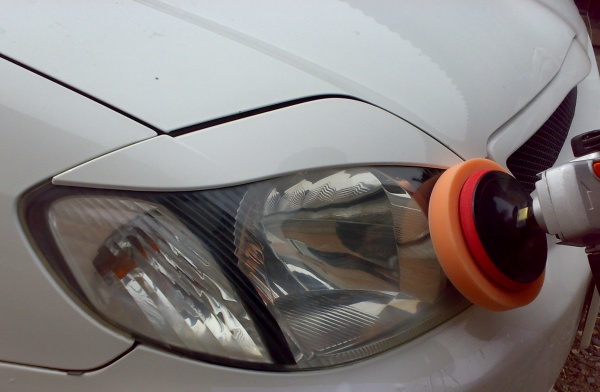
To polish car headlights with your own hands, you will need several types of sandpaper and types of polish. All joints near the headlights must be taped. They can also be simply removed for more comfortable work.
First, the headlights are treated with sandpaper with an abrasiveness of no more than 2500. After this, the surface of the product should become slightly cloudy. There is no need to be afraid of this; subsequent polishing of the car with your own hands will correct this defect.
After all the scratches on the headlights have been corrected, you can use sandpaper with an abrasiveness coefficient of 4000. Next, the surface of the car is treated with coarse abrasive polish, then shallow again.
At the end of polishing, the headlights are washed and reinstalled. The effect can be observed immediately. The glass will become crystal clear, as if the car had just been purchased.
Results
Polishing a car with your own hands is a completely feasible task for every motorist. In the process, you can use either a purchased polishing machine or a regular drill with a special adapter. Wide selection of sandpapers with different levels abrasiveness allows you to achieve good result even at home.
The paintwork of a car has a limited service life. The car body is subjected to special stress. Over time, scuffs and scratches appear on it. In order to restore the appearance, the surface of the car body is polished with your own hands.
Car polishing is one of the the most important procedures auto-tuning when processing paintwork. It is comprehensive and provides:
- restoration of original shine;
- giving fresh paint;
- protection from exposure to aggressive environments.
Polishing your car yourself helps with minor damage. If serious damage has been caused to the body coating, the procedure is performed only after repair work.
Body polishing is effective in the following cases:
- the paint layer has faded;
- abrasions, cloudy spots, roughness or scratches have appeared;
- shagreen has formed, enamel streaks, color mismatch after touch-up, graininess.
The disadvantage of polishing a car is that it removes a small layer of paint. Therefore, it is not recommended to do it too often. The factory paintwork is designed for 15 standard car polishes at home.

Tools, materials and equipment
The procedure is performed using special equipment. The main tool used to polish a car body is a grinding machine. If narrow-purpose equipment is needed, a car polishing machine is used. Optimal power of this device ranges from 1,000 to 3,000 rpm.
To polish a car with this tool, you will need to be connected to an electrical outlet. There are machines on sale with a built-in battery, but their use is not recommended. They discharge quickly, so one battery may not be enough to fully process the body.
Some drivers prefer to use a drill instead of a grinder, installing the necessary attachment on it.
The list of additional materials for polishing car body coating includes:
- polish;
- grinding wheels;
- sandpaper;
- degreaser;
- applicator.
Grinding wheels usually come complete with polishing machine, but sometimes a separate purchase may be required. Additional consumables include sanding paste, foam rubber, and flannel.

Preparation
To polish a car, you must first carry out preparation. Initially, a room is set up in which grinding work will be carried out:
- a ventilation system is installed;
- sunlight exposure is minimized;
- artificial lighting is provided.
The paintwork of a car can be polished at temperatures from +10 to + 23 degrees Celsius. Therefore, in summer or in sunny weather, the procedure cannot be carried out outdoors. The next stage is preparing the car. It includes:
- removing existing dents;
- washing and removing grease from the surface;
- drying the paintwork.
To prevent the polishing compound from getting on the plastic and rubber inserts, they are pre-pasted. To do this, use masking tape. Paper cloth capes are better suited for protecting windows or bumpers.
Types and technology of polishing
Body polishing can be simple or deep. There are rules and secrets that must be followed when treating the surface of a car:
- do not use budget polishing products; it is recommended to give preference to well-known products with additional functions;
- do not polish the car at low temperatures, otherwise the mixture will lose its normal consistency;
- when polishing the body, you cannot carry out other work (for example, primer or putty), since the smallest particles of other materials can deform the surface;
- Do not wash the body surface too often.
First you need to degrease the body. You can polish your car with your own hands or using tools. The first option is carried out according to the following scheme:
- a lint-free cloth is taken, onto which sanding paste is applied, after which the surface is treated with it;
- a certain period is waited during which the substance must dry and acquire a characteristic shade;
- To give the coating shine, use a clean rag to rub the surface.
Each package of polishing mixture contains a number of recommendations. They must be taken into account when carrying out work.
The use of electrical equipment helps to better remove more complex damage, such as deep scratches, shagreen and drips. Polishing work is carried out in two stages. The first one includes the following steps:
- installation of a grinding wheel moistened with water;
- applying paste with abrasive to the wheel;
- setting the frequency on the grinding machine to 2,000 rpm;
- soft surface treatment using uniform movements.
After the above set of works has been completed, the transition to the next stage takes place:
- reducing the frequency on the grinding machine to 1,000 rpm;
- applying polish without abrasive;
- parallel processing of individual sections of the car (they should not intersect).
When polishing, apply minimal pressure. Strong pressure can remove too much paint and damage the coating.

If there is no experience in this area, a test grinding is carried out on the surface of the old unnecessary element or part. Polishing is a long and labor-intensive procedure that is best done in small areas. The larger the area processed at a time, the lower its quality after polishing. This feature is due to the fact that the average surface hardening time is 5 minutes. If you mark an area that is too large, you may not be able to process it within the specified time.
Simple
The technology of simple polishing of a car body involves a minimum number of steps, the purpose of which is to add shine to the paint surface of the car. Also, simple grinding is aimed at eliminating minor scratches on the car, provided that they do not touch the ground. Usually such damage is difficult to notice with the naked eye, but together they spoil the appearance of the car.
A simple car polish is recommended, no matter how scratched the car is. Even if there is no visible damage, this procedure should be carried out for preventive purposes. This is done using a mixture that is rubbed into the surface of the body with a rag.

Deep
With the help of professional deep polishing, they are eliminated serious damage. The main purpose of this procedure is to remove scratches from the surface that have damaged the primer. Deep polishing a scratched car body with your own hands takes a long time, but allows you to give the coating its original appearance.
Deep polishing is difficult to do on your own, even with experience. It requires special skills and equipment.
Features of polishing after painting
Polishing a car body after painting is carried out if the procedure results in the following:
- shagreen;
- matte finish;
- injection effect.
After painting, we polish in three ways:
- abrasive - to neutralize deep scratches and chips (using sandpaper and polishing paste);
- protective - to prevent scratches (applying the paste manually is allowed);
- nanopolishing – processing using a special multi-component nano-varnish.

The first and second methods are most often used (sometimes together). First, the surface is treated with sandpaper, after which restorative polishing is carried out. Once the car is dry, you can apply liquid wax or another protective mixture.
Working with chrome
The risk of interaction with the chrome surface occurs when finishing parts are polished. The peculiarity of chrome is that when interacting with this element, the polishing mixture forms a matte surface. As a result, additional processing may be required.
Final polishing is carried out using an electric machine operating at a speed of 3,000 to 4,000 rpm. Chrome parts are insulated to prevent paste from accidentally getting on them. This prevents the formation of a matte surface when interacting with a grinding wheel or protective polish.

Cost and results
Polishing a car at a service center costs from 1,000 rubles, depending on the condition of the paintwork. Professional staff use polishing machine. For protective purposes, the procedure is performed 2 to 3 times a year.
The polishing layer lasts for 8-10 surface cleanings. Main role in in this case plays a role in the quality of the polishing mixture used to process the body.
The procedure has pros and cons. After it is carried out, the car owner receives an updated, bright, scratch-free coating. The polishing effect is temporary, so it is periodically updated. Proper treatment increases the service life of the coating.
Car polishing is a popular service in service centers. But not all car owners are ready to pay several thousand rubles for polishing the body, which prompts them to think about polishing the car with their own hands. It’s worth mentioning right away that only a professional can polish your car perfectly. However, if you want to save money, then you should purchase a special polishing machine for personal use. In addition, you will have to put in some effort and spend your time, but your efforts will be rewarded with the shine of the car body.
How often to polish a car body
Let's start with the fact that polishing is done every six months. This usually happens when the winter-summer season changes. IN winter season Excess moisture, dirt and salt affect the paintwork. In summer it’s extremely high temperatures and dry air can aggravate problems with minor scratches and chips. But don't polish too often, as this can cause the finish to become dull. If you want to maintain the appearance of your car at a decent level, it is enough to rub the body with car wax or other specialized products every 2-3 months.
What is polishing?

The essence of polishing is to slightly heat the paint layer of the car body under a special machine. Due to this, the paint, roughly speaking, spreads and fills small scratches and unevenness on the body.
Do-it-yourself car body polishing
To polish your car yourself, you will need to acquire the following tools and consumables: soft cloth, car body polish, polishing machine, car body wax, water.
Let's take a step-by-step look at how to water a car with your own hands:

Finally, it is important to note that after work you need to wash the polishing attachment with a strong stream of water. During the following body treatments, dried particles of paint and polishes can damage the paintwork.
Problems of how to polish a car begin to bother car owners already in the second or third year after purchasing a car. Even durable car enamels of premium foreign cars become dull and fade over this period. Less durable paint on budget cars not only loses its shine. Paintwork without protective polishing begins to peel and crack.
Reasons for the need for polishing and restoration of paintwork
The main reasons for the need for polishing remain the natural aging of car enamel and dirt on domestic roads. All road debris raised by passing and oncoming vehicles leaves marks on the body of your car. Micro-scratches are difficult to notice with the naked eye, but their accumulation affects the reflectivity of the varnish. More noticeable on the paint are traces of hard sand, gravel, flying stones, and roadside branches getting into the body.
Scuffs and dull color car paint brings road chemicals, winter sprinkling of highways with salt, sand, and chemical reagents. Various bischofites and modified calcium have a destructive effect on the paintwork of the body. Acid rain, hail, and dirty snow leave marks on car enamel.
Oddly enough, auto mechanics consider trips to an automatic brush wash to be an important cause of scratches and abrasions. From regular washing with rotating brushes, body paint (especially soft enamels) loses its shine and becomes dull. And if the owner of a car wash saves on timely replacement worn brushes, the hard ends of the bristles leave deep scratches in the paint. Road dirt gets packed into microscratches and small chips, expanding and deepening the damage.
In addition to the loss of shine and brightness of the factory color, all damage to the paintwork is dangerous with more serious consequences. Scratches, overlapping each other, completely cut through the paint layer and can become sources of rust, which will require expensive body repairs and repainting of the car to eliminate.
Every driver wants to restore perfect shine body and glass, but the services of branded technical centers and detailing studios are expensive, and are not available to the average car owner once every two to three months. With limited financial possibilities Many Russian car enthusiasts have no choice but to polish the car themselves.
How to polish a car at home
Naturally, home conditions should be understood as a dry, well-lit garage. It is impossible to polish a car on the street or in the yard even in warm summers. Dust brought by the wind and fallen leaves will instantly ruin the results of your work. It is also important that many types of pastes and polishes dry unevenly in the sun, which affects the quality of work, general form cars.
Preparatory operations
The garage must be cleaned before work, removing as much dust as possible. Experienced auto mechanics do not recommend polishing a car when sub-zero temperatures and in the heat (over 35 - 40 degrees). Before you begin polishing, a number of preliminary operations are required:
- body wash (manual or contactless);
- removal of stains and stubborn contaminants (oil, bitumen);
- pasting of decorative parts (chrome, nickel, rubber, plastic);
- inspection of a clean body (the choice of abrasives and the granularity of polishing compounds depend on the degree of damage).
If you do not have the space or conditions for self-wash cars near the garage, right before polishing you can visit a car wash, preferably a contactless one. Once you enter the garage, you need to wipe the car again with a clean, dry cloth.
After washing, stains of bitumen and oil are clearly visible, which are removed manually using mild solvents, degreasers, and white spirit. There is no need to use screwdrivers or knives. Once the stain has been soaked, it can be easily removed with a fingernail or plastic card.
In order not to damage decorative elements (glass trims, moldings, mirrors), they are covered with masking tape. Professional polishers remove and nickel plated door handles, but it is not recommended for beginners to do this during their first experiments.
Experienced do-it-yourselfers also polish the car's windows at the same time as polishing the car body. Technologically, the operations differ little (only in the composition of the pastes and protective equipment), with experience, you will be able to polish glass yourself. When trying to polish for the first time, it is better to seal all the glass.
Restorative abrasive polishing of the body
Before you polish your car with your own hands, you need to take care of the tools and consumables. There are two ways to abrasively remove damage to the paint layer - manual and mechanical (using a grinder). For beginners independent work Experts advise first to try your hand at manual abrasive polishing, which requires less material costs.
To manually sand paintwork you will need:
- abrasive sandpaper (R-2000, R-2500);
- water spray;
- special napkins or cotton rags;
- polishing pastes and polishes.
Body abrasive grinding operations
Before use, the sanding paper is cut into small pieces and their edges are rounded so that sharp corners do not leave deep scratches. Manual grinding begins with a small area of the body, then moving from it in different directions. Before grinding, the surface is moistened with water from a spray bottle.
Using soaked sandpaper, the paint is sanded in two perpendicular directions, achieving an even matte color of the paintwork. The process is repeated several times, wiping off the water with a damp and dry cloth. After the R-2000 sandpaper, the second sanding can be carried out with the R-2500 sandpaper. After this, apply polishing paste to the sanded area using a fine-grained sponge or plastic card and rub it forcefully in a circular motion with special tampons or napkins.
Polishing after sanding will be much faster if you use a sander. Instead of a machine, you can use an electric drill with a special attachment (only drills with adjustable speed).
For mechanical polishing you will need to add the following tools to the initial set:
- grinding machine (with adjustable speed from 700 to 3000);
- protective glasses;
- grinding and polishing discs;
- mandrels for securing disks of various thicknesses;
- felt or fur polishing wheels;
- a stiff brush for cleaning circles.

During the mechanical polishing process, the machine is moved in a circular motion. Start working at low speeds, making efforts to rub in the polishing paste. Subsequently, the speed is increased, reducing the clamping force. Start working with coarser pastes and hard wheels. Based on the results of polishing, they are successively replaced with softer wheels and fine-grained pastes.

Working with a grinder requires practiced skills, so before you start polishing the car body, you can practice on a removed body parts. At wrong choice The graininess of the paste, the speed of rotation of the disk and the pressure force, car enamel can be worn down to metal, burned out (rainbow spots of tarnish appear, the paint swells). Particularly critical places are the kinks of the body, shaped stampings on the hood, fenders, and doors, which need to be polished especially carefully.

Choice of pastes or gels. How to polish a car.
In addition to polishing technology, the question of how to polish a car is no less important. Having understood the basics of production processes, you need to choose polishing pastes, protective and restorative polishes. Polishing pastes are usually divided into powder and gel. The first type of paste is chosen for hard coatings with numerous damages and polishes the enamel with them to reduce graininess.
Gel pastes work more gently and are used for polishing soft paintwork. budget foreign cars with relatively little damage. Gel (paste) and aerosol (liquid) pastes in cylinders are used for various parts of the body. The gel paste is applied to a polishing wheel; it is convenient to use on the side surfaces (doors, wings) of the car. Spray the roof, hood, and trunk of the car with aerosol paste, and then rub it with a soft polishing wheel.
When using abrasive polishing pastes, you need to remember that the number of polishes is not infinite. Each polish removes a layer of paint; by polishing your car weekly, you'll wear off the paint in a year.
Produced in exactly the same way abrasive polishing cars after body repairs and car touch-ups. In this case, its goal is to level the paint layer, eliminate paint drips, and “shagreen.” After painting, it is better to use gel polishing pastes.
You can see in more detail how to properly polish a car in the video:
Protective polishing of paintwork
After treatment with abrasives, restorative polishing pastes, filling micro-scratches, level the surface of the car enamel, correctly reflect light rays, which gives the paint a mirror shine. But restorative polishing does not protect the body from new damage. Protective polishes are used to prevent minor paint damage.
Manufacturers produce protective polishes based on:
- artificial and natural waxes;
- Teflon;
- wood resins;
- silicone;
- ceramics;
- "liquid glass"
Before choosing a polishing paste for protective polishing, you should carefully read the instructions for use. Some of them can be applied to the car by hand, others require the use of a grinding machine.
The principle of operation of protective pastes is the same. They create a thin layer on the paintwork that protects the enamel from ultraviolet radiation (paint fades less) and repels water, dirt, and chemicals.
Simple soft pastes include wax compounds that can be manually applied to the body and rubbed with a special napkin. Preventive protection the car owner can apply it to the car body in an hour, but the soft paste can only withstand two to three contact washes.
Polishing protective pastes based on silicone and Teflon are more durable. They can withstand 30-40 washes, but you need to polish the car with a grinder with replaceable attachments. The polishing technology is similar to abrasive, but requires precise timing, depending on the drying of the protective composition.
In more expensive nanoceramic protective polishes, the hard outer layer is created by polymerized compounds containing tiny crystals of silicon dioxide and titanium oxides. The polymer ceramic layer fills the unevenness of the paint, tightens microcracks, and protects the enamel from peeling. The protective properties of nanocremics increase depending on the applied layers of polish (up to ten layers are used). Professional polishers highly appreciate the Ceramic Pro, NANO POLISH, CERAMIC PRO LIGHT, and Restor FX polishes. Determining the effectiveness of protective polishing is quite simple. If you pour a ladle of water on the hood of your car, the liquid will collect on the surface in large drops.

Compositions under the common name " liquid glass"contain plastic solutions of silicon dioxide and sodium silicate, which, when hardened, fill microdamages and irregularities in the enamel. Mirror layer of silicon compounds obtained from quartz sand, harder than automobile paint coatings, therefore it becomes reliable and long lasting protection paints. After finishing polishing, the car cannot be washed for about two weeks until the protective layer has completely hardened.

By independently performing abrasive restorative polishing, polishing the car with durable protective compounds, you will return the car to an appearance that is not inferior to a new car. Protective polishing operations, repeated once or twice a year, will reduce the need for abrasive restoration.