The procedure for replacing the stove on Kalina is as follows:
- Remove 3 screws of the fastening of the heater cover and frame of the coat of radiator nozzles.
- Remove the radiator from the heater housing.


Installing the stove radiator is performed in reverse order.
How to remove a radiator of the heater of viburnum quickly
The first method set forth in the service manual of the car VAZ 1117, 1118 and 1119 is very time-consuming and long. Many car enthusiasts are not solved to replace the radiator of the Kalina heater only because it is necessary to take a torpedo, and it is not very easy to do it.However, thanks to the famous Russian regiment, it was still possible to find the answer to the question, how to change the stove on Kalina without removing the panel assemblyAnd for this you will need only 1.
Procedure:
- Remove gas pedal (3 nuts on 10).
- Remove / take to the side of the brake pedal.
- Cut the radiator tubes and cut a slightly seat.
- Remove the radiator of the potassium heater from the pedals.
Good day. Calina came with a stove radiator. We will try to replace radiator stove on Lada Kalina, without removing the panel. The method of course barbaric, but fast.
Instruments:
- flat screwdriver
- crosshead screwdriver
- heads and Gorog Set
- bulgarian
- a piece of insulation
Vendor code:
- 2108-8101206 (2 pcs) — hoses stove are complete with clamps.
- 11180-810106000 - Radiator stove.
Step-by-step replacement of the stove radiator
1. We merge the cooling fluid.
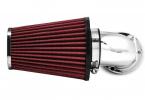
2. We dismantle the air filter along with the corrugation.
3. Remove the battery and platform under the battery.
4. Remove the metal protection and put as shown in the photo below. It is attached on two bolts.
5. We release the clamp and remove the two below the shown hose of the stove.
Upper removed from the thermostat case.

Bottom from the nozzle.


7. Disconnect all chips that are suitable for the steering switch.

8. Turn off the chips from the ignition lock and from the electric amplifier.
9. Remove the steering column bolt which is noted below.

10. Remove four more bolts of the steering column in the electric amplifier area and dismantle the steering column. The location of the bolts is best to look in the video lesson.
 The photo marked the location of the steering column bolts
  In the photo marked fastening bolts
 12. Remove the three nuts marked below.

13. Remove the brake pedal sensor, flexing the tongue and fold down the pedal up. It is necessary in order to get more space to replace the radiator.
 Sensor
 If it is not clear, this moment on the video lesson with 4-55 .
14. Under the hood, unscrew the nut at ten, where the hoses come out.

And still scold with a grinder, the place where the hoses are suitable.

16. More radiator does not hold anything, take it out. Also remove old hoses from under the hood.

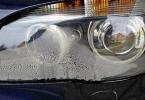
Even before dismantling the radiator, you need to unscrew the decorative lid. She is on three screws.
17. Here is a view in the cabin when the radiator is removed.

18. We take a new radiator and unscrew the taps as shown in the photo below.

Do not forget to clean the plastic bursts.
19. We stick to the radiator running the strip against vibration.

20. Insert the radiator into the seat.
21. Wear the bottom nozzle. We put the clamp on the lower removal of the radiator, and wear the nozzle from under the hood. Next, we release the clamp, we wear on the nozzle and delay.

22. The same procedure is done with the top hose and install the decorative lid.

23. I advise you to stuff some insulation between the hoses so that noise from the motor into the salon is less.
24. Under the hood, we wear the top nozzle and clamp. But the lower nozzle needs to shorten a little, and then wear and fix the clamp.


Video lesson
Information on how to change the stove on Kalina on its own, is very popular for all motorists, who at least once collided with malfunctions of this VAZ 2118.
The heating and ventilation system itself is quite simple, but to get to its elements hidden behind the front panel (torpedo) is very difficult. Therefore, issues relating to the cooling system malfunctions in general and the radiator of the stove in particular deserve a detailed consideration.
Cooling system problems
Most often, the owners of the car Lada Kalina have to deal with such faults:
- engine overheating due to late inclusion or failure of the main fan;
- outlooking the stove fan;
- the tap of the stove or the radiator itself, which leads to a complete replacement of the potassium heater;
- the Power Aggregate VAZ 2118 does not warm up to the operating temperature due to the fact that the fan is constantly working.
Forced cooling of viburnum, the electronic control unit (ECU) is energized, focusing on pulses, which transmits the temperature sensor for turning the fan. When antifreeze in the upper nozzle is heated to 103-105 ° C, this sensor transmits a signal to the ECU, and he starts the impeller through the relay.
If the fan turning point is reached and the cooler is not running, the fault lies in the sensor itself or in the relay contacts.
When the cooling fan does not work, it threatens the engine overheating leading to the replacement of the piston group. But if the impeller spins constantly, regardless of temperature, then you need to immediately open the block relay. In one of them, which is responsible for the operation of the cooler, probably messages contacts. Reducing the temperature of the fluid or overheating of the engine can be caused by the encoding of the thermostat, which is only replaced.
Also, only the replacement of the stove on Kalina can correct the situation when it appears in its radiator. The reason is that the factory elements are made of aluminum and cannot be sealed. It often happens that the heater fan does not withstand heavy operating conditions and fails. Here, too, only replacement of the stove motor.
The focus is that the first fault group after the correct diagnostics is eliminated quite easily. There is nothing difficult in changing the fan power sensor or clean the contacts of the relay. A little longer takes the installation of a new thermostat, but replacing the fan of the stove or its radiator is the more task.
We will have to remove the entire instrument panel, and this is a long process. Therefore, information on how to change the viburnum stove without dismantling the torpedo is so important.
Removing the old and installing new radiator
Before replacing the stove radiator, it is necessary to prepare the entire necessary tool, namely:
- hackstone for metal;
- set of end and horn keys;
- pliers, screwdriver;
- cropped plastic canister or tase for antifreeze.
The first and main question: how to remove the stove on Kalina, so as not to disassemble the entire dashboard? First, it is necessary to empty the cooling system, draining the liquid into the cooked container. Then the air filter is then disconnected together with the nozzle, and the battery is also removed.

This access to the pipes going to the salon heater opens. They must be removed from the stoves, knocking out the remnants of antifreeze in the pelvis.
Near the fittings you can find a nut that fastens a protective plate inside the cabin. It should also be unscrewed so that later the plate moved freely and did not interfere with the dismantling of the stove. After that, you need to move to the salon and dismantle the following details:
- Accelerator pedal. It holds on 3 bolts, it is pre-disconnecting the cable and bend the plate.
- Side decorative panel.
- Plastic side cover stove.
- Brake pedal. It is not necessary to remove it entirely, only remove the metal rod so that the pedal is raised.

Since the stove fittings stick out in the engine compartment, and its frame does not allow to push the radiator to the desired side, then for freedom of action it is necessary to cut part of the plastic.
To do this, use the hacksaw blade so that the neckline is neat. After that, the stove is a little fed and toward the driver's door, removing from the nest. The same way is installed a new heater, and the opening is stuck with plastic, which was cut earlier. The rest of the assembly is made in the reverse order.
When the radiator is removed, there is an opportunity to change the motor valve motor in case of incorrect work. The gearbox and the valve position sensor are made as one block attached to 3 screws. They need to be unscrewed, disconnect the motor deuctor and put a new one. Also, when the radiator was removed, the stove crane is calmly performed, and this need will appear.
Removing the electric motor blower
The stove fan is a fairly reliable unit, but when operating in difficult conditions (heat, a lot of dust or high humidity), its electric motor can fail. Repair the blown motor is more complicated and more expensive than buying a new one, therefore, in such a situation, the fan of the viburnum heater is replaced.
For the production of work, a standard set of tools is needed, and even the end keys "under the asterisk". Such grooves have all the self-tapping screws, which will have to be unscrewed during the disassembly. The latter begins with the removal of the outer plastic lattice and the extraction of the cabin filter.

All rubbish from the landing socket must be removed so that it does not make you on his head while dismantling the stove fan.
Replacing the heater motor will require you to take an acrobatic position inside the cabin of viburnum, if you do not remove the front passenger chair in advance. Its crawls are fastened with 4 nuts, so this operation will not take much time.
Then you need to open the glove box, freeing it from things and unscrew 4 screws located on its backing wall. Another screw is outside, under the grill of blowing, it should also be turned off.


Further, the decorative pad is removed from the right front rack, the bottom of the plastic panel attachment and the blowing assembly are detected from below. They are twisted, remove the plug assembly and raise the plastic panel (holds on the "velcro").
There are 2 nuts under it, they should be loosen the end key. To remove the stove fan, you need to push the torpedo as much as possible and fix it in this position.
The last step is, lying on the floor of the viburnum, remove the stove fan, disconnecting the electrical connector. You need to rearrange its turbine to a new electric motor. The unit is then installed in place, and then assembly works are performed. Details The replacement process is shown on video.
With the onset of cold weather, motorists begin to use the stoves of their cars. Due to the fact that this unit was not exploited at all or quite rarely, malfunctions are possible in its work. According to statistical data, all breakdowns of the heating system are based on the failure of two nodes:
- stove radiator;
- engine fan.
Winter in Russia is one of the coldest, so one of the advantages of Lada-Kalina becomes just the presence of a pretty warm stove. However, the disadvantage is that in the process of constant operation, in a short time, you begin to detect a puddle on the mats from the leaking radiator with the resistant aroma of antifreeze or antifreeze.
Immediately it is necessary to put a goal for replacing the radiator, because the leaking fluid can pour the electronic control unit, which will entail more serious problems.
The radiator "Kalina" The will of the manufacturer is located in a not quite convenient place, getting to it is not so simple. In order to make its replacement, you need to disassemble and remove the central panel. It is slightly lower than the venue of the audio training of the gas pedal over the electronic control unit.
The solution to the problem can be performed in three ways:
- Choose professionals and remove the car to the repair service.
- To try with the help of the technical manual for the operation to solve the problem independently, disassembled according to the instructions half of the car.
- Use a people's way that avoids the removal of the panel, and the replacement process is possible through a gas pedal at a driver's seat.
The cost of services is about five thousand rubles, so many prefer to change the released aggregate on their own.
- Drain Tosol before starting repair work.
- Release nozzles leading to the stove from fastening.
- From the driver's side using a screwdriver and unscrew the mounting of the radiator consisting of three screws, after which the gas key to unscrew the fastening of the gas pedal and remove it so that it does not interfere with further manipulation.
- Gently remove the computer (electronic control unit).
- Unscrew the two bolts of fastening the lining, the nuts under the velcro are the nuts and it is also necessary to remove. Important! No need to unscrew anything.
- According to the reference instructions, the location of the front panel is indicated on the diagram. You must use it to unscrew all bolts freaking it from the mount.
- Folded neatly removed items with fasteners from them.
- Loosen the packer belt twisting one bolt of its attachment, and the second twisting at all, it is necessary to facilitate the removal process of the tunnel of the tunnel.
- Next you need to dismantle the torpedo and remove the front panel.
- After unscrew the stove fastening bolt.
- Upon completion of these procedures, access to the stove with the radiator is fully open.
- Afterverting the screws from the cover of the casing, the frame of the sealer is released.
- The old radiator is dismantled, and the new is installed in its place.
- The assembly is stepdown in the opposite direction. Upon completion, a new antifreeze is poured or antifreeze. To check the performance, integrity and absence of leaks, it is necessary to leave the unit in a working condition for a while.
- After checking, the process can be considered completed.
The process described above is very laborious therefore, in many forums, the following process of replacing the radiator is proposed.
Options from users how to change the radiator without removing panels
- To implement the procedure for replacing the radiator without removing the front panel, the space is needed sufficient to fully open the door from the driver.
- Release a place under the hood by removing the air filter battery field along with the air duct.
- Dry Tosol or antifreeze.
- Disconnect the nozzles that are attached to the engine fitting. Exactly the same fittings are on fastening the stove, find them quite easily.
- Disconnect the nozzles leading to the stove.
- Between the hoses there is a nut fastening of the casing to the engine shield.
- Unscrew and remove this nut.
- In the cabin dismantle the gas pedal and weaken the brake pedal, to ensure the opportunity to push it away.
- Remove the sidebar and the radiator lid three self-press, three nuts for ten.
- Crop the tubes leading to the radiator slightly cutting the landing place to remove it.
- Remove the faulty unit and install a new one.
- If in the process of installing a new radiator there are difficulties with walking tubes, they need to be reduced by cutting about the centimeter.
- Melt the ends of the tubes to do not swashed after connecting the nozzles.
- The assembly is conducted in the reverse order.
The second version of the radiator replacement
- Merge toosol.
- Remove the gas pedal.
- Disassemble the steering column and remove the electric power steering.
- Remove the radiator tubes.
- Carefully cut a piece of the housing of the stove for freedom of manipulation in the process of removing the radiator.
- Remove the faulty parts and install a new one.
- The assembly is made in the reverse order. The carved piece of the case can be installed in place and make a hatch that is attached to self-drawing bolts.
- Pour the new Tosol and leave the system to work in normal mode.
The options for replacing the radiator at motorists are a great set, familiar with them is possible on the forums, in auto parts stores, where highly qualified specialists will definitely advise on the methods and options for repair.
Experience of car owner
Outcome
Whatever the radiator replacement option would be chosen, the most important thing is that everything happens, and the Iron horse pleased not only a fast ride, but also a warm comfortable interior.
Well, if the method of repair does not suit the service specialists, it will surely help solve the issue with the repair of cars in the shortest possible time.
Good day and the article presented below will be useful to those who have to replace the heater radiator on Kalina do it yourself. This material sent me to mail so that I publish it in the blog! Article author - Boris Lynnikov .
Main problems and precautions with radiator stove on Kalina
- From the first days, when you start ride on Kalina, watchfully watch whether there are dark spots in place, where "spent the night" your car. In the motor compartment, periodically check whether there are non-ferrous drills under the hoses of the cooling system. If something drips under the car or traces of antifreeze appear on the engine nodes, - immediately !!! - Change the plug on the cooling system expansion tank. The plug has a valve through which the increased pressure occurs when the engine is heated. If the valve does not work, sooner or later the stove radiator is sold. It is primarily pushing. Cooling fluid flows into the cabin. But before that she will fall into the computer of your car., And it will be most likely to change it.
- I recommend from my own experience. Immediately. It is located exactly under the stove radiator, and the grief designers did not guessed at least turning it to "upside down" right in the same place. Then the cooling fluid would simply flow from the computer case, without applying it no harm (this is the case of the computer)
It's just done. Remove the facing on the right below the switches of ventilation modes. Unscrew the two screws for fastening the computer. Put the computer to yourself and put it on the top of the shelf that under the "glove compartment", from the engine side. Wiring harness it allows. Secure the computer at your discretion. He does not require grounding. But forever get rid of the expectation of an unexpected way out of order. On the facing, which was filmed, cut the corner, approximately 1 cm. In order for plastic to not sell isolation, I put on this cut a piece of PVC tube cut along. I go so for more than six months - no problems.
Replacing the radiator stove (heater)
I had to do it yourself, so I used the help of the Internet.
- We drag about three liters of coolant. A good way to YouTube from Andrei Vizarov. However, I did not shoot the air filter, just inserted a piece of the watering hose in the canister, and the hose was placed in it disconnected from the cooling of the throttle node.
- He saws on the advice of many parts of the ventilation systems adjacent to the stove radiator. DO NOT DO THAT!!! The radiator is still impossible to insert even with this additional hole.
The best way prompted Roman Smirnov in Youtube. It is necessary to free the place through which the radiator is removed and is taken out. It is necessary to remove the gas pedal and raise the brake pedal. I did not disconnect the gas pedal completely, but simply tied it up. But first you need to remove the steering column assembly so that you do not configure anything. It is simply removed:
- remove plastic protection from the column and under it
- disconnect 8 connectors from the column - two from the switches, two from the ignition lock, two (they are in the center) from the steering amplifier and two at the very top under the sound signal
- disconnect the two details of the intermediate cardan of the steering column (Roman Smirnov)
- unscrew 4 nuts (on 13, high head)
- remove column
- Unscrew the stop switch - to the right of the brake pedal
- Raise the brake pedal up, but at the same time it is necessary to "break down" with the place of screwing the stop switch, which turned out to be quite difficult. Used lever
- Passed the pedals of gas and brakes, tied them at the top
- Now there is a place to remove the old radiator
Under the hood: Remove the battery, stand under it, the bracket on which it is worth. Air duct disconnect from the air filter and distinguished toward the cabin.
Unscrew the hoses of the radiator of the interior heating from its nozzles and unscrew the nut to the left of the pipes. We need a high head or tubular key to 10. When disconnecting hoses from the radiator, it is borne in mind that another amount of coolant will turn out. In the cabin, cover the hacksaw blade under the metal protection to the left of the radiator and sprinkle the nozzles. Plastic saws easily. After that, you can try to remove the radiator together with the metal protection and the seal.
I did not succeed to remove - a long stud, with which under the hood we unscrewed the nut on 10. I had to cut the grooves between the hole in the body into the bodice in the seal, through which the radiator and the hole were encouraged through which the "notorious" stud. Only after that it was possible to remove the radiator and everything that refers to it.
- Put the radiator entirely right here, even when the ducts are drained, it did not work out. Again, I used the Council of Roman Smirnov - cut off part of the pipes so as not to be interfered with the radiator in place, it is intended.
- Now you need to collect everything back.
- Brake pedal again "break" with the place of fastening the stop switch.
- Put the stop switch - as far away, because It turns on when pressed the button. Check immediately to not mess under the steering column.
- Before stepping the steering column to place, remove the springs from the device to change the position of the steering column. Otherwise, all 4 fastening holes will not fall on the heel. They will return to place after all. The steering column put alone, difficult, but maybe.
Two parts of the intermediate cardan column connected using clamp. Then the WD-shock drunk and slightly turned the top of the gas key. I did it carefully, without too much effort, so as not to crush the cross.
The hoses for connecting the stove radiator replaced the new, they go at number 21088101206. I planted them on the sealant.
That's all. Thanks to the guys, which showed all this in YouTube. I hope my experience will help someone. On Kalina 4 years, if he knew about the plug at once, no computer nor the radiator would change. On two then - none ...... (any crucible word) did not suggest. Perhaps the qualifications are such that they simply do not know this.