What is the clutch itself? This is the mechanism that affects how smoothly the car moves. The same detail affects the softness of the process of switching between speeds. This detail remains almost imperceptible during external inspection. We generally remember the presence of this mechanism only thanks to the pedal, which is located next to the left foot. Although sometimes you need to adjust the clutch pedal travel.
When pumping is required
Scientifically correct, bleeding a clutch is a procedure that involves purging the hydraulic clutch system of excess air. Air enters the system when piping is faulty. Or if the threaded connections are too tight. When air is inside, various kinds of malfunctions occur, which leads to a breakdown of the entire hydraulic system.
- a popular car tuning option. Read more about it in the material Procrossover.How to replace a speed sensor on a VAZ 2110 and when a replacement is required - find out
A little about free running
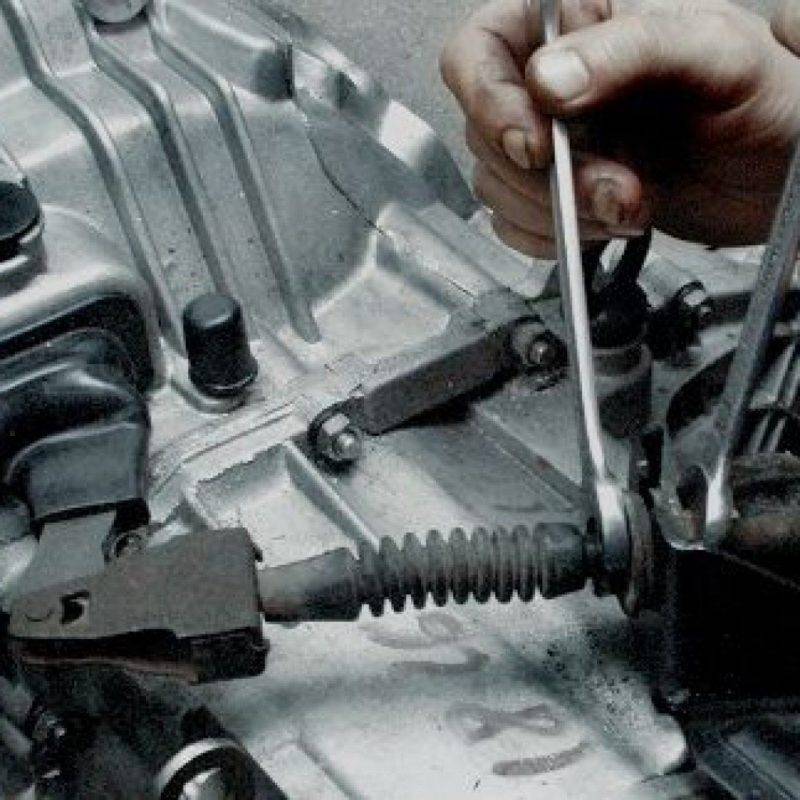
The cable length for the clutch accelerator must be changed if the fork has a free play of 3 millimeters or more. The fork must be pushed forward when checking. If the minimum required values are not met, then the adjustment is carried out using a special nut located on the threaded part of the cable.
The 5mm limit is acceptable for easy throttle travel if there are no faults. The brake light must be repositioned to establish clearance if the free play becomes too large.
What is wrong with the wrong clutch stroke
If the free play is large, then there is a possibility that the clutch will not fully engage. There are other types of failures:
- Spring failures.
- The driven disk starts to warp.
- Thrust bearing warps.
Approximately the same thing happens when the stroke is small and insufficient. Because of this, again, the springs break, the friction linings at the driven disk wear out, and oiling occurs.
Large and small travel at the clutch pedal are almost equally harmful to the car. Photo: 4.bp.blogspot.com
DIY adjustment procedure
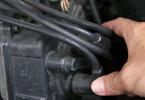
The first necessary action is to adjust the wires. To be more precise, a special bolt. It is located under the hood, at the end of the cable. The bolt is secured with lock nuts, so finding it is not difficult.
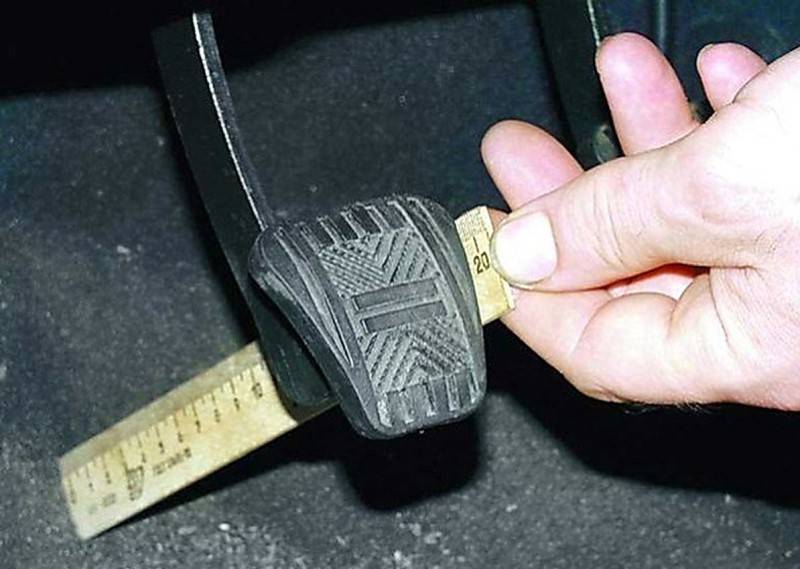
Pedal travel is simply fine-tuned when making adjustments. The standard and normal value for the stroke itself is 120-130 millimeters. The nut is screwed onto the tip when magnification is required. When the parameter decreases, the part is unscrewed.
The pedal is pressed three times when the debugging process is completed.
First you need to prepare the tools, which most often include brake fluid and a free container along with a hose of a suitable diameter.
Only after preparation, you can proceed to the procedure itself. It doesn't matter if the clutch pedal travel is long or short. Photo: pbs.twimg.com
- The first step is adding brake fluid to the expansion tank. This is done even before the pumping. The liquid is added until 15-20 millimeters remain to the edge. The main thing is to keep it clean. And make sure that the system is rid of debris and dust.
- You can not do without an assistant, who must be inside the car. First, he presses the pedal three times. It should go all the way down. And the movement itself should be as sharp as possible. After the strongest pressure, the pedal is released. And wait until the structure returns to its original position. The main thing is not to exceed the time interval between expectations. Usually it is two seconds.
- After the third pressing, the pedal is not released, but fixed in a specific position. Then the second person fixes the hose on the fitting. The next step is to release the valve, which is designed to get rid of excess air. To do this, use a simple cap, or a special key. It is immersed in a container prepared in advance. From this container comes the end of the hose.
- Next, go to the lapel of the fitting, no less than half. The maximum allowable movement is 3/4. Fluid will begin to flow out of the structure when the motion ends. There is nothing strange in the fact that air bubbles can also be seen. The pedal starts to release as everything else leaves the system. The person inside the car must wait until the pedal reaches the stop. Without removing his feet, the assistant informs the owner of the car about this. Then the valve is screwed back.
You can also find self-leveling options on the video:
What else to pay attention
During the bleeding procedure, it is necessary to constantly monitor the level of the brake fluid. We are talking about the liquid located in the expansion tank. Its amount decreases as it progresses.
The addition of liquid is allowed after the procedure is repeated 2-3 times. The main thing is that its volume does not decrease by more than 35 millimeters to the edge of the expansion tank. If necessary, simply add more material.
But sometimes it happens that air bubbles appear even after 3-4 repetitions of the procedure. Then, perhaps, the reason lies in other components.
They proceed to the last stages, already when all the air is eliminated. Then the valve is clamped, and the hose is removed. A special cap is put on the valve for additional protection. The pumped out liquid is poured into a container that could easily be closed if necessary. Such waste materials can be reused if this does not lead to a decrease in overall safety.
At the end of the procedure, you need to check the operation of each part. For what the pedal is first fully squeezed out. And then they study the power reserve of the pusher in the piston. The standard value is 27-28 millimeters. If the indicator differs from the norm, the adjustment is repeated.
Conclusion: about other subtleties
Bleeding is a mandatory procedure after any car repair work and other actions when components in the hydraulic line are affected. Photo: a.d-cd.net
Technical goggles and gloves, a mask are devices that should not be abandoned by those who are engaged in pumping on their own. The main thing is to be extremely careful when performing work. After all, the liquid from the hydraulic line is poisonous and dangerous to health. After completion of the procedure, hands are thoroughly washed with soap. It is recommended to repeat this action several times.
It is important to take measurements in advance for indicators of parts. Then you can immediately understand whether adjustment is needed or not. As you can see, no particularly sophisticated tools are required to solve this issue. It will be enough to use the usual wrenches and screwdrivers, which are likely to be found in any garage. All that remains is to call an assistant, this is one of the mandatory requirements.
Sometimes it happens that the problem is solved, but only for a while. Then the reason is that the case does not maintain tightness. Defective hoses can allow air to enter.
Oil seals and rubber cuffs also cause serious defects if they are already worn out or destroyed for one reason or another. Such parts are completed with cylinders that are involved in the operation of the entire system. These are the parts that wear out the most. And the first to fail during active operation.