Is it possible to make a power bumper with your own hands? If a car enthusiast is interested in this issue, then having learned the price of such a service in a car workshop, he may change his mind. However, you can make a rear power bumper on your own, and it will not differ in anything from the same made to order.
After studying this article, you can familiarize yourself with the techniques for making a bumper at home, but in practice it can raise the showiness of a car, increase its functionality when driving off-road. Many bespoke bumper models do not differ much in appearance, but the classic shapes look pretty decent.
What do you need to make a DIY power bumper in your car workshop? First of all, you must have a desire. Together with it, you can create a bumper of a not very complex shape, it can be suitable for your car and the manufacturing cost may be an order of magnitude less than in a car workshop. It is very simple to change the shape of the bumper, for this you just need to cut a blank from a metal sheet. But let's leave the manufacturing procedure for later, and now let's return to the tools.
The first thing you have to stock up on for work is sheet metal and cardboard. The thickness of such material should be about three millimeters. The quantity depends on the size of the vehicle. To finally determine the amount of metal, you can stock up on cardboard patterns. We need the following tools - a grinder, that is, an angle grinder.
It is also necessary to prepare cutting and grinding wheels for it. In addition to it, it is also necessary to prepare a welding machine. You can also use a profile tube, which can also be used to create a rear power bumper. Other tools required for work: tape measure, tape, marker, scissors. Most of these tools can be found in any body shop.
Patterns and cutting
Cardboard templates should be prepared even before cutting the metal of the required shape begins. Cardboard can be edited very quickly, cut or enlarged, and it is very easy to check how the future bumper will look like by placing it on the car. To cut blanks, you need to prepare a drawing, and the overall dimensions will depend on the dimensions of the car. You can take measurements with a tape measure. If there are inconsistencies in the drawing, they can be changed and adjusted to fit the actual dimensions. After such modifications to the cardboard sheet, the work can be significantly simplified. Parts of the bumper are cut out of cardboard, glued with tape, applied to the front of the car.
If the cardboard layout suits everyone completely, it will be aesthetically pleasing in appearance, the workpiece can be transferred to the metal. All template fragments are placed on it and cut out. The metal is cut with a grinder, if it is not at home, then cuts can be made at the enterprise. If the work will still be carried out at home, then the cut out parts can be substituted one to one and connected at the same time. In this way, the uniformity of the individual parts can be achieved. Symmetry is also achieved, and after the pattern, you can choose ways of further work.
One piece bumper
The first option for working with a bumper is to make it from a single piece of metal.
In order to give it volume and the correct appearance, it bends. It is best to do justice to this option, so the product becomes attractive, the corners will not be too sharp and you do not have to make many seams during welding. There is no need to grind problem areas, and during heating there is a danger of damaging the base.
There are some downsides to making a single piece power rear bumper. First, you need a fairly large piece. While this is not a problem, some metal bases do not sell such pieces, so you might have to look around. But the second minus is more serious - a strong unit is needed to bend the sheet. You will also have to look for him. Bending metal of this thickness to the correct angle can be very difficult. Insufficient power of the sheet fold will require additional procedures, heating problem areas.
Multi-piece bumper
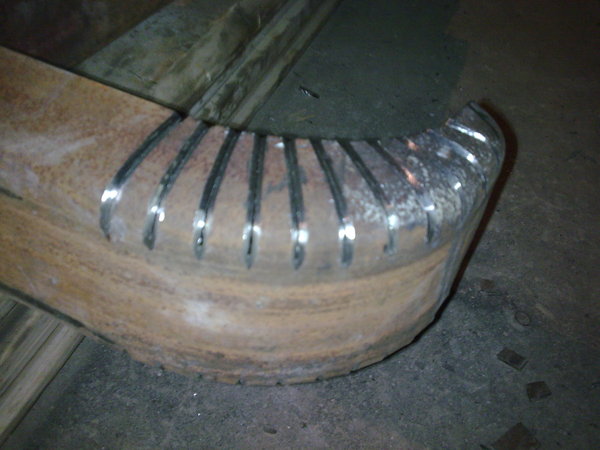
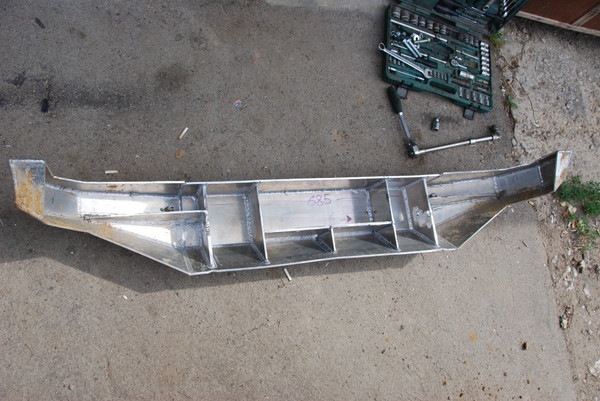
A bumper made of several parts or parts eliminates bends and consists of cutting individual pieces. Having made the docking at the desired angles, the parts are welded. The procedure is as follows - it is necessary to dock all the fragments and grab them. Only then can they be welded.
It is impossible to weld on a structure from parts at once, it can be "led". For welding, it is best to use a high-quality welding unit, it cooks without slag and is more convenient to work with. In order to properly dock and grip the parts, you can use a protractor. If it is not there, then you can use cardboard templates, exactly those that represent the corners. Accurate joining is very important, only a few millimeters of deviation may not be displayed in the best way on the entire structure. Tacking is best done on the outside and welding on the inside. If the use of a winch is envisaged, then a hole is cut out for it after welding.
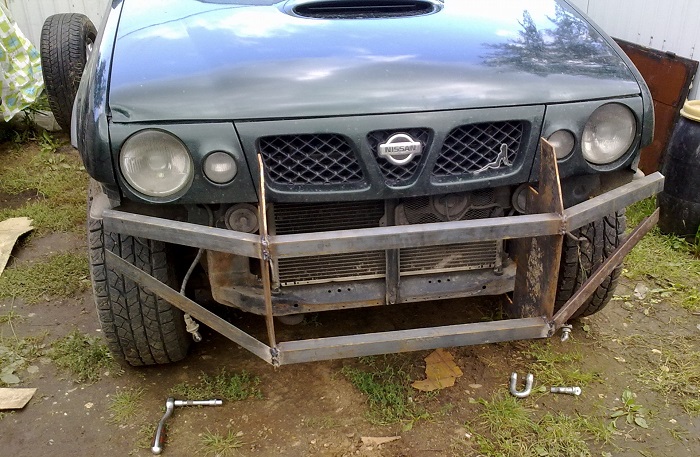
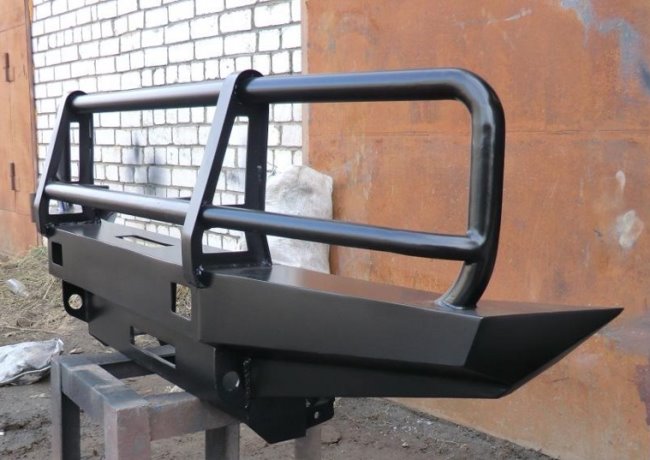
Manufacturing and welding of a kengurin
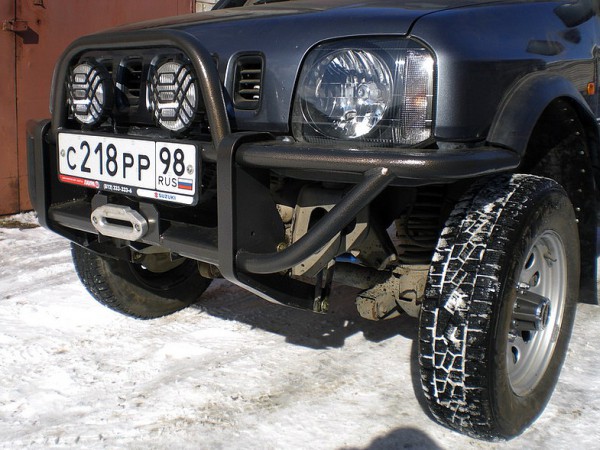
The next stage of work is welding a bumper guard to the rear power bumper, which will give the bumper an aesthetic appearance and will be able to protect the car from obstacles. It can be made even without a pipe bender. First you need to choose which type of kangaroo you like best. It can be from one solid bent pipe, or it can be welded from several arcs and have several sections. You can also come up with your own design for this part. Outwardly, any type of this device is perfectly acceptable, however, some are stiffer than others. If two "kerchiefs" serve as the basis, such a detail will be more rigid.
After creating the kerchiefs, steel pipes are welded to such a base on the sides. They will protect the headlights and fenders of the vehicle. It is also important to think about how to add originality and more functionality to the bumper. It can also be fitted with an additional pair of headlights. More expensive lenses will look even better. At the end of the work, the arcs can also be improved externally - a mesh or grill is soldered on them, which will completely protect the headlights from stones and damage. Since the rear power bumper weighs a lot, it can be reinforced with additional attachments.
Painting
After the rear power bumper is ready, it can be painted. What color for painting is up to everyone to decide for themselves. If the paint is significantly different from the color of the car, it is best to choose black or metallic. There are motorists who love off-road driving, especially if you have to drive a jeep, for them it will be very useful advice to make a power bumper made of stainless metal, it is not necessary to paint it, and it is not afraid of scratches.
Powder coating can also be useful, it is very durable and scratch-resistant, you cannot say this with ordinary paint. It is also a good idea to install a crankcase guard, it will show itself in the best way when you drive off-road. The painting of the rear power bumper takes place according to the traditional technology, and makes the bumper in a presentable appearance. After completing all procedures, the bumper is attached to the designated place.