There is no point in talking about the merits of the car for a long time. Most owners are well aware of the benefits that it gives, so most often the question arises about whether to make it yourself or contact a car service. Most often, a special film is used to protect the car interior from excessive sun and prying eyes. It is made self-adhesive, therefore, in addition to a certain share of perseverance and painstaking work, no special skills are required from the performer.
Choosing a film for tinting
Almost everyone is capable of toning their car independently, having the minimum necessary set of tools for this, so the main problem will not be in the work technology itself, but in the correct choice of material. There are a lot of films on sale, but not all of them are suitable for windshields and side windows of a car, due to the prohibition of excessive dimming, established by the corresponding GOST.
To tint a car yourself, you will need to purchase a special film. You should focus on the following basic qualities:
- light transmission capacity;
- resistance to mechanical damage;
- color spectrum;
- cost indicators.
From the point of view of traffic rules, the key is the first criterion. In 2014, there was a rule that the total throughput of the film and windshield should not be lower than 75%.
For the side ones, there was a relaxation of up to 70%. On January 1, 2015, a new GOST 32565-2013 was released, according to which the windshield must transmit at least 70% of the light. If there is the slightest doubt that the film is less transparent than required by GOST, then in order not to engage in plywood later, you need to take a sample from the seller, attach it to the glass and carry out the necessary measurements.
The color scheme is a matter of taste and depends on which car is tinted, and therefore there can be no general recommendations. With strength characteristics and cost indicators, the situation is more complicated. It is far from a fact that the more expensive the better, but it is unlikely that you will be able to buy something of high quality for a penny. It is very difficult to choose a suitable and inexpensive material yourself, so you cannot do without advice from experienced friends and sellers. It is preferable to focus on well-known brands that have been tested by many, and therefore reviews on them can be found quite easily.
A lot is determined by the tasks that the car enthusiast wants to solve. So, for example, there are special anti-vandal films that are glued to the outside of the car. They can be used for long journeys over rough terrain, for example, participating in a rally. For trips around the city, they are no worse, but is it worth spending a lot of money on their purchase if you can get by with less expensive materials?
Required tool
In order to do the tinting yourself, you will need the following tool:
- rubber spatula;
- stationery knife
- glass detergent;
- dry, soft, lint-free cloth.
The film usually comes with a small plastic scraper and a special knife, but they are not very convenient to work with, so it is better to get normal tools.
A plastic spatula is bad in that it can damage the glass surface when pressed, and the cutter included in the kit is made of a material that quickly becomes dull and therefore begins to tear the film. In addition, it is convenient to have a spray bottle in stock that allows you to spray water evenly on the windows of your car.
Stages of work
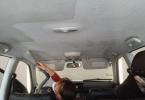
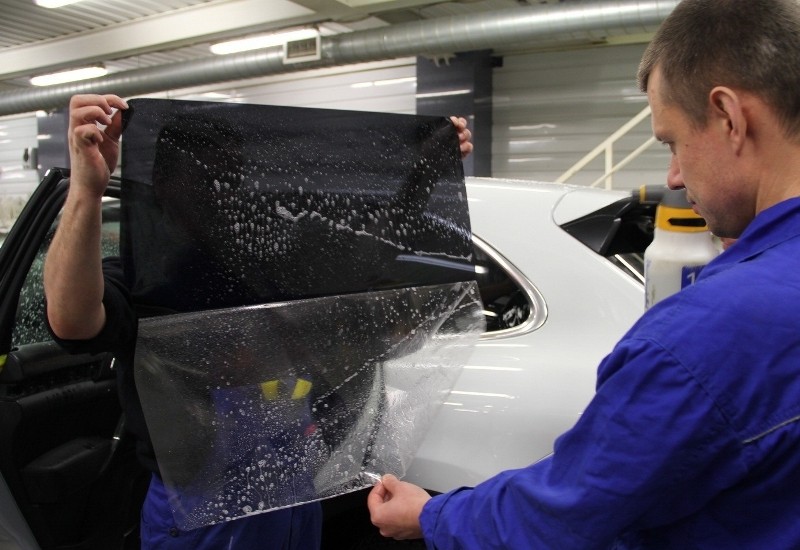
Car glass tinting is done from inside the passenger compartment. The reason for this is primitively simple - the outside of the film will last much less time and will have to be changed. The material does not possess super-strong characteristics and, under the influence of the environment, it will quickly lose its presentation. It is more convenient to carry out work together. The film has a protective layer and when it is removed it is easier when one person slowly removes it, and the second sprinkles a soapy solution into the formed gap. Before starting work, it is better to dismantle the glass from the car, especially if you do not have a lot of experience in gluing the film. This will make it much easier to ensure high-quality tinting. Special requirements are imposed on the cleanliness of the workplace. Any grain of sand caught between the film and the glass, after gluing, will become a clearly visible bulge, distorting the view and spoiling the appearance of the car glasses.
After the film is purchased and the tools are prepared, you can start working. Self-tinting consists of several main stages:
- dismantling glasses and cleaning them from dirt and grease;
- cutting blanks from the film;
- separation of the protective layer;
- fitting, gluing and trimming.
The first three stages of work should not cause any particular difficulties: everyone is able to wash the glass of a car with high quality and make blanks out of the film. The patterns are usually cut with an allowance of a few millimeters and, after gluing, are adjusted exactly in place using a sharpened knife. The main thing is not to confuse the sides of the film when trying it on. It must be well remembered that it is glued with the inner side after the protective layer has been removed from it.
The film is glued as follows:
- the inner surface of the glass is abundantly sprayed from a spray bottle with a prepared soap solution;
- the protective layer is removed from the pre-cut workpiece, the film is sprayed with a solution, the right side is applied to the glass and leveled;
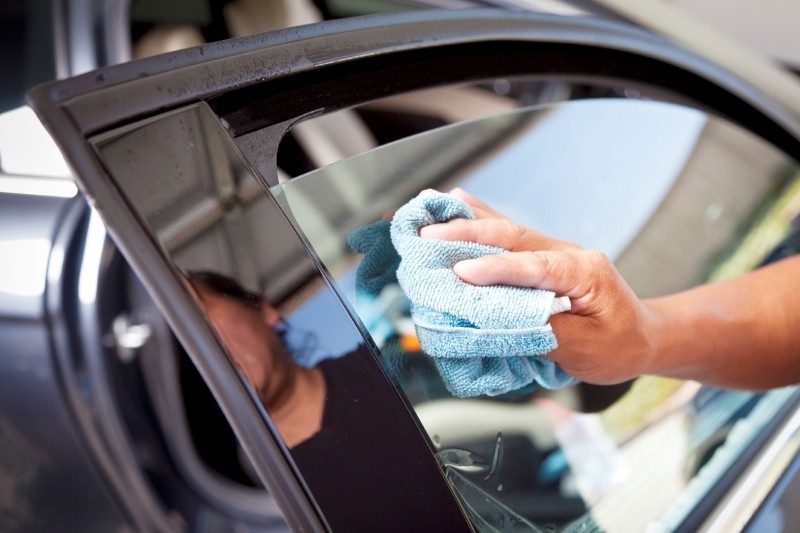
- using a spatula, air and water bubbles are driven out from under the film;
- the allowance is cut off (excess film at the edges);
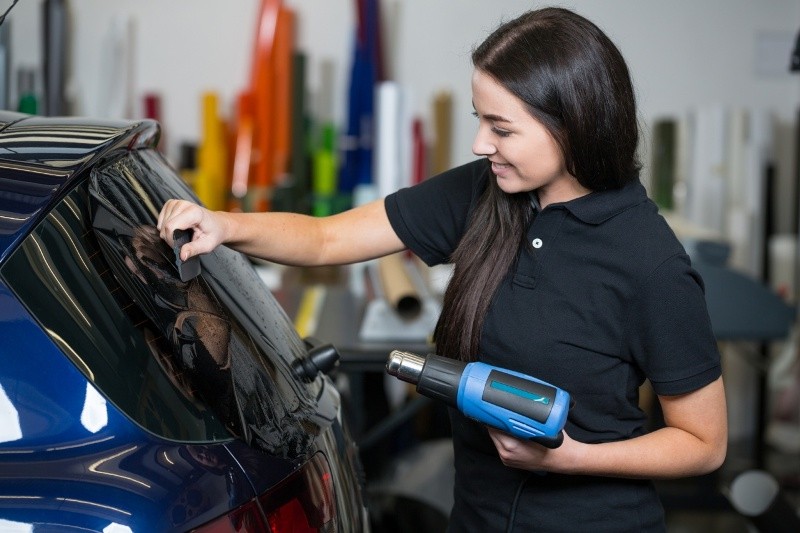
- the glass is dried with a hairdryer.
Particular attention should be paid to the second point, which is more convenient to carry out together - one person carefully begins to remove the protective layer, and the second sprays the points of separation. The purpose of this action is to prevent the tint film from accidentally folding and sticking to itself. It is not worth throwing away the removed protective layer, it can be placed under the spatula when removing bubbles, so as not to accidentally damage the tint.
The hardest part is fitting. If it is easy enough to work with the side windows of a car, then not everyone can tint the rear one on their own. The problem lies in its curvature. Soap solution comes to the rescue, which is poured into a spray bottle and a hair dryer. After spraying the adhesive film, it is applied to the glass and begins to be adjusted in place.
Where the tinting does not want to fit, it is heated and stretched with a rubber spatula, achieving a perfect fit. To make the material fit smoother, it can be additionally moistened with water.
You need to work very carefully, since the deformed film will not return its shape back. After all air bubbles have been removed from under the coating, it should dry well. You can use a hairdryer to speed up the process. After the auto glass tinting is completed, they are installed in place and ready for use.