A car bumper serves both cosmetic and practical purposes - being part of the body design, it protects it from damage. That is why during operation vehicle this item quite often gets damaged, suffering even from the lightest frontal car impacts, not to mention serious collisions.
If you removed the tape, then the rubber may be further worn in the profile. If you don't have the right build tools, take a look. Steel chrome plated or stainless steel? Rumors circulate that stainless steel bars have a strong yellow tint or don't have much in common with chrome.
Stainless steel is not bad as the alloy is good and the finish is correct. American models have far protruding bumpers, which are rather unpopular in Europe. If you have this, before you need a special conversion kit, which is offered in various versions on the market.
Replacing or repairing a bumper is an eternal dilemma for motorists who have been in an accident. Oddly enough, in addition to the cost of the part, the choice of a method for solving the problem is more influenced not by the nature of the damage, but by the material of the product - plastic or metal.
Today, 90% of modern cars are equipped with plastic bumpers.
The reasons are obvious - relatively low cost and ease of manufacture, high rates wear resistance. Non-critical flaws are easily eliminated by simple heating, straightening or gluing. At the same time, the cost of repair compared to replacement will be quite small. In cases serious damage often recovery is not possible, and the only solution to the problem is replacement.
The bumper holders should be made of spring steel, which will deform again in the event of a slight impact. But there are holders on the market that are made of mild steel and are not deformed by small nicks. The various conversion kits are then adventurously attached partly with self-tapping screws or a welding machine to the cross member.
Mechanical elements 1 2 3. Below are the main characteristics. Sedan Monoblock, 3 volumes, 4 doors, 5 people, with a steppe located on the floor of the trunk. Manufactured by mechanical gear pump, forced system with pressure limiting valve and bypass.
Metal bumpers can also be brought back to normal after an accident. During repair, they are also subjected to straightening and updating of the coating (by grinding, polishing or chrome plating). But, frankly, it makes more sense to replace a damaged metal bumper, since restoration procedures are most often costly. more expensive than buying and installation of a new product.
It is carried out by a centrifugal pump, an expansion tank and a honeycomb radiator located in the secondary circuit for circulating water from the engine to the radiator. Semi-independent, longitudinal swingarm and stabilizing plate, telescopic double-acting hydraulic shock absorbers and coil springs.
The characteristics that identify the vehicle are found on the chassis number and the manufacturer's nameplate. Its correct location is described below. Chassis number Chassis number: engraved on the right floor below the seat front passenger. It consists of seventeen alphanumeric characters that indicate various characteristics vehicle, such as date of manufacture, model, origin, etc. an identification number vehicle is also present on the windows of the vehicle and on self-adhesive labels located on the following parts of the vehicle: on the right mounting bracket front seat in the right column A engine compartment next to the wheelchair, in a plaque attached under the hood.
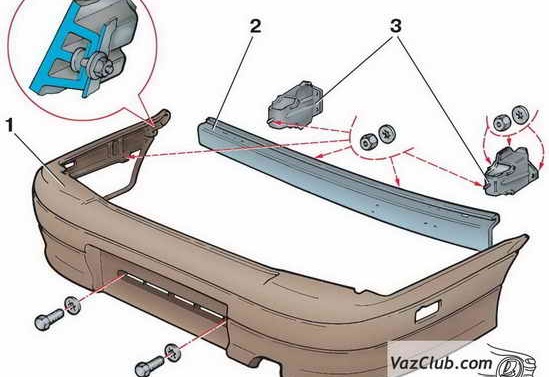
Removal and installation of bumpers on the VAZ
For a complete understanding of what service centers charge money for, let's take a closer look at the replacement process using the example of a VAZ-2114 car (and its modifications VAZ-2115). The procedure is carried out using a key on "10", sockets on "13" and on "10", an extension cord, a wrench and a screwdriver with a Phillips blade.
Selection of new bumpers
Below is the meaning of each code. Builder Plate: It is located on the front panel in the top lintel. Engine type and number: Recorded on the engine block on the left side. Figure 01 - Location of vehicle identification plates.
These materials can be repaired with the appropriate technical procedures providing a good aesthetic finish. The figure below shows the repairable plastic elements, which, due to their location, can be broken in the event of a collision, as well as the identification of the plastic that will be used in their repair.
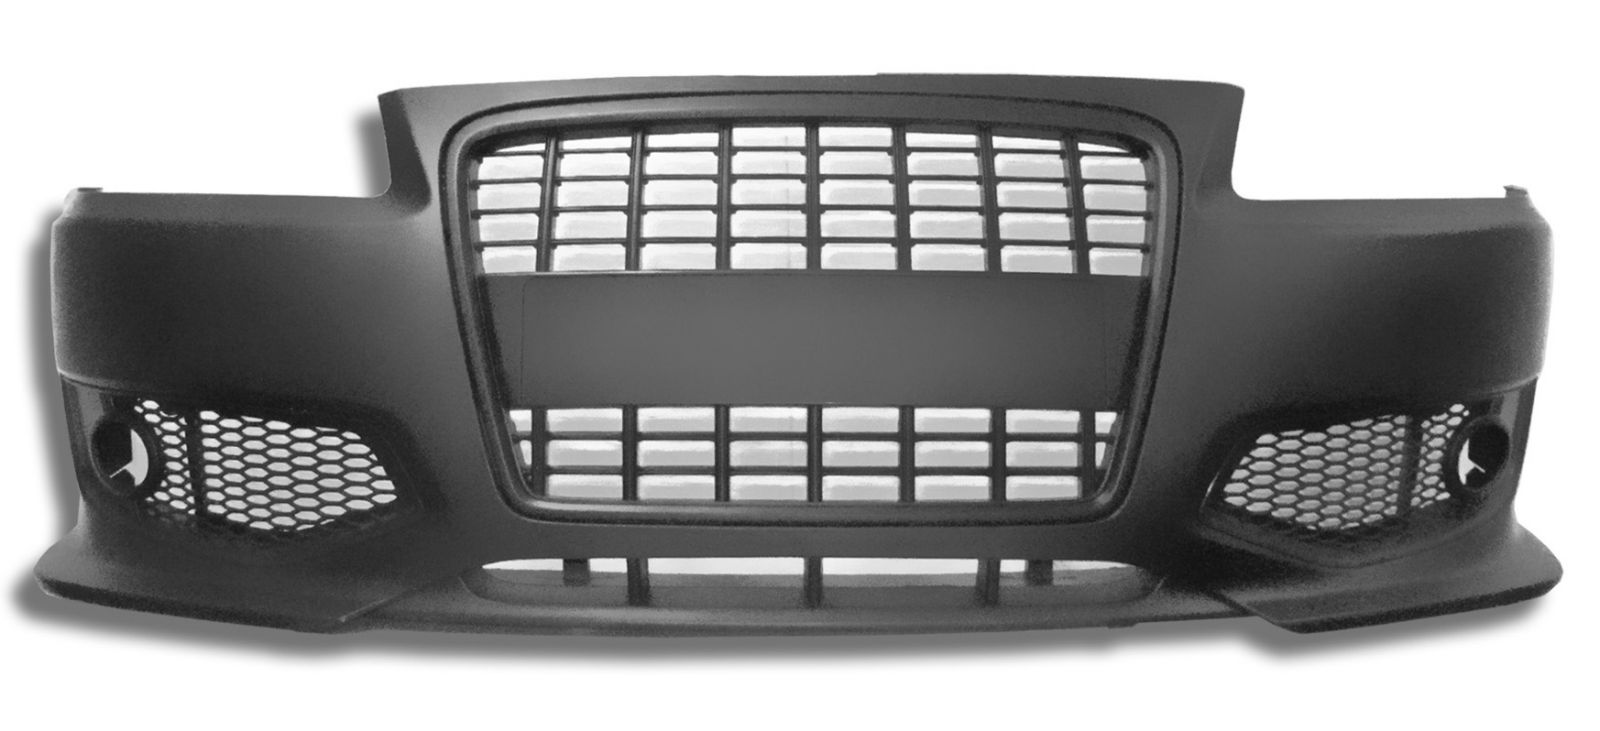
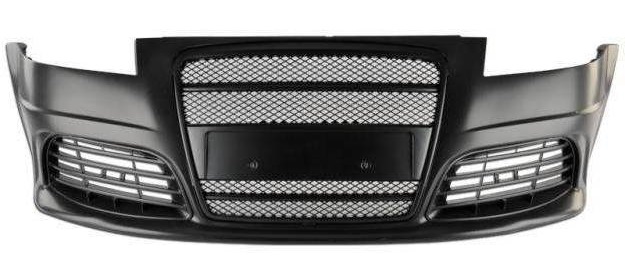
Front bumper
Before starting to dismantle the deformed part, remove the front fender liner, remove both fog lights and remove the license plate.
Next, two bolts are unscrewed, with the help of which the bumper lining is attached to the amplifier. During their extraction, it is necessary to inside hold the bolt nuts with a second wrench. After that, it is necessary to unscrew the two nuts responsible for attaching the right and left cladding brackets to the mudguard of the body
Figure 02 - External elements made of plastic. Verification and control of possible deformations in the structural elements of the vehicle body subjected to high forces must be controlled by checking the dimensions and dimensions of a series of one-piece points, such as suspension attachment points, towers and floor. These measurements were made using established mechanics.
Checking the dimensions in the upper part of the body was carried out using a rod compass, checking the equality of measures of its shapes between the pieces of the left and right sides. Figure 03 - Outer case dimensions. Note: Measurements in mm Figure 04 - Vehicle span dimensions.
The next step is to remove the cladding mounting studs from the holes located in the mudguard on both sides, remove the two bracket mounting nuts and remove the bumper beam. If necessary, the left and right brackets are also removed, for which two bolts are unscrewed and the nuts fastening to the body are unscrewed.
Removed and new parts are installed in reverse order.
Figure 05 - Vehicle measures. Groups of parts that are sold by the manufacturer are marked with a number, while parts of that group that can be purchased separately are marked with the same number plus one letter. Front elements. Lock wheel front wheel Front mount right front pillar.
Figure 06 - Front elements. Center and back. Figure 7 - Central and rear elements. In this way, savings can be achieved during the repair, which reduces its cost. At the same time, damage to other parts of the body that were not affected is excluded, which would not have happened if the complete replacement. Figure 8 - Partial replacements.
The video shows the disassembly front bumper on the VAZ-2110.
rear bumper
When withdrawing rear bumper first of all, it is necessary to unscrew the nuts responsible for connecting the body and fender liner with the lining fasteners. Next, loosen all the bolts of the lower and upper bumper beams. After removing them, dismantle the mounting brackets and the entire structure.
These problems are seen as accessibility for repair and integration with the body, among others. will also focus external elements, which are most often damaged in a collision. Wing-wing. Figure 9 - Front elements. Figure 10 - Beacon marketing.
Part assembly The headlight is attached to the body with screws. Figure 11 details the integration of this part with the rest of the body. Fastening the screw to the jumper. Figure 12 - Front bumper marketing. Assembling the part The front bumper is attached to the body with screws. Figure 13 details the connection of the part to the rest of the body.
Install the rear bumper in the reverse order of removal.
It should be noted that the removal of the rear bumper trim for VAZ cars different generations slightly different. This is seen in next video on the example of Lada Priora.
The cost of the service at the service station
bumper replacement cost service centers Moscow varies from 1,200 to 9,000 rubles.
Bottom fixing screw Bottom fixing screw. Front panel fixing screw. Figure 13 - Installing the bumper on the body. Preliminary Operations for Replacement or Repair The following items are pre-assembled to replace or repair the front bumper. Disconnect the battery; Release the mudguard; Disconnect the auxiliary headlight; Remove the bumper.
Figure 14 - Commercialization of the mudguard. Assembling the part The mudguard is attached to the body with screws and tabs. Figure 15 details the connection of this part to the rest of the body. Figure 15 - The union of the mudguard to the body. Marketing. The manufacturer installs the top bar as an original spare part. Figure 16 - Top Beam Marketing.
The following factors influence the price:
- make and model of the car (cars under the icons of world brands will cost more);
- the material of the element itself (plastic, metal, composite);
- the color and design of the car (so that the bumper "fits in", i.e. looks organically against the background of the body);
- urgency of the order.
Another advantage (far from the main, but sometimes decisive) of replacing the bumper before repair is the duration of the procedure: restoration is still a laborious process, and replacement is carried out by the vast majority of repair shops within one day.
Part connection The top web is connected to the carriage by means of resistance welds. Figure 17 details the connection of this part to the rest of the body. 4 indicates the wheel box. Figure 17 - Connecting the upper transom to the body.
Availability. It is an open configuration, easily accessible for repair. Figure 18 - Accessibility of the top latch. Preliminary Operations for Replacement or Repair The following items are pre-assembled to replace or repair the front upper element.
Disconnect the battery; Remove the auxiliary headlight; Remove bumper; Remove front flashing; Remove headlights; Remove the radiator air baffle; Remove holder air filter; Remove the front mudguard; Remove the horn; Remove the top tray. In the event of a repair, it will be necessary to disassemble one or another of the elements mentioned above, depending on the size and location of the damage.
Each car has its own design features. Removing and replacing the bumper of this horse is described in the following video.
On cars VAZ 2113, 2114, 2115 are installed plastic bumpers. During operation, this part may be damaged as a result of a collision. In case of severe damage, the rear bumper is easier to remove and replace than to repair, and you can do it yourself.
Figure 19 - Commercialization of the wing. Part Attachment The splash guard is attached to the body with bolts and nuts. Figure 20 details the integration of this part with the rest of the body. Figure 20 - Attaching the mudguard to the body. Availability Displays a mixed configuration. Reinforcement areas have little access to repairs, but for the most part, it has easy access.
Figure 21 - Attaching the mudguard to the body. Preliminary Operations for Replacement or Repair The following items are pre-assembled for replacement or repair of the wing. Delete Delete Delete Delete Delete. Windshield clay; front flashlight; front bumper; frieze; wing.
When Should You Replace Your Bumper?
The bumper for any car plays an important role: it allows you to give the car a finished look and ensures safety in a collision. On modern machines such a part is usually made of plastic. Curved bumper edges increase downforce, which prevents turbulence at the rear of the car.
Figure 22 - Hood marketing. Assembling the part The hood is attached to the body with screws using a hinge, which is attached to the body with screws. Figure 23 - Attaching the hood to the body. It is a closed configuration with reinforcement areas, having good access for repairs in some areas and zero in most. Figure 24 - Hood accessibility.
Preliminary Operations for Replacement or Repair The following items are pre-assembled for replacing or repairing the cover. Disconnect the battery; Remove thermoacoustic coating; Remove the hose from the wiper; Remove the wiper nozzles; Remove emblem; Remove the hood cover bracket; Remove clamps and plugs; Remove the hood latch; Remove the identification plate; Remove front fairing.
As the vehicle is used, it is possible different situations: from a collision in an accident to an accidental collision with an obstacle. In such situations, bumper replacement is required.
The main reasons for purchasing a new part:
- the bumper cannot be restored after an accident;
- no time to fix a damaged bumper (replace part faster than repair);
- installing a new part is part of car tuning.
In case of significant damage to the bumper, it is more profitable to replace the part than to repair it.
Figure 25 - Lower beam marketing. Part attachment The lower cross member is fixed to the body by spot welding. Figure 26 details the connection of this part to the rest of the body. Figure 26 - Connecting the lower transom to the body. It has a closed configuration with mostly zero access and difficult access points to repair. Figure 27 - Accessibility of the lower deck.
Replacement or Repair Preliminary Operations To replace or repair the lower deck, the following items are pre-assembled. Disconnect the battery; Remove the front bumper; Take off front light; Remove headlight; Remove the bumper mount; Remove the hood latch; Remove the electrical installation; Remove the engine intake ducts; Remove the horn; Remove the cover opening cable; Remove latches and tabs; Remove the adjuster; Remove the identification plate; Remove shock absorber; Remove the cap from the mudguard; Remove the radiator baffle; Remove protective cover crankcase; Remove the front bottom bracket.
When to put in a new part
If the bumper is damaged, then it is not always possible to restore it. If there are small cracks and scratches in a car service, the item can be repaired. If the bumper simply split into several parts, then it will not be possible to restore it. In this case, there is only one way out - to replace the part. Depending on the degree of damage, sometimes you have to purchase bumper mounts.
Figure 28 - Commercialization of the front stringer. Figure 29 details the connection of this part to the rest of the body. Figure 29 - Installing the front spar to the body. Availability Displays a closed configuration without access to a repair technician.
Before replacing or repairing Before replacing or repairing the front side member, the following items must first be assembled. The picture below shows what these things are. Figure 30 - Elements of the central part. Figure 31 - Front door marketing.
Part Attachment The front door is attached to the body with hinges and screws. Figure 32 details the integration of this part with the rest of the body. Hinge fixing screw. Figure 32 - Assembly of the front door and body. Availability 33 you can see access passages in the door frame, as well as regions of different repair access.
For such vehicles domestic auto industry like VAZ 2113, 2114, 2115, get new bumper not difficult. In this case, you can purchase both a “native” part and a product of third-party manufacturers. Nevertheless, it is recommended to install the original bumpers, which is due to their higher quality.
How to change a part
For those who are faced with the need to replace the bumper, it is important to know how to properly remove and install this element. First of all, you need to adhere to the following tips when choosing a new bumper:
- pay attention to how thick the plastic of the new part is (preference is given to products of greater thickness);
- it is important to choose the right color if you are buying a painted part;
- on VAZ 2114, a bumper from VAZ 2115 is suitable with provided places for fog lights.
If the damaged bumper is not replaced, then the car becomes less attractive, in addition to possible collision from a strong impact, the body can be seriously damaged. First of all, parts such as the fan and radiator of the cooling system, the TV frame and fenders will be hit. Therefore, it is worth protecting yourself from possible troubles and replacing the damaged bumper.
In case of large cracks or missing parts of the bumper, the part must be replaced, although some car owners are trying to restore it
How to replace a part with your own hands
To perform a replacement, it is not necessary to contact the service, because you can do all the work yourself. This event does not require any special tools. Let's take a closer look at what needs to be done and in what order.
How to replace the front bumper on VAZ 2113, 2114, 2115
First of all, it is worth noting that the removal of the bumper from the VAZ 2113, 2114, 2115 is carried out in the same way. There may be some differences in new versions. Before starting work, you will need to prepare the following list of tools:
- screwdriver or screwdriver with a cross;
- open-end or box wrench for 8 and 10;
- head on 13 with a collar.
It will take a little over an hour to replace the part. It is advisable to drive the car to viewing hole or a lift. This will make it easier to remove the bumper.
- Using a screwdriver, unscrew the 3 screws that secure the front wheel protection to the bumper.
- With a key (open-end or ring) for 8, we unscrew 2 screws in the wheel arch.
- To access the bumper from the inside, you will need to bend the protection back.
- If you look from below, we will see 2 nuts by 10. We use a wrench to unscrew them. We perform a similar procedure on the other side of the machine.
- Using a screwdriver, unscrew the 4 screws located in front: two of them in the lower windows and two under the license plate.
- It remains to remove the bumper from the car.
- If the vehicle has been involved in an accident, the bumper reinforcement may also be damaged. Therefore, it may be necessary to remove and replace this part. Then with a head of 13 it will be necessary to unscrew two nuts on each side.
- The amplifier can be adjusted during installation. To do this, there may be shims on the studs, you do not need to remove them.
- The new bumper is installed on the car in reverse order.
Photo gallery: dismantling the front bumper
There are 2 self-tapping screws under the license plate - we unscrew them with a Phillips screwdriver At the bottom of the VAZ 2114 front bumper, unscrew two self-tapping screws To remove the bumper, unscrew two 10 nuts on each side of the car There may be adjustment washers on the amplifier mounting studs that do not need to be removed
Adjusting the amplifier during assembly allows you to change the gap between the wing and the bumper. As an addition, it is worth noting: if available fog lights on the bumper, they must be disconnected from the car wiring so that the wires are not damaged during dismantling. In addition, on the new VAZ 2114 models, the design of the bumper amplifier is such that there are teeth in the upper part that are designed to put on the bumper during installation.
During the assembly process, the amplifier can be adjusted, thereby changing the gap between the wing and the bumper
To install the mounting brackets on the new bumper, remove them from the old one. Mounting is done with three screws.

From the old bumper it is necessary to remove and install on the new brackets, which are fastened with three screws
How to remove and install the rear bumper
The rear bumper has to be changed for the same reasons as the front. Since the part is made of plastic, it is not particularly durable. Basically, the bumper is more profitable and faster to replace than to repair. To carry out the work you will need the following list of tools:
- 2 jacks;
- recoil shoes;
- a set of socket heads with a collar;
- set of open-end wrenches;
- metal brush.
Dismantling is carried out in the following sequence:
- We install the car on a flat surface, placing stops under the front wheels, and hang the rear wheels with the help of jacks and remove.
- After the wheels are removed, access to the fender liner opens. It is necessary to clean the dirt with a metal brush and unscrew the screws while holding the fender liner. After which they are removed.
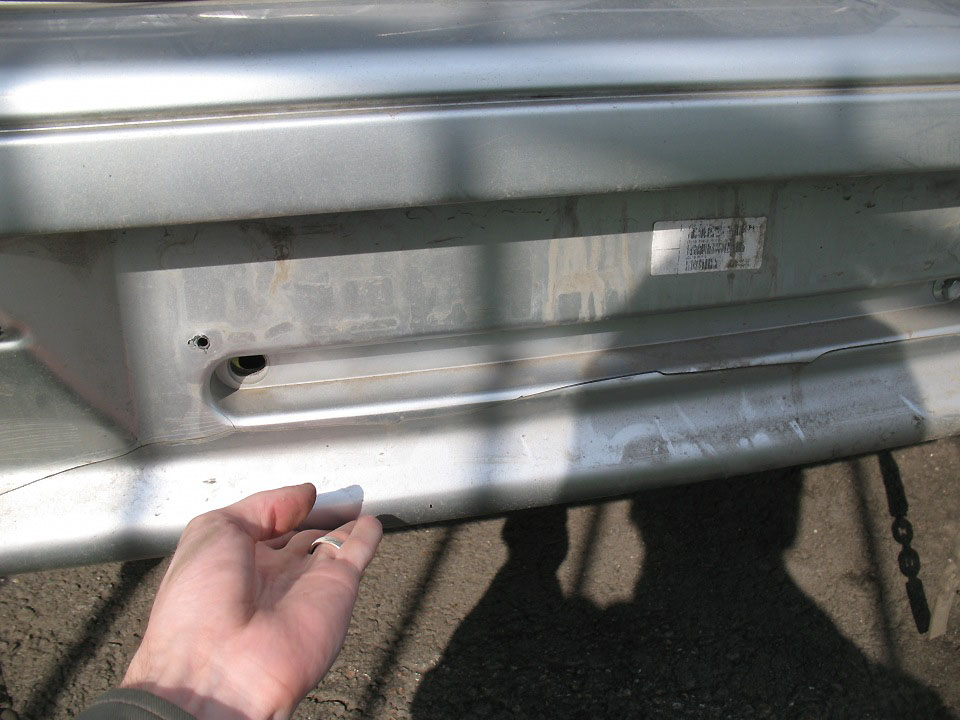
- To dismantle the bumper from the VAZ 2115, you will need to disconnect the wiring from the license plate light.
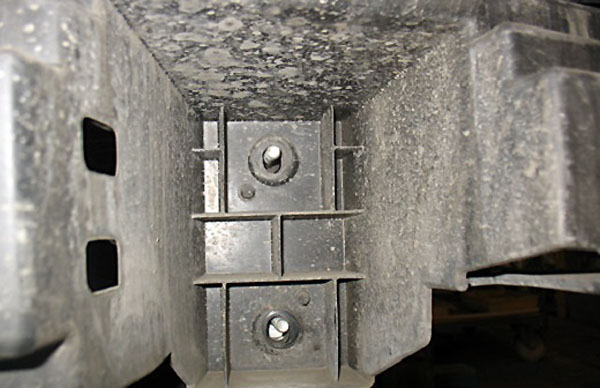
- Under the protection of the wings are 4 bumper mounting bolts (2 on each side). We turn them away socket head 10 with the help of a crank.
- Under the bumper there are four 13 nuts that secure the bumper reinforcement. It takes some effort to unscrew them. It would be useful to pre-lubricate them with a penetrating liquid.
- We unscrew the nuts and remove the rear bumper.

From the inside, on each side of the bumper, unscrew the two fastening nuts
Video: how to dismantle a part using the VAZ 2114 as an example
Replacing the front or rear bumper on a VAZ 2113, 2114, 2115 with your own hands is not difficult. This does not require special tool. Even a novice car enthusiast will be able to remove and install the bumper on their own, following the step-by-step instructions.