The tricycle is closer to an ATV in terms of its driving characteristics and is very useful in those places where a regular Ural motorcycle will not pass. In addition, it is more comfortable to travel long distances on a tricycle, which is important in rural areas. After the rework, the motorcycle becomes more stable, moves faster and can carry more load.

Assembling a tricycle from the Urals with your own hands
Before starting work, it is necessary to think over the design of the future tricycle and the location of all elements. Ideally, make a drawing of the future vehicle.
Important design points:
- All joints must be reinforced.
- Car cups are welded to the top beam. It is also a support for shock absorbers.
- Frames are welded to the central beam, which serve as footrests for passengers, and also serve as a support for the suspension bumpers.
- The base for the pedal weights is the lower transverse tube, which is attached to the frame.
- The transverse frame also supports the gearbox.
The main difference between a tricycle and a motorcycle is that the engine is located at the back and therefore the vehicle's center of gravity shifts back. When accelerating, such a tricycle rises up a little. Below you can see a diagram of how to convert a Ural motorcycle into a tricycle.

1, 2 - front wheel and fender; 3 - front wheel suspension system; 4, 5 - headlight and headlight bracket; 6 - speedometer; 7 - gas tank; 8, 9 - lever and gearbox; 10 - battery; 11 - seat back; 12 - rear lights; 13 - air filter; 14 - engine; 15 - cooler; 16 - oil-air radiator; 17 - mufflers; 18 - rear wheel; 19 - elastic coupling; 20 - brake rod; 21 - brake pedal; 22 - beep; 23 - struts of the rear wing; 24 - shock absorbers; 25 - frame for mounting the radiator and muffler; 26, 27 - rear wing and its attachment console; 28 - front console; 29 - wing bracket; 30 - rear wheel suspension arms; 31, 32 - throttle and brake levers, respectively; 33 - ignition lock; 34, 35 - clutch pedal and clutch rod; 36 - speed switch; 37 - steering wheel.
Arrangement of tricycle parts
As we have already said, the engine of the Ural tricycle is not on the main axis, like in motorcycles. It is placed between the rear wheels because of this, with a rapid set of speed, the tricycle easily rears up. But this is a much safer experience than riding a motorcycle and brings adrenaline and entertainment to the ride.
Engine
As a motor, you can use a native motor from the Urals, or take a car engine. The main parameter of choice is its capacity between the rear wheels. It is imperative to secure it securely in at least three places. Most often, if the power unit is in good condition, then you don't even need to do anything with it. And if the motor is old, then you can replace the radiator or some other elements.

Depending on the engine you choose, you will have to change the exhaust system, installing one muffler for each cylinder.
Checkpoint
When converting a motorcycle from the Urals to a tricycle with your own hands, the gearbox is usually installed on the left side, because you usually need to firmly hold the steering wheel with your right hand. We'll have to think a little how to connect it to the engine, because now the gearbox will be located much further away from it.
Suspension
The standard motorcycle suspension will have to be redone due to the fact that the load on the wheels in the Ural motorcycle tricycle is distributed differently.
This is done with two consoles and two large springs (air springs are ideal, but automobile springs will work as well). The consoles are connected by levers through which the front axle is passed.
Powerful springs are needed because there is a huge load on the front wheel and suspension when driving. The rest of the springs can be left with standard motorcycle springs.
Battery
A separate frame is usually welded under the battery, which is attached between the engine and the driver's seat. All the main parts are thus arranged in one place. And if you attach trunks to the tricycle, then they will completely hide all the important elements.
Dyeing

Since a do-it-yourself tricycle on the basis of the Urals is assembled from different parts, as well as other motorcycles and cars, all the parts are different and therefore need to be painted. After painting, it is advisable to make the coating with a transparent varnish and polish. And the metal elements are chrome-plated.
When creating a cargo tricycle with your own hands from the Urals and parts of a VAZ-2101 car, the easiest thing will be to install a conventional bridge and make an automobile suspension with shock absorbers from the Urals.
The bridge from the VAZ-2101 is turned over, having previously welded the differential. This affects handling - the steering wheel turns quite hard, however, the trike increases its cross-country ability.
The propeller shaft is shortened and welded to the fork in the final drive and connected to the axle via a rubber coupling. It is better to take the original Ural clutch, in this case the transmission will be softer.

To avoid kinking the driveline, you can shift the engine to the left by 7-9 cm or shift the axle to the right or increase the wheelbase.
It is better to leave the engine as a whole unchanged, but instead of two carburetors, make one Chinese. And as a forced cooling, take an air filter from Izh.
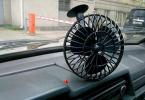
In addition, two fans can be installed to cool the engine under difficult conditions and run separately if required.
Pros and cons of the design
How to make a tricycle from a motorcycle Ural and ZAZ-968
The front fork works like in the Urals, a system of levers is used and the front axle is located between the wishbones.
The rear part, when creating a trike from the Urals and the ZAZ-968 car, remains practically unchanged, like a car. Only the muffler, oil cooler and air filter are added there. The gearbox and engine are also used by relatives from ZAZ. The engine is mounted as before, and the gearbox is placed on the left.
In general, you don't have to change much.

DIY assembly steps
- At the very beginning, the rear axle is removed from the car.
- A beam is attached to the cut.
- Mufflers, an air filter, an oil cooler and branch pipes are installed on the rear wheel axle. If you use engines from the 90s, then all these elements will already be installed.
- A frame is being made, which will be the basis of the tricycle, therefore it is necessary to make it strong and reliable.
- An elongated front fork is made by welding with shock absorbers attached to it. Elongation occurs by replacing the fork rods with longer ones or by welding more tubes to the Ural fork.
- Welds the frame and rear axle of the vehicle to form a one-piece structure.
- The fork is connected to the frame by welding, as well as to the rear axle of the ZAZ.
- After that, the seats, gas tank and other elements are attached.
- Finally, the new tricycle is painted and chrome plated.
Ural Hercules - factory tricycle Ural
The Irbit Motorcycle Plant has released a three-wheeled modification in its model range for the transport of goods up to 500 kg. The model is called "Hercules" and perfectly moves both on city roads and off-road. The sides of the tricycle are also removed and this allows it not to be limited in the size of the transported cargo. Hercules is a truck that does not need a C license.

Technical characteristics of the Hercules tricycle:
- Dimensions: 335x150x115 cm
- Clearance: 185 mm
- Weight: 500 kg
- Fuel tank capacity: 19 l
- Maximum speed: 70 km / h
- Engine displacement: 750 cc
- Power: 45 HP
- Engine type: opposed 4-stroke with two cylinders
- Generator: 500W
- Electrical: 12V
- Gearbox: 4-speed, with reverse gear
- Tires: 6.45 and 13 inches
The design of this homemade swamp vehicle is so simple that almost any car enthusiast can repeat it in his own garage. The basis of the swamp rover is the IZH Planet 3 motorcycle. Motorcycles Izh Planet often become donors in all-terrain homemade products, this is primarily due to the endurance and unpretentiousness of their engines.
The main feature of this self-made swamp-going vehicle is that during its design, turning work is minimized. They had to turn to the turner only once so that they cut out a seat on a 50 tooth sprocket in order to fit it on the differential of the Moskvich bridge.
Swampwalker bridge
The bridge was taken from a Muscovite and modernized. The bearing fasteners from the doll are cut out with a grinder, then the drag arc is welded to the bridge stocking (if it is not welded, the stocking will be re-cut when you cut it in half), then the stocking itself is cut in order to fix the sprocket. The chain tensioner is also borrowed from the combine.
Swamp Vehicle Wheels

KF-97 cameras are used from the agricultural trailer of the T-150 tractor. The tire for such a chamber wheel is the same chamber, only cut along a smaller diameter. First, the "tire" is put on, then it is pulled over with belts. The transverse harness belts turned out to be 1.02 m long, and the longitudinal strip was 3.5 m long. The width of the longitudinal strip is 30 centimeters. Cross belts with a longitudinal strip are bolted together.
Swamp rover discs

The disks from the cornfield were taken as a basis, cut in half with a small grinder and lengthened by 30 centimeters with steel plates welded between the halves of the disks (6 plates in total). The disk is covered with a camera from a VAZ car, cut along a larger diameter. Since the disks were used from Niva, and the axle was from a Muscovite, the rear disks had to be cut at the attachment points.
Frame, brakes and gear


The motorcycle frame is lengthened and reinforced. So that the pendulum fork does not "go", it was welded. The chain and stars are borrowed from the combine. Their ratio is 2 to 1. Small star with 25 teeth, it is attached to the drum with eight hardened bolts of 10. Large star with 50 teeth. The braking system of the swamp rover is no different from any other, so the brakes are left unchanged. But the drum has been upgraded for sprocket mounts.
Fork


The length of the fork stays of this bogie is 800mm, while its width is approximately 700mm. The front wheel axle is used from a donor - motorcycle IZH. On one side, a 500mm long extension pipe is welded to the axle. This pipe is inserted into a modernized Izhevsk drum screwed to the wheel. On the other hand, the axle is screwed into the same mount as on the forks. The mount was cut off from the shock absorber and welded to the feather (it is not visible in the photo as it is inserted into the pipe and welded).
The fork is attached to the handlebars of the swamp rover quite simply. 2 pipes are inserted into the shock absorber mount.

All-terrain vehicle engine
The engine from the IZH-Planet 3 motorcycle with forced air cooling from the SZD motorized carriage (popularly "Invalidka"). The crankshaft is native - planetary, not "SZDshny", since the seat for the generator at the "SZD" does not fit (it is more), and the ignition coil Izh 6v is on the swamp rover.
Tricycle body
Not everyone can find a vehicle for themselves according to their own taste - especially if they want something unusual. Therefore, it is worth thinking about the fact that you will have to do everything yourself - this is the only way out, but it is also the best if you understand mechanics and know a lot about assembly. But what can you collect on your own to surprise everyone around? A great example of this is a tricycle - you can't buy them in stores, they are rarely produced in large quantities, so you can create your own unique vehicle that will be the envy of everyone around you. However, a serious question arises here - how to make a tricycle with your own hands? To do this, you will need a wide variety of parts that you can get, while using the base and parts of any of the available motorcycles, such as "Ural" or "Izh". It is possible that you have one of these samples in your garage. They can be easily converted into a tricycle or used to assemble your own unique model from scratch. Accordingly, you will need to think over everything in advance, make a drawing or download it from the Internet, because there are definitely enough enthusiasts like you on the network. And then you need to get ready for a long and difficult job, which can be made easier by a few tips. You can read them further.
Tricycle layout
The first thing you need to think about if you are going to DIY a tricycle is its layout. The fact is that the power unit, which is usually located directly on the axle of motorcycles, thereby improving the balance and reliability of the vehicle on the road, can no longer be there. Accordingly, you need to carry it by the axle, between the two rear wheels. Naturally, this affects the stability and handling of the tricycle - and not in the best way. But if you are an experienced driver, then you can adjust pretty quickly. Moreover, it opens up some interesting perspectives - for example, the ability to rear your vehicle at high speed without any problems. It looks extremely impressive and, unlike motorcycles, in this case you do not risk anything - this is an absolutely safe action (of course, if you do not drag the car over yourself, but on a motorcycle such a trick is much more difficult anyway). Accordingly, you will be able to impress everyone around you not only with the appearance of your vehicle, but also with its spectacular capabilities. This is already enough to convince yourself to make a tricycle with your own hands.
Power unit

Naturally, when you think about making a tricycle with your own hands, you will need to find the right engine. In this case, you do not need to take a power unit from another motorcycle - an engine from a car will also do. The main thing is that it fits normally between the rear wheels. This will improve the performance of your vehicle. In some cases, you won't even have to make any changes or improvements, in others, you will need to replace the radiator or some other part. It is also recommended to install other mufflers, and to increase their number by installing one for each of the cylinders. Naturally, there are other options - it all depends on what kind of power unit you decide to choose. For example, if you make a tricycle from the "Ural" with your own hands, then it is better to replace the engine completely.
Gear box

When you make a tricycle from the "Ural" with your own hands, you definitely need to consider where the gearbox will be located. You already understand that the engine itself will be off-axis, behind the seat, between the two rear wheels. At the same time, make sure that it is attached as securely as possible in at least three places - especially if you plan to perform various tricks, as described above. As for the gearbox, it is better to install it on the left side of the steering wheel, since your right hand will be busy most of the time. It is unlikely that if you take the engine and gearbox from the car, you will be able to make a structure that is comfortable enough to change gears without interrupting driving. Also don't forget that you need to take care of connecting the box to the motor, which is a little more complicated considering that it is now located a little further from the box than it should have been in the original. But if you are trying to figure out how to make a tricycle with your own hands, you always need to be prepared for these kinds of surprises and difficulties.
Suspension

It doesn't matter if you make a tricycle with your own hands from Izh or any other motorcycle. You will have to remodel the front wheel suspension anyway. After all, the distribution of forces in a tricycle is very different from that which is observed in a conventional motorcycle. To do this, you will need two pairs of consoles, as well as two powerful springs - if possible, try to get a helicopter or plane, but springs from cars can also be used if necessary. The consoles must be connected to each other with levers through which the axle of your front wheel will pass. Naturally, this is not the only way - there are many ways to make a tricycle with your own hands. Drawings are available online (one of them is in our article), but this method is one of the most effective.
Suspension principle

If you are not making a tricycle from a scooter with your own hands and are counting on a powerful and impressive model, and not on a children's tricycle with a motor, then you need to seriously think about the effect of the suspension of your front wheel. What are helicopter or airplane reasons for? The fact is that the movement of the wheel along the vertical axis will occur with much more force than on a motorcycle, so you need to install stiff and strong springs - at least in the lower part of the suspension, which compensates for movement along the vertical axis. To compensate for movement along the horizontal axis, you can use softer springs, for example, from the Izh motorcycle. It is rather difficult to assemble a tricycle with your own hands, as you can see, but if you follow all the instructions, you will have a clear drawing and all the necessary materials, you should cope.
Battery

The battery for your tricycle needs to be installed under the driver's seat by creating a special frame located above the engine. Thus, all the most important things in your vehicle are located in one place. You should also consider making the passenger seat behind the driver's seat. Not only will it allow more people to ride at the same time, it can also be equipped with saddlebags that completely cover the engine and battery, making your tricycle complete.
Installing accessories

Before completing the work, you need to think about installing all the necessary items, such as rear-view mirrors and so on. All this needs to be thought out so that these devices can be easily and conveniently used in any situation.
Painting
Well, the final stage, of course, is painting, because you worked with individual parts from different vehicles. Most likely, they either do not have paint as such, or are painted in different colors. Accordingly, you need to make sure that your tricycle looks perfect in the end. After painting, you will need to cover all the painted areas with clear varnish, and then polish, and the metal parts, if desired, chrome to make the tricycle look like new.
Everyone knows that only three points are needed for good support, but for some reason three-wheeled vehicles are not as common on our roads as four-wheeled vehicles. Although the first tricycles appeared in the 18th century. It was on such steam engines that it was proposed to transport guns and heavy weapons for the army.
Homemade tricycle - transport of many generations.
At one time tricycles were much more common than their own, but today we do not often see three-wheeled vehicles on the roads. Photos of tricycles - this is the second name of tricycles can be seen on the sites of bikers or car enthusiasts. It is worth noting that a tricycle can be both a kind of motorcycle and a kind of car, so if you are thinking of making a tricycle with your own hands, immediately decide what kind of tricycle you imagine.
Of course, before building a trike with your own hands, you should study in detail the principle of operation of such a transport and have drawings. Drawings can be made independently if you have the necessary education and good knowledge of the operation of all units. But if you don't have such skills, but you really want to create a homemade trike, you can find ready-made laid out drawings of homemade trikes that were designed by other craftsmen.
By the way, you can watch a video of tricycles that garage Kulibins made with your own hands on rework sites or YouToube, where a video of testing garage inventions is posted.
DIY trikes: where to start
Donors for a tricycle can be any kind of transport, but most often they collect a tricycle from "Ural" or a tricycle from "IZH".
In this version, you have to redo the least, because the base of the motorcycles is the most suitable for trikes.
Many people make trikes with their own hands "Ural" and "ZAZ" bringing together these two vehicles.
The first stage of work on the trike is the creation of the frame and rear axle. The bridges to the frame can be attached to rods, on the principle of VAZ cars, or they can be put on springs, as is done in Moskvichi. The frame will naturally have to be extended, but this is easy to do with pipes and profiles. If you are planning to make a homemade trike from the "Ural" with your own hands, almost everything will remain native - the fork, brake discs, hydraulics, fender, etc. By the way, these homemade tricycles look good in a chopper style with elongated forks and a low rise. On the Internet you can see photos of tricycles-
Motorcycles produced back in the Soviet era are already considered a rarity. It is unlikely that he will be able to interest any of them in the quality of a vehicle. A museum exhibit, nothing more! Such equipment is sold very cheaply, a little more expensive than scrap metal. Despite the fact that the old "horse" has already served its purpose, it's time, as they say, to retire, but you don't want to part with it. Familiar situation? Often such a vehicle does not have documents, you cannot go far from home on it - trouble from the police is guaranteed.
Not everyone will think that an old motorcycle "Ural", gathering dust idle in the garage, can be turned into a practical unit. Such a homemade product from the Urals does not require huge financial investments, but a certain amount of patience and a few hours of free time will be very useful.
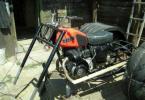
Homemade tricycle from the Urals
The main advantages of a tricycle based on the "Ural":
The predominant part of the component parts belongs to the motorcycle, the engine for the trike is suitable from the ZAZ-968. The most time consuming process is the manufacture of the frame. In the design, it is a kind of connecting link on which all assemblies and parts are installed.
Design features
For inexperienced designers, when assembling a tricycle, the drawing will be an excellent guide to action. It is important to think carefully about sizing.
Rear shock absorbers are mounted on the upper beam, which are similar to automobile counterparts. When driving on a road with irregularities, the shock absorbers will react sensitively to them. Glasses are welded to the beam, which provides the desired comfort. The pipes are welded to the end together with reinforcing kerchiefs - the fastening will be reliable.
Due to the fact that the power unit is installed at the rear, the center of gravity is also there. With a sharp increase in engine speed, the front wheel comes off the road, the tricycle rears up. The elimination of this effect is facilitated by placing the balance closer to the front wheel.
If the engine is slightly tired, it needs to be slightly repaired. The exhaust system in this case is home-made, and the cooling system can be chosen water or oil type.
Since the right hand is busy adjusting the "throttle", then the gear lever, of course, should be on the left side.
Assembly sequence
- The frame is constructed according to the drawing. Everything that is made of ferrous metal must be covered with a layer of primer, and then with paint.
- The rear axle must be in good condition. It can be removed from a Zaporozhets or Moskvich car.
- All major components and assemblies represented by the engine, filters, exhaust system and oil cooler are mounted on the rear axle.
- To have free access to all parts and to ensure ease of assembly, it is recommended to use a jack or lift. The frame must provide a secure connection between the front fork, rear axle and engine.
- When fixing the elements, backlash should not be allowed, there should be no clinking. To avoid vibrations, make the connection with lock nuts.
- The most reliable is considered to be fastening by welding. This must be taken into account when fixing on the frame, rear axle and cross members.
- Attaching the fuel tank, seats, trunk and other accessories is done at the very end of the assembly, when the homemade trike is already on the wheels.
Homemade ATV from the Urals
Heavy motorcycles "Ural" are not very popular. One of the reasons is the huge consumption of gasoline. Many motorcyclists and bikers are not satisfied with the large dimensions of the Urals. Despite this, craftsmen are interested in such motorcycles. Moments such as the presence of a reverse gear, a rather powerful four-stroke engine are very tempting in terms of converting an old Ural into an ATV. As a result, its cost is much lower than that of its European congener, and the engine power is much higher. Such homemade products from the Ural motorcycle will appeal to everyone who loves to create with their own hands.

Design features
Craftsmen from the city of Barnaul received a successful version of a homemade ATV:
- The Ural motorcycle was taken as a basis, in particular, the frame with the engine was left.
- The reinforced gearbox was removed from the motorcycle of another model of the domestic motorcycle - "Dnepr".
- The drive had to be made of a cardan type, due to the fact that the options with sprockets and chains are less reliable.
- Two pairs of wheels fit well from the Gazelle car. At the same time, the appearance of the ATV turned out to be rude, uncouth.

The management of Russian car factories should think about the issue of producing domestic ATVs and tricycles, taking advantage of the excellent experience, for example, of the Barnaul craftsmen. Moreover, most of the components have already left the conveyors of these enterprises in due time!
Homemade Ural motorcycles can look different. In any case, this technique is impressive.
Homemade snowmobile from the Urals
Most craftsmen who have tried to design a snowmobile with their own hands are faced with the problem of choosing a light engine with high power. It is also difficult to find a track track.

Important criteria a homemade snowmobile must meet:
- I would like to simplify the scheme as much as possible so that the manufacture of the unit at home is not accompanied by difficulties. The product should be as cheap as possible, otherwise it is more profitable to buy a ready-made factory analogue.
- The inventor is accountable to customers by offering them a hazardous vehicle.
- Minimize the naming of parts that require processing on a lathe or other machine. Otherwise, the process of manufacturing the unit becomes more complicated, because in modern conditions, finding the necessary machine and a specialist who knows how to handle it is not easy.
Features of a homemade snowmobile
- When choosing and modifying the chassis, you can use the Buran snowmobile diagram. The track system is in the form of rollers, but only one of them was needed for the homemade unit.
- The implementation of the power train from the gearbox to the drive shaft is made possible by means of a chain.
- In the front there are a pair of racks that are designed to have skis instead of wheels. The struts are equipped with springs from the rear shock absorbers of the Izh-Planeta motorcycle.
- The run of the homemade snowmobile over 3 thousand km did not affect the engine's operation - there was no overheating. Traveling a distance of 90 km, the snowmobile consumes almost 10 liters of gasoline.