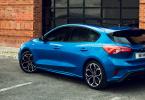
In my youth, like any kid, I was very interested in radio-controlled cars. I remember how the neighbor's guy had such a car, how the same guys lined up on the street who wanted to try to steer at least a little. It is clear that very few people could afford such a luxury, but almost all of us attended a young technician's circle, where they were taught to design and create some models of technology. Do you remember how they subscribed home the editions "Young Technician" and "Tekhnika Molodezhi", I still have packs of magazines in my dacha that I once read far and wide ... covers, it is simply impossible to contain emotions ...
My labor teacher was able to do many things and gave us a lot, for which he thanks a lot. I still remember our lessons - it would seem that we were given the most elementary knowledge, but how much they meant then! This modern youth does not appreciate what they are given at school and at the university - gaining knowledge has become something insipid and not at all valuable.
In the light of the innovative ideas of our teacher, some of us still tried to do something like a self-propelled apparatus. It worked out well, though few reached the bitter end. I, without realizing the idea, decided with my son to make a typewriter on the control panel. True, again, we did not reach the victorious one ...
Our goal was:
1. Make yourself a radio-controlled model.
2. Use the means at hand.
Here's where we left off:


A steering wheel was also planned here, as you can see, control with an independent suspension, a completely homemade unit (wood, cardboard, wire, screw, rubber, glue were used). The son left, and we never made the typewriter. Just recently, again with nostalgia, I took it out of a deep box and thought that it would be worthwhile to do what I had started. True, the entire mechanism is beyond my strength, and there is no point in taking a steam bath - the modern possibilities have been decided for us - you can buy ready-made spare parts. So there is little left to do - the motor, radio control, and you're done! Soon it will be similar to this model)))))))))))))

I took the photo from here: hobbyostrov.ru/automodels/, from where, in fact, I plan to buy radio-controlled parts for implementation in my car. Only now vague doubts gnaw at me ... Should I take a hand-made unit as a basis, or buy a ready-made - not radio-controlled car and make a radio-controlled one. Or, more simply, go to the above site and buy a ready-made car with radio control - is it worth bothering? Because I have order with the guiding elastic elements, but there can be real problems with depreciation, durability, all-terrain vehicles.
Therefore, for now, I'm leaning towards the second option - as a basis, you can buy a designer and build a model to your liking, in which you can implement radio control. Still, the cardboard model is not so durable, and where can the transmission be lubricated in it?)))))) Moreover, you can buy all the necessary spare parts on the same hobbyostrov.ru/.
In general, I'll do it - I'll show you what happened. In the meantime, I would like to hear / see the experience of creating radio-controlled models, I'm sure that I'm not the only one who bothers like that. Maybe there will be specific advice? ..
Not only children are now interested in toys. Many adults buy exact copies of cars of famous brands or are looking for radio-controlled models of cars. Among the offered assortment of toy stores, it is not always possible to find an option that will completely suit the client. In some cases, it is much better to make a radio-controlled model of a car yourself, your child will appreciate your efforts. A do-it-yourself gift from improvised means is much more valuable than a bright typewriter bought at an expensive toy store.
You can make your own radio-controlled car using our sequential algorithm. Modeling from one finished model of a car to another is very similar to the actions of craftsmen in a car workshop.
To create a controllable car with your own hands, you need to have the following elements:
- Electric motor;
- Small car body;
- Robust chassis;
- Removable wheels;
- Mini screwdriver set;
- Detailed instructions for accessories.
Undoubtedly, self-assembly of the machine on the remote control has a lot of advantageous advantages, namely:
- Saving money, while you will have the model of the car that you wanted;
- You can choose the model you need from the offered assortment of spare parts and body types;
- You decide - to make a mini-typewriter on a wired remote control, or use a radio control, which will have to spend a large amount.
After you decide on the model, follow the following sequence of actions:
- We select a chassis for your model, pay attention to the quality of all small parts. No blotches and notches on the surface of the plastic should be visible, the front wheels should move smoothly;
- When choosing wheels, pay special attention to models with rubber, since all plastic models have a poor quality grip surface;
- Take the choice of motor with all seriousness, since this is the main heart of the mini-car. There are 2 types of mini-motors for cars - electric and gasoline. Electric motors are affordable and easy to use, they are powered by a battery, and it is very easy to recharge it. Gasoline options have more power, but they are more expensive and require delicate maintenance. They need to be injected with special fuel. For beginners in the field of toy car modeling, electric motors are suitable;
- You need to decide on the type of control - wired or wireless. Wired controls are cheaper, but the car will only move within a limited radius, while the RC model will move within antenna range. The radio unit is much more efficient for mini-cars;
- The body of the future car also deserves increased attention. You can choose a ready-made case or make it according to your personal sketch.
After all the parts are purchased, you can start assembling.

We attach a motor and a radio unit to the chassis. We mount the antenna. Along with the accessories, there should be detailed instructions for assembling the entire machine. We are adjusting the work of the motor. After everything is working properly, fix the sturdy body of the mini-car to the chassis. Now you can decorate the created model as you like. Let's make a car with a powerful motor.
Many will find the idea of assembling a motorized car for their child very strange, since there are many ready-made options on store shelves. But if you strive to show individuality and earn credibility in the eyes of your child, then you can start assembling a machine with a motor, although this is not easy, but the result will justify all efforts.

The best option is to start assembling a radio-controlled model. This will require certain skills and knowledge of small electrical engineering, because this mini-machine is a rather complex mechanism, despite its compact size. All important parts must be purchased.
We begin to study the control panel. The movement of the car, the ability to overcome obstacles, and make beautiful maneuvers directly depends on the correct assembly. Many car models use a three-channel pistol-style remote control, which you can assemble yourself.
You can follow a simple path - get a special designer, where the kit contains all the necessary parts, their detailed diagrams and final drawings of the finished models.
Engines for future radio-controlled models can be electric or internal combustion. Internal combustion engines produce gasoline or incandescent, operating on a composition of methanol, oil and nitromethane, a special gas-alcohol mixture. The approximate volumes of such engines range from 15 to 35 cm3.
The approximate volume of the fuel tank for such vehicles is 700 cm3. It keeps the engine running smoothly for 45 minutes. Many gasoline models are rear-wheel drive with independent suspension.
Today, there are many demountable models on the market for car builders. Among the leading manufacturers of mini-cars, it is worth highlighting ABC, Protech, FG Modelsport (Germany), HPI, HIMOTO (USA). Their main feature is the similarity of mini-models with real prototypes. After completing the assembly, according to the attached instructions, install a charged on-board battery, a battery in the transmitter, pour a small amount of gasoline into the tank. You can safely launch your iron horse on the way.

Modeling cars of your own accord is a fun hobby, especially when the result exceeds all expectations. To begin with, you need to purchase a Range Rover bench model, from which we will make a jeep that can freely dissect off-road. We also need to take working electronics from an old jeep, we will fix it in an SUV.
We make bridges and differentials from copper pipes with a soldering iron. We attach it to the powerful wheels of the SUV. Care must be taken to ensure that all connections are firmly sealed. We closed the sharpening differentials with pill caps. From above we cover the entire joint of the differential with ordinary auto enamel. We put the bridges on the frame and carry out the steering rods. Steering rods can be obtained from an old disassembled machine. After installing the plastic bottom, we cut out a hole there, which is necessary for installing the gearbox, cardan shafts. The gearbox contains an airplane engine, which is also quite powerful. The model does not move in jerks, but smoothly, this is the most important condition for such models. It is quite difficult to make a gearbox, but here you can show all your ingenuity. We fix the gearbox tightly to the bottom, attach the bottom to the frame. Now the electronics, shock absorbers, battery are being installed. At the end, the car body is painted, the main units are installed, the headlights and much more. We apply the paint in 4 layers for ordinary plastic. The author found the original photo of the car and made a mini-copy of it in a toy version. So that the model is not afraid of moisture, he covered the electronics with a special compound. To give the effect of antiquity, I sanded the outer surface of the car after painting. The battery in this model is enough for 25 minutes of continuous riding.

To create such a simple model, we need the following list of small details:
- Microcircuit for a radio-controlled car;
- Remote Control;
- Steering element;
- Soldering iron with solder;
- Compact electrical device;
- Battery with charger.
The procedure is as follows:
- We collect the lower part of the car, that is, the suspension;
- For this purpose, a strong plastic plate is required, it will be the basis for this model;
- A microcircuit for a radio-controlled car is attached to it, we solder a wire to it, which serves as an antenna;
- We solder the wires from the electric motor;
- We fix the battery wires to the correct points of the microcircuit;
- We fix the wheels taken from a simple children's car;
- All parts can be secured so as not to fall off during use.
We fix the steering elements, it is impossible to do this with glue alone. The front axle must be wrapped with electrical tape for a stronger fix. We attach the battery to a microcircuit. The machine is now ready for testing. It must definitely function. The control of such a machine is carried out using the remote control. By following these instructions, you can easily make a new typewriter on the controls. If you want to design with your own hands, then this guide is more useful than ever. A handmade toy pleases much more than a model bought with your own hands.

To assemble this model, we need the following components:
- A simple model of a car of any production;
- VAZ parts for opening doors, 12-volt battery;
- Radio control equipment;
- Durable batteries with chargers;
- Radiator;
- Electronic measuring equipment;
- Small soldering iron with solder;
- Locksmith tools;
- A piece of rubber to provide reinforcement for the bumper.
An approximate scheme for collecting a radio-controlled model is shown in the figure.

Let's move on to reading and collecting the diagram, to the fascinating process of creating a unique mini-typewriter. First, we collect the suspension. We take VAZ connections and gears for assembling the gearbox. The studs and housing need to be threaded in order to hang the gears and solenoids. We connect the gearbox to the power supply, check it, and then fix it on a typewriter. To effectively protect the system from overheating, we install a radiator. The plate from it can be firmly fixed with ordinary bolts. Next comes the installation of power driver and radio control microcircuits. We completely install the car body. Our mini car is ready for real challenges.

You have a radio-controlled car. Are you looking to make it more agile, but don't know how to do it?
Do not overload the model with additional systems and unnecessary small details. Sound signals, glowing headlights - these are all conveniences, they look great, but the independent process of collecting a radio-controlled car has certain difficulties even without it. The complication of parts can negatively affect the important chassis of the car. The main point to focus on is the creation of a high-quality suspension, ensuring reliable signal transmission.
To improve the maneuverability indicators and optimize the speed parameters, fine-tuning the system during test drives is suitable. These guidelines will help you to understand the business of car modeling. You can create a typewriter yourself, which will be a real copy of a large model. All the details will be similar, only your version will have everything in a mini-format.

Make your son happy - make a car with him on the control panel
You can start with a simple one - to assemble a construction machine on the remote control. First you need to come up with a project: how your car will look like, how it will move, view other details. To start immediate assembly, you need to prepare not only all the important components of the future iron horse, but also the necessary devices. To start an exciting joint activity with our sons, we take the following things:
- Small motor, can be borrowed from an old vein or a household fan;
- Sturdy frame;
- Mini rubber kit;
- Quality suspension for a small chassis;
- 2 sturdy axles for fixing the wheels;
- Wireless antenna;
- Thin wires for connections;
- High-quality batteries for the accumulator or special gasoline;
- Assembled signal receiver;
- An old remote control, a simple transmitter or an outdated radio unit will do.
From the devices you will need pliers, a small soldering iron, screwdrivers of various diameters.
Assembly order
During the collection process, it may turn out that some of the missing parts will have to be purchased or borrowed from the old, broken machines of the little son. After all, he will sacrifice them for the sake of a cool novelty, isn't that so ?! We take the frame and body from the old samples of the son's toys. The selected motor is tested in advance for maneuverability and performance. The power of the engine should not go against the weight of the car, because a weak motor will not pull a heavy structure. Batteries must be unused. The step-by-step assembly steps are as follows:
- First, we assemble the mini-frame;
- Then we fix and adjust the serviceable motor;
- We introduce batteries or a compact battery;
- Next, the antenna is fixed;
- The wheels are mounted so that they can turn freely, spinning with the axle. If this condition is not met, the machine will only move forward and backward.
For the future iron horse, it is better to take rubber tires, since they perform best on open ground. If the assembly process was easy enough, you were able to figure out all the intricacies of the primary car modeling, then you can make several samples, you can give another copy to a neighbor's boy. They will arrange outdoor racing on the street.
Assembling a new unique car is a fascinating process for which dad and son can spend more than one evening. To turn it into a productive business, you can follow the following recommendations, they must be taken into account when assembling a modern toy:
- Make a sketch of the future model that you want to assemble, or use the ready-made assembly instructions;
- Purchase all quality car parts;
- Additional parts can be taken from old machines or purchased new ones;
- Before installation, thoroughly test the selected motor, this is the heart of the machine;
- Don't skimp on batteries for a new model, keep them new and unused;
- Firmly fix all the details, according to their sequence;
- Study the schemes for creating similar cars in advance to facilitate the assembly process;
- Choose a ready-made model or come up with something of your own, unique.
Following these recommendations, you and your child will easily make the chosen model of the machine. You can make and collect exact replicas of the original cars when you reach a certain skill level. Putting together a typewriter in a family circle is the best way to effectively organize leisure for yourself and your child.
A self-assembled machine will be a valuable present for your children, because real fatherly feelings are embedded in it. When assembled, the model will travel in the selected direction and is easy to maneuver. You can learn how to make a simple version of the typewriter by following the recommendations from the proposed video. Start your journey in the world of car modeling!
And I decided to repeat it. From the beginning I ordered the equipment, servos, shock absorbers, which are less in front and large back. Photo not very 


 found a chainsaw engine of 45 cc and 3 horsepower.
And I started making the frame. The first pancake turned out to be lumpy, because I made it from a metal profile and the frame turned out to be heavy and flaky, which did not suit me.
Then I decided to try to make something lighter and more durable. I came across a sheet of aluminum from it, then I decided to make a frame. Firstly, light and durable (to some extent) one of its minuses is that it bends, but it doesn’t matter. In order for it not to bend, I reinforced it in the center by installing 2 strips of aluminum profile. The frame turned out to be surprisingly strong 32 kg weight that can withstand how hello, and this is what I need. The length of the frame is 73 cm, the width is 25 cm, the thickness is 2.5 mm. Here is the actual frame. 
Then I thought about how to make a chassis, how to install the front wheels, from the beginning I wanted to use an aluminum U-shaped profile to install a suspension on it, but I couldn't find it anywhere (I never thought that this was such a deficit of D). I had to buy an aluminum corner of 25 mm, but then I found out that the rophile could be bought in castoram, but it was too late, that's what happened 


the height of the corners turned out to be 6 cm. At the back, I still think about how best to do it, because the model will be rear-wheel drive and such a scheme will no longer work and I do not risk making the rear suspension without the main parts, because I need to make estimates. And while I'm waiting for the main premise without which this machine is not when it will not budge. It comes with a set of drive axles 
the receiver is like a native, because of my stupidity burned out 
and wheel adapters
By the end of the first part, I want to show approximately how my model will look like, I will say right away the photos are not mine, I found them on the Internet. To be continued. 


Greetings!
There are a lot of various radio-controlled (RC) equipment in the world, from very simple children's cars on the control panel to huge aircraft models reaching the size of a car. In this article, I want to talk about a part of the RC world called car modeling, about what classes of models there are, what categories they are divided into, where to start, and so on.
Details under the cut. Beware, a lot of traffic.
Model types
Monsters (Monster Truck)
The most popular class of equipment for entertainment.It is a model with high ground clearance, huge wheels, high center of gravity, and therefore very unstable.
Able to overcome any type of surface, ideal for jumping from trampolines, slides and just for fun in the country.

Buggy
As a rule, four-wheel drive. They are able to overcome any type of surface, while driving on densely packed soil will be the most optimal.It is this class that is most widely represented in competitions.

Short Course
It is a pickup truck with a short wheelbase and rear wheel drive.Has a great similarity (copy number) with real cars. Designed for the same surface as the buggy, that is, rolled soil.


Truggy
Something between a buggy and a monster.It is characterized by the presence of large, widely spaced wheels and low ground clearance. Accordingly, in this class, you can perfectly overcome a variety of obstacles, jumps, uneven ground, while the handling is worse than that of a buggy, but better than that of a monster.
An excellent compromise option.

Crawler
It is characterized by huge ground clearance, the same huge suspension travel, and low speed.Designed exclusively for accurate and leisurely overcoming obstacles.


Drift
Exceptionally road car.Designed, as the name implies, for drifting on asphalt.


Rally (rally)
Along with crawlers, a rather rare class of cars.As a rule, four-wheel drive vehicles. Differ in copy number. Designed for rolled soil.

Trophy
Differs in high copy quantity, full wire - often with continuous bridges, low speed, soft, tenacious tires.Designed for unhurried overcoming of various obstacles in the form of puddles, mud, swamps.
On popular models, a huge amount of tuning is sold in the form of cans, wheels, bodies, and so on to create an exact copy of a real trophy of cars.


Scale models
Models vary in scale from micro (1:18) to huge 1: 5 or 1: 4 up to 1 meter long.Models of scale from 1:18 to 1:12 are actually toys and do not participate in competitions, while they are not suitable as a gift for small children and are not intended for riding at home, as they are capable of speeds of 30-35 km / h.
The most interesting and popular scales are 1:10 and 1: 8. It is in these classes that the bulk of the competition and the greatest variety of models are held.
Models with a scale of 1:10 and 1: 8 can reach 50 cm in length and are not intended for riding in courtyards and crowded places, since they can reach very high speeds (up to 117 km / h HPI Vorza), and in combination with a mass ( 4-6 kg) can cause serious injury.
The largest models of 1: 5 scale have, in the overwhelming majority, an internal combustion engine with a volume of 24-28 cm3 and in fact repeat the design of real cars.
Engines
At the moment, car engines have four types of engines:- Electric brushed motor. Electric motors of a completely standard design with a coil, brushes. It is characterized by low power, often poor reliability and is generally not interesting. It is used on inexpensive small and micro scale models. For 1:18 scale models, it can reach speeds of 25 km / h.
- Electric brushless (valve) motor (BC). It appeared in RC relatively recently, significantly pushing aside traditional models with internal combustion engines, since it produces similar power and, unlike an internal combustion engine, is much easier to operate.
- Glow carburetor engine. Used in models from 1:12 to 1: 8 scale. Fueled with fuel containing from 16% to 30% nitromethane. A very moody engine that needs fine tuning of the carburetor. It is highly not recommended for beginners or those who do not like poking around with technology. The engine is small in volume (a few cubic centimeters), but at the same time it allows you to remove a few horsepower and reach 30,000 - 40,000 rpm.
- Gasoline internal combustion engines. Used in 1: 5 scale models. Fueled with AI 92-95 gasoline. Engines are much less capricious than low-volume glow motors
Prices
The prices for car models, in contrast to aircraft models, have their own clear limits. So the prices for Chinese models 1:18 with collector motors start at 3000 rubles (~ 80 usd). With a more powerful brushless motor, the price reaches 4500 rubles (~ 130usd). The price range for hobby models (not sports) of a more interesting scale (1:10, 1: 8) varies from 10,000 rubles to 25,000 (300 - 700 usd). The most expensive are models of a scale of 1: 5, prices can reach 40 - 70 thousand rubles (1200 - 2000 usd).Configuration (delivery options)
There are two types of delivery of models:- RTR - ready to run. Such a complete set means that the model is assembled and completely ready for races. But it should be borne in mind that batteries, charger and so on may not be included in the kit. Usually they are included in the kit only for very budget devices. Also, if you buy a model with an internal combustion engine, you will definitely need to purchase a glow plug, batteries, fuel, a thermometer, and so on.
- Kit. Such a complete set means that for the final assembly of the model, in addition to batteries, chargers, etc., you will need an engine, equipment (remote control with a receiver) wheels, an engine speed regulator, and so on. The whales are for athletes and not for beginners. Such kits are usually supplied in the maximum tuning and it is assumed that the athlete already has all the additional body kit.
Equipment (appa)
One of the most important parts of an RC hobby is hardware: remote control, receiver, telemetry. There are a large number of options on the market from very simple and budget options for 2-channel equipment for 15-20 bucks:
Up to a fancy 4-channel, with telemetry, a bunch of settings and other chips and a price of 600 usd:

The design of a car on the example of my traggie ICE
General picture from the official website:
The model is all-wheel drive. Three differentials. 4.6 cm3 engine, 2.9 hp Two cardan shafts diverging from the center differential to the front and rear. The center differential has two disc brakes. A glow-type engine, which means that to start the engine, the candle must be heated with a special glow, and then the candle spiral keeps the temperature itself.
Bottom deck:

The bottom deck is a 4.5 mm thick aluminum plate with holes for starting the motor using the starter table.
Front Suspension Design:

The design of the front suspension is in fact not much inferior to real cars in complexity and greatly surpasses them in terms of reliability, so falls from a height of 2 meters onto the ground with a dozen overturns, as a rule, pass for a car without any breakdowns.
Which model should I buy?
The question is complex, and as in the case of computers, you must first decide on the budget and tasks. So for example, if you just want to drive on the model, jump from trampolines and just get fun, then your choice is a monster - for example, HPI Savage. If you are interested in large scale 5 cars, you can look towards the HPI Baja 5T. On a number of forums there are special topics for beginners dedicated to the choice of technology - links at the bottom of the article.Brands (manufacturers)
A large number of manufacturers are currently represented on the market. You can try to divide them into three categories:- Purebred Chinese: Iron Track, Himoto, BSD Racing, VRX Racing, HSP. Favorably differ in price, while reliability and thoughtfulness of the design may suffer. You can buy it as the first model in order to understand whether you like it or not, gain experience in repair and operation.
- RTR models from US, UK and Japan manufacturers: HPI, KYOSHO, Team Associated, HOTBODIES, Traxxas, Maverick, Team Losi. On average, "hospitals" are more reliable and well thought-out than the Chinese at a slightly higher price. In the case of manufacturers from the middle group, each model should be considered separately, since each brand has both high-quality successful models and not high-quality ones.
- Whales from Xrax, KYOSHO, Durango, Team Associated. Uncompromising sportsmen's models in full tuning. A whale alone can cost more than the same model in the RTR version, and do not forget that you need to buy an app, an engine, wheels, a speed controller and so on for it. With an average cost of an RTR model of 20 thousand rubles (600 usd), a prepared version for a competition based on a whale can cost up to 60 - 70 thousand (2000 - 2300 usd).
Competitions
For fans of RC hobbies, competitions are held both at the regional level and at the all-Russian level. Competitions, as a rule, have strict regulations and are generally divided into the following classes:- Buggy 1:10 4wd electro
- Buggy 1: 8 4wd electro
- Buggy 1:10 4wd nitro
- Buggy 1: 8 4wd nitro
- Hobby unlim 1: 8
If you decide that you want to participate in competitions, think carefully about whether you need it, because like any sport, RC racing requires a lot of time, money, knowledge and patience. As I mentioned above, preparing a new model from scratch for a whale-based competition can cost 60 - 70 thousand rubles. A used one can be found for 25-35 thousand.
Nitro or electro
Before the advent of BC systems, ICEs ruled in the world of car modeling, since collector motors have much less power. With the advent of brushless (valve) electric motors, the scales swung in the opposite direction, since electric motors, with a capacity comparable to that of an internal combustion engine, have a number of advantages, such as silence, reliability, no need to adjust, run in, no need to start, maintenance is much easier, and so on. At the same time, there is a drawback in the form of the need to charge the batteries and swelling the batteries at sub-zero temperatures.From myself, I can notice that when I was choosing a serious model, the choice was made on the ICE version, which I later regretted more than once, since maintenance, tuning, etc. take a lot of time, but you can ride while there is fuel, and the frantic roar of the engine in a compartment with a cloud of smoke does not leave indifferent more than one passer-by.
How to start?
In order to understand whether you like it or not, he will decide on the model and, in general, I advise you to come and look at the competitions, pokatushki. The people are usually responsive and sociable, they will help and prompt, because they themselves once started that way. It is also worth asking questions on the RC hobby forums.In St. Petersburg, you can come and talk to the race track called "Under the Bridge":
This article is a modeler's story about making a DIY Range Rover 4x4 vehicle from a plastic model. It reveals the nuances of manufacturing axle drives, installing electronics and many other nuances.
So, I decided to make a car model with my own hands!
Bought a regular Range Rovera bench model from the store. The price of this model is 1500 rubles, in general it is a little expensive, but the model is worth it! Initially I thought of making a hummer, but this model is much more suitable in design.  I had electronics, well, I took some spare parts from a trophy collector called "cat" which I didn't need for a long time and was disassembled for parts!
Of course, it was possible to take other prefabricated models as a basis, but I wanted just such an off-road jeep.
It all started with bridges and differentials that I made from copper pipes and soldered with an ordinary 100w soldering iron. Differentials are ordinary here, the gear is plastic, the rods and the drive bones are made of iron from the trophy. 
These tubes can be purchased at any hardware store. 
I took the differential gear from a conventional printer. I didn't need him for a long time, and so I decided that it was time for him to retire.  Everything turned out quite reliably, but it is rather inconvenient to work with a soldering iron!

After I made the differentials, I had to close them with something, I closed them with caps from under the pills.  And painted it with ordinary auto enamel. It turned out beautifully, although the trophy drinker hardly needs beauty.
Then it was necessary to make steering rods and put the bridges on the frame, the frame was included and to my surprise it turned out to be iron, not plastic.


It was quite difficult to do this, since the scale of the parts is very small and it was not possible to solder here, I had to screw it with bolts. I took the steering rods from the same old trophy case that I disassembled.

All the parts of the differentials are on bearings. As I have been making the model for a long time.  I also ordered a gearbox with a reduction gear, the gear will be turned on by a microservice from the remote control.

Well, in general, then I installed a plastic bottom, cut out a hole in it, installed a gearbox, cardan shafts, a homemade gearbox, an ordinary collector engine for such a small model, there is no point in setting the bk, and the speed is not important to me. 
The engine is from a helicopter, but in the gearbox it is quite powerful.
 The most important thing is that the model does not go in jerks, but smoothly without delay, the gearbox was not easy to make, but the main thing is ingenuity.
The gearbox was screwed to the bottom, it held up perfectly, but to attach the bottom to the frame I had to tinker.

 Then I installed electronics, shock absorbers, and a battery. At first I put the electronics rather weak and the regulator and the receiver were a single whole, but then I put everything separately and the electronics were more powerful.

.1390645053061.prev.jpg)


And finally, painting, installing all the main units, decals, headlights and more. I painted everything with usual paint for plastic in 4 layers, then painted the wings brown and sanded the parts to give a worn and worn look. 
 The body of the model and the color are completely original, the color was found on the Internet and the photo of the real car was done according to the original. This combination of colors exists on a real machine and was painted in this color at the factory.

Well, here are the final photos. I will add a video with the test a little later, and the model turned out to be very passable, the speed was 18 km / h, but I did not make it for speed. In general, I am satisfied with my work, and you will appreciate it.
 The machine is not large, scale 1k24 in size and there is the whole point of the idea, I wanted myself a mini trophy.


The model is not afraid of moisture! He sealed everything himself, he simply covered the electronics with varnish, very reliably, no moisture is terrible.
 Servomachine micro park from the plane to 3.5 kg.


The battery is enough for 25 minutes of riding, but I will put more powerful electronics and a battery, because this is not quite enough.


Even the bumpers are the same as on the original. And the mounts on them are the same. The drive on it is not 50 to 50%, but 60 to 40%.

In general, the Range Rover turned out in a rustic style, I did not even think that it would turn out to paint so high-quality because I don't really know how to paint, although there is nothing difficult! .1390645295252.prev.jpg)

I forgot to add for beauty, I also installed a roll cage and a full-fledged spare tire. The spare wheel and frame were included with the kit.

More about radio-controlled models:
Mishania comments:
Tell me, how is the four-wheel drive arranged, what is inside the bridge except for the transfer case? There must be a steering knuckle after all.