Final drive axle
or military bridge UAZ
U-shaped drive axles with final drive - are installed on UAZ 3151 utility vehicles.
Installation of U-shaped driving axles (complete front and rear) on UAZ 31512 vehicles is possible with the simultaneous installation of the drive shafts of the UAZ 3151 vehicle. car suspension, manufacture of cardan shafts, shortened by 10 mm, and cannot be performed outside the factory (without his recommendations)
rice. 1 Rear axle with final drive:

1 - cover of the main gear housing; 2- differential bearing; 3,13,49 - shims; 4 - a sealing gasket; 5.7 - drive gear bearings; 6.15 - adjusting rings; 8.42 - cuffs; 9 - flange; 10 - nut; 11 - dirt reflector; 12 - ring; 14 - spacer sleeve; 16 - main gear drive gear; 17 - satellite; 18 - right semiaxis; 19 - side gear housing; 20.29 - oil deflectors; 21 - semi-axle bearing; 22,26,40 - retaining rings; 23 - sealing gasket of the side gear housing; 24 - side gear housing cover; 25 - bearing; 27 - brake shield; 28 - brake drum; 30 - wheel bolt; 31 - pin; 32 - hub bearing; 33.41 - gaskets; 34 - lock washer; 35- leading flange; 36 - nut of hub bearings; 37 - lock washer; 38 - bushing; 39 - the driven shaft of the side gear; 43 - driven shaft bearing; 44 - driven gear wheel of the side gear; 45 - special nut; 46.50 - drain plugs; 47 - leading gear wheel of the side gear; 48 - right cup of the satellite box; 51 - main gear case; 52 - washer of the semi-axle gear; 53 - semi-axle gear; 54 - axis of satellites; 55 - driven gear wheel of the main transfer; 56 - left cup of the satellite box; 57 - left semi-axis
Axles with final drives (Fig. 1 and 2) are installed as a set (front and rear) on modifications of cars of the UAZ-31512 family with simultaneous replacement of the rear propeller shaft.
Maintenance of axles with final drives differs from the one described above in the technology of changing the grease in the joints of the steering knuckles of the front axles, checking and changing the oil in the housings of the final drives, as well as adjusting the position of the driving gear 16 of the main gear and its bearings 5 and 7 (see Fig. 1 ).
After adjusting the side play, it is necessary to check the meshing of the final drive gears by the contact patch, as indicated in the section -Assembling and adjusting the rear axle assemblies- (p. 73).
After running 50,000 km, during the next maintenance, it is recommended to tighten the bolts of the final drive gear 44 and the final drive gear 55, as well as the bolts of the removable final drive bearing housing 25.
The position of the gear 16 is adjusted by selecting the adjusting ring 15 of the required thickness. When replacing the main gears and the large tapered bearing or only the main gears, measure the mounting height of the large tapered bearing 5 under an axial load of 2-2.5 kN (200-250 kgf) and, if it is less than 32.95 mm by some value, then increase the thickness of the adjusting ring by the same amount compared to that which was installed in the axle housing. When replacing only the large tapered bearing 5, so as not to disturb the position of the gear, measure the mounting height of the old and new bearings and, if the new bearing has a higher mounting height than the old one, then reduce the thickness of the adjusting ring 15, and if it is less, then increase it by difference in bearing heights.
Adjust the preload in bearings 5 and 7 by selecting the adjusting ring 6 and tightening the nut 10. If this cannot be done, then change the number of spacers 13 and again by selecting the ring and tightening the nut, achieve such a preload of the bearings so that there is no axial movement of the gear, and the gear rotates without great effort. Check with a dynamometer with the rubber cuff removed 8. With proper adjustment, at the moment of turning the gear by the hole in the flange, the dynamometer should show 10-20 N (1-2 kgf) for worn-in bearings and 25-35 N (2.5-3.5 kgf ) for new ones.
Change the grease in the steering knuckle joints in the following order:
Rice. 2 Steering knuckle, front axle with final drive:

a - signal groove; I - right steering knuckle; II - left steering knuckle; III - wheel cut-off clutch (for variant, see Fig. 180, IV); 1 - oil seal; 2 - ball bearing; 3 - steering knuckle joint; 4 - gasket; 5 - grease nipple; 6 - kingpin; 7 - pad; 8 - steering knuckle body; 9 - king pin bushing; 10 - bearing; 11 - driven shaft of side gear; 12 - hub; 13 - leading flange; 14 - coupling; 15 - ball of the retainer; 16 - protective cap; 17 - coupling bolt; 18 - pin; 19 - lock nut; 20.23 - support washers; 21 - the leading gear wheel of the side gear; 22 - locking pin; 24 - rubber sealing ring; 25 - thrust washer; 26 - axle shaft casing; 27 - bolt of rotation limitation; 28 - stop-limiter for wheel rotation; 29 - steering knuckle lever
1. Disconnect the flexible hose from the wheel cylinder of the brake mechanism and the ends of the steering rods from the levers, unscrew the bolts securing the clips of the o-rings of the ball joint and slide the clips with O-rings onto the neck of the ball joint (Fig. 2).
2. Unscrew the nuts of the studs securing the lever or the bolts of the upper pivot pad and remove the lever or pad and shims.
3. Unscrew the bolts securing the bottom pad, remove the pad with adjusting shims.
Rice. 3 Pin puller

4. Using a puller (see Fig. 3), remove the pivots from the steering knuckle housing and remove the housing assembly with the ball joint hinge.
5. Carefully, without moving apart the forks (so that the balls do not jump out), remove the joint assembly with bearings and gear from the steering knuckle housing. Do not remove the hinge from the steering knuckle housing and disassemble it without special need.
6. Remove the used grease from the ball joint, joint and housing, rinse thoroughly with kerosene and add fresh grease.
Perform assembly in the reverse order to disassembly, observing the requirements for adjusting the pins. When installing the flexible hose of the brake drive, do not allow it to be twisted. After assembly, bleed the brake drive system (see section "Service brake system").
Disassemble the final drive in the following order:
1. After removing the hub with the brake drum (see the section "Removing, disassembling and assembling the hubs"), unscrew the clutch of the brake drive pipeline (on the front - a tee of connecting pipes and a flexible hose) from the wheel cylinder on the rear brake shield, unscrew the fastening stud nuts trunnions and remove the spring washers, slinger, trunnion, trunnion gasket, spring washer, brake assembly and brake shield gaskets.
2. Unscrew the nut 45 (see Fig. 1) fastening the bearing on the driven shaft of the final drive, unscrew the bolts securing the cover of the final drive housing, remove the cover assembly with the shaft, remove the cover gasket and press out the shaft from the cover.
In contrast to the left-hand final drive, the shaft 39 and nut 45 of the right gear have a left-hand thread. A nut with a left-hand thread is marked with an annular groove, and the shaft is marked with a blind hole with a diameter of 3 mm at the end face of the spline end.
3. Remove the bolts securing the driven gear and remove the gear from shaft 39.
4. Mark the position of the roller bearing housing 25 on the lug of the final drive housing of the rear axle, unscrew the housing fastening bolts, remove the bearing housing. Do not remove the front axle final drive roller bearing housing without special need. (For the further procedure for disassembling the final drive of the front axle, see above in the description of changing the lubricant in the joints of the steering knuckles.) Remove the circlip 22 of the ball bearing 21, the axle shaft 18 and the oil deflector 20 from the final drive housing.
5. Remove the roller bearing retaining ring 26, roller bearing 25, drive gear 47 and ball bearing from the axle shaft.
UAZ vehicles cannot be called a very common group of vehicles on modern roads, but despite this, people are often interested in issues related to the design features of the front or rear axle or troubleshooting other units and systems of these machines. Considering this fact, in this article we will consider the device of the front axle of the UAZ using the example of the 3741 model, or, as it is also called, “loaves”.
How the front axle of UAZ works
The old-style front axles, which include part of the UAZ-3741 design, do not differ much from similar new elements of the "Spicer" type. The fundamental differences between them lie only in the design of the crankcase, the dimensions of the constituent parts of the main gear and differential, as well as in some of the parts used.
The main part of the old axle is made up of a split crankcase, which consists of two divided halves, into each of which casings with axle shafts are pressed inside. The covers are also provided for the presence of safety valves, which are responsible for limiting the increase in oil pressure in the system.

The main gear and differential are located in the crankcase, which have a standard device: the drive gear with a small diameter is located in the horizontal direction and is connected to the cardan. It engages with a large driven gear which is positioned longitudinally. A differential is placed inside the driven gear, consisting of four satellites located on two axles and two semi-axle gears.
On the edges of the crankcase there are pivot assemblies, which include ball bearings with housings of the pivots (or pivots) on them. On the opposite side of the axle shaft, the trunnions themselves are attached to the trunnion housings, in which the wheel hub is mounted by means of two bearings. In the housings of the ball joints, there are hinges of equal angular velocities (CV joints), the outer trunnions of which are located in the hubs.
The main feature of the front axles of the UAZ is the presence in them of a mechanism for connecting the wheel hub with the semi-axle, which is made in the form of a clutch, with which it is possible to connect or disconnect the hub and the pivot of the hinge. This is what guarantees the transmission of torque from the differential to the wheel.
When the clutch is disengaged, the wheel hub can rotate freely on the trunnion, which means that the car will have a 4 × 2 wheel arrangement... In the event that the clutch is engaged, the wheel hub through the CV joint will be connected to the semi-axle and differential, and the car becomes all-wheel drive - 4 × 4. The front axles of the old representatives of the UAZ, the design features of which are also characteristic of the "loaves", were equipped with hubs with drum brakes installed on them. To control the wheelbase on the bridge there are steering knuckle levers (located at the top of the steering knuckle housings) and steering rods connected to them.
Note! In the new Spicer-type axles, the wheel steering angle reaches 32 °, while the same figure for older specimens does not exceed 29 °. Otherwise, the control of vehicles with different types of axles is no different.
Possible bridge failures and their causes
 The main malfunctions of the front axle include the formation of leaks of lubricating fluids, excessive wear of fasteners, defects in bearings, axle shafts, as well as mechanical damage to the beam and wear of components. The reasons for these malfunctions can be very diverse. For example, if a rear-wheel drive car is equipped with front-wheel drive, then driving on uneven road sections will damage the transmission components. The use of winter gear oil in summer or flight fluid in winter can lead to a similar effect, which in any case will not have the best effect on the functioning of the car. Also, remember to maintain constant tire pressure to help prevent bearing and shaft problems.
As for the most common cause of various faults on the front axle of the UAZ 3741, then, in most cases, the reason for their appearance is a violation of the axial clearance of the pivots. To check whether it is broken or not, it is enough to raise the front of the car with a jack and try to swing the wheel up and down. If axial play is observed, then it will be necessary to adjust the clearance of the pins.
Interesting fact! The first car produced by the Ulyanovsk Automobile Plant, known as the GAZ-69, already had a 4 × 4 wheel arrangement, which provided it with simply phenomenal cross-country ability. Moreover, this vehicle was not whimsical in terms of service, which was also an undeniable advantage. A similar concept of "people's SUV", which was successfully implemented in the GAZ-69, still retains its relevance and continues to be implemented in modern models of the UAZ group.
How to remove the front axle
Considering that the UAZ-3741 has a frame structure, then dismantling the front axle will not be particularly difficult. To complete the task, you will need durable and high-quality jack, stops, which can withstand one and a half tons, and a special liquid WD-40, helping to unscrew rusted nuts.  The procedure for removing the front axle is as follows:
- Place stops under the rear wheels and make sure that the vehicle is securely fixed.
- Disconnect the right and left brake pipes from the rubber hoses to the front wheel brake drums.
- Unscrew the nuts securing the brake hoses and dismantle the hoses themselves.
- Unscrew the fastening nuts of the lower ends of the shock absorber and the bolts that connect the propeller shaft to the drive gear flange.
- Unscrew and unscrew the bipod ball pin nut and disconnect the tie rod from it.
- Now it is necessary to unscrew the fasteners (nuts) of the ladder of the front springs and remove the part (ladder) together with gaskets and linings.
- At the last stage of work, lift the front of the car by the frame and remove the bridge from under it.
How to disassemble the bridge
When repairing the front axle, it must first be installed on a special stand. This will greatly facilitate the task of disassembly, which consists of several sequential stages:
 That's it, the dismantling of the UAZ bridge can be considered complete.
Did you know? The Ulyanovsk Automobile Plant, which is still engaged in the production of UAZ vehicles, was founded in July 1941 and is part of the Sollers holding.
Dismantling the steering knuckle without removing the axle
If you do not want to dismantle the front axle of the UAZ, but it is still somehow necessary to disassemble the steering knuckle, then the following steps should be performed:
 Thus, by performing these simple manipulations, you will be able to disassemble the steering knuckle without any need to remove the bridge.
Domestic off-road conditions cannot scare the owners of UAZ vehicles, but for their proper operation, it is necessary to adhere to certain operating rules.
So, for example, UAZ ("loaf") has a front axle, the design of which imposes certain requirements on the control of the machine. Among other things, such axles provide for the disconnection of the wheel hubs and semi-axles, which contributes to an increase in the resource of the axle parts when the front drive is disconnected. Therefore, to turn on the front drive UAZ-3741, you will have to perform two steps: by turning the coupling, connect the wheel hub to the axle shaft, and then, using the lever, turn on the front drive.
 In order not to damage the components of the structure, you can turn on the front-wheel drive only after turning on the clutches, both on an idle car and in the process of its movement at a speed of no more than 40 km / h. If the lever for turning on the drive when the car is off does not want to take the working position, then you need to start the engine and switch it on the go.
As soon as the machine overcomes the problematic section of the path, carry out all the actions in the reverse order: stop the vehicle, disengage the front axle using the lever and turn the clutch caps to the “4 × 2” position. After that, the car will be able to continue its movement as a normal rear-wheel drive vehicle.
Remember! It is impossible to activate the front-wheel drive by means of the lever (from the passenger compartment) without engaging the clutches.
Also, experts do not advise to constantly ride with the clutches on, as this seriously reduces the resource of the front axle and rubber.
Nevertheless, in the off-season and with constant use of the UAZ-3741 in off-road conditions, the clutches can not be disconnected, it is enough to adhere to a moderate speed mode.
Interesting fact! Nowadays, there are systems for remote rotation of couplings, which can be pneumatic or electric. In the presence of such a system, the clutches are turned on and off by pressing the button located in the passenger compartment.
 As for the maintenance of the "loaf", it is not particularly difficult. Check all sealing elements at regular intervals, clean the valves and, if necessary, tighten existing screw connections. In addition, do not forget about the need to periodically check and adjust the wheel bearings and diagnose the axial clearance of the pinion gear.
 Particularly noteworthy is the transmission oil poured into the axle, the replacement of which must be carried out in a timely manner (according to the manufacturer's recommendations - every 40,000 km of run or more often, depending on the specific operating conditions, the age of the vehicle and the quality of the lubricant filled in). It is also necessary to periodically change the oil in the CV joint, wheel hubs and steering knuckles, and in the drive axles of the "Spicer" type, the guide bushings of the disc brakes are additionally lubricated.
Regular maintenance and proper operation of the front and rear axles of the UAZ-3741 are the key to the reliable operation of the vehicle for many years.
Many variants of bridges were installed on UAZ vehicles of different models and at different times at the plant. Let's try to figure it out ...
UAZ Timken bridge (civil or collective farm)
This is a split type bridge, that is, a bridge consisting of two halves. This type can also be attributed (it is gear or portal). From the factory, civil bridges are installed on UAZ trucks of the cargo range (loaf, onboard,), as well as on UAZ-3151 (469) passenger cars.

Gear ratios of military bridges UAZ
The gear ratio of military bridges is 5.38 (= 2.77 * 1.94 - gear ratios, respectively, of the main and final drives) - more high-torque, but less high-speed than that of conventional bridges.
Military bridge characteristics
- Ground clearance: 300 mm (with tires I-192 215/90 R15 (31 x 8.5 R15)
- Track: 1445 mm
- Track of UAZ Bars gear axles: 1600 mm
- Front military axle weight UAZ: 140 kg
- Rear military axle weight UAZ: 122 kg
Diagram of the gear (military) bridge UAZ
Rear axle UAZ with final drive:
1 - cover of the main gear housing; 2 - differential bearing; 3,13,49 - shims; 4 - a sealing gasket; 5,7 - drive gear bearings; 6.15 - adjusting rings; 8.42 - cuffs; 9 - flange;
10 - nut; 11 - dirt reflector; 12 - ring; 14 - spacer sleeve;
16 - leading gear wheel of the main transfer; 17 - satellite; 18 - right semiaxis; 19 - side gear housing; 20.29 - oil deflectors; 21 - semi-axle bearing; 22,26,40 - retaining rings; 23 - sealing gasket of the side gear housing; 24 - side gear housing cover; 25 - bearing; 27 - brake shield; 28 - brake drum; 30 - wheel bolt; 31 - pin; 32 - hub bearing; 33.41 - gaskets; 34 - lock washer; 35 - leading flange; 36 - nut of the hub bearings; 37 - lock washer; 38 - bushing; 39 - the driven shaft of the side gear; 43 - driven shaft bearing; 44 - driven gear wheel of the side gear; 45 - special nut; 46.50 - drain plugs;
47 - the leading gear wheel of the side gear; 48 - right cup of the satellite box; 51 - main gear case; 52 - washer of the semi-axle gear;
53 - semi-axle gear; 54 - axis of satellites; 55 - driven gear wheel of the main transfer; 56 - left cup of the satellite box; 57 - left semi-axis

Steering knuckle of the front axle UAZ with final drive:
a - signal groove;
I - right steering knuckle; II - left steering knuckle; III - wheel cut-off clutch (for variant, see Fig. 180, IV); 1 - oil seal; 2 - ball bearing; 3 - steering knuckle hinge; 4 - gasket; 5 - grease nipple; 6 - kingpin; 7 - pad; 8 - steering knuckle body; 9 - king pin bushing; 10 - bearing; 11 - the driven shaft of the side gear; 12 - hub; 13 - leading flange; 14 - clutch; 15 - retainer ball; 16 - protective cap; 17 - coupling bolt; 18 - pin; 19 - lock nut;
20.23 - support washers; 21 - the leading gear wheel of the side gear; 22 - locking pin; 24 - rubber sealing ring; 25 - thrust washer; 26 - axle shaft casing; 27 - bolt of rotation limitation; 28 - stop-limiter for wheel rotation; 29 - steering knuckle lever

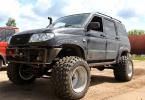
The device of the military bridge (photo)


Video replacement and adjustment of the main pair on the UAZ military bridge
Bridges Spicer UAZ Patriot and Hunter
Spicer is not a split, one-piece bridge.
In the early 90s, for the new UAZ-3160 vehicle at the Ulyanovsk Automobile Plant, Spicer-type drive axles with a one-piece crankcase were developed.
The absence of a split in the transverse plane of the axle gives the structure high rigidity, the unloaded connection between the cover and the crankcase reduces the likelihood of leakage along the joint, and the placement of the main gear and differential in a single crankcase ensures high precision of engagement and more favorable conditions for the operation of bearings.
- Spicer bridges width for UAZ Patriot - 1600 mm
- Width of Spicer bridges for UAZ Hunter - 1445 mm


 Spicer bridge differential
The device of the front axle of the UAZ 469 differs from the rear analogue in some design features. In addition to the bridge girder and differential, the unit includes equal speeds at the corners and a gearbox. The axle shaft casing is connected to the ball joint by means of a flange. The hinge body is fixed with a pair of pins. A gearbox cover with a trunnion and a brake shield is bolted to the frame.
Description
To reduce the degree of wear of the unit parts, it is recommended to turn off the front axle of the UAZ 469 when moving on a hard surface, the device of which will be discussed below. You should also deactivate the hubs on the front wheels. To do this, remove the caps and unscrew the bolts from the shaft seat. As a result, the coupling is set to the position corresponding to the annular groove and the face of the coupling. After installing this element in the required position, they begin to tighten the protective cap.
The front wheel is activated by securely locking the bolts. The bridge design scheme is focused on synchronous switching on and off of the drive of both wheels.
Front axle device UAZ 469
The crankcase, main gear and differential correspond to those of the rear counterpart. In modification 469B, an oil deflector ring and a right-hand thread with the "P" brand are provided. A ball joint is attached to the axle shaft casing. It is fixed with five bolts. Bushings and pivots are pressed into it. In addition, the support has a wheel reducer housing cover and a steering knuckle housing. A trunnion and a brake shield are attached to the locking element with six bolts.
The pivot attachment of the rotary cam is mounted with an interference, the value of which is adjustable from 0.02 to 0.10 mm. To prevent this element from turning, locking pins are provided in the design. Position adjustment is made by means of shims installed at the top, between the knuckle lever. In addition, the position can be corrected by installing shims in the side and bottom of the part.

Peculiarities
The device of the front axle of the UAZ 469, the photo of which is presented above, assumes the presence of an oil seal, which is responsible for retaining the lubricant in the housing and protecting the rotary cam from contamination. The element consists of an inner cage, a partition, a felt pad and an outdoor unit. The oil seal is attached to the frame with bolts.
Protection against overflow of the lubricant mixture from the main gear case to the rotary cam is provided by an internal self-tightening rubber gland in a metal cage. The upper pivot elements and the ball joint are lubricated through special grease fittings. The lower elements are lubricated with a substance coming from the support by gravity.

Hinge
The UAZ 469 front axle device includes a hinged angular velocity stabilization system. Its design guarantees the stability of the angular velocity of the driving and follower shafts. In this case, the distance and deviation between them do not play a role. The hinge itself consists of a pair of forks, in the curved sockets of which four balls are placed. In the center compartments of these parts there is a fifth locating ball that serves to center the forks.
Longitudinal movement of the joint is prevented by a ball bearing and a safety washer. The drive inner fork interacts with the differential pinion axle. On the edge of the outer driven fork, the main gear of the wheel reducer and a roller-type bearing with a lock nut are mounted. Internal engagement of the element takes place by means of a bolted connection. The driven part is aggregated with a roller bearing shaft and a bronze bushing in the middle of the journal. At the end of the shaft there is a device for deactivating the front wheels of the machine. It consists of a movable sleeve, spring, balls and bolts. The part is connected with the outer projections to the inner splines of the flange, which is fixed with bolts on the hub.
Gearbox device
469, the gear unit has almost identical to the wheel gear of the rear axle. Among the differences between these elements is the method of installation and fastening of the drive gear, as well as the design of a ball bearing placed in a special glass socket. The leading one is mounted on the splines of the driven articulated yoke. It is fixed with bearings by means of a special nut, which is drilled into the groove of the shaft after tightening.

The support washer is located between the roller bearing and the gear. These parts are not interchangeable with those of the rear gearboxes. Maintenance is the same for both nodes.
Front axle device UAZ 469: connection diagram
The assembly and connection of the part in question is carried out in the following order:
- The bushing is inserted into the knuckle pivot by pressing. It should be flush with the end of the seat. Then the sleeve is turned and adjusted with a special brooch to the required diameter.
- Limiting the movement of the joint of identical angular longitudinal velocities is provided by washers installed in the trunnion and the ball joint. Their location should be directed by the lubrication grooves towards the hinge. The fixing washer is fixed by punching in several places at points evenly distributed around the circumference.
- Replacing the pivot bushings involves pressing and screwing them to a diameter of 25 mm, with the possibility of passing through each bushing.
- When installing the hinge, grease is poured into the support.
- The device of the front axle on the UAZ 469 involves the adjustment of the necessary axial tensions with the help of regulating inserts, on which the location of the bushings and the ball joint itself depends. At least five shims are used. The total thickness indicators at the top and bottom should not have a difference of more than 0.1 mm.
- Before collecting the oil seal, the felt ring is soaked in warm engine oil.
After assembling the front axle, it is tested on the stand in a static state and under load. This position is created by synchronous braking of the axle shafts. If the unit is assembled correctly, there will be no increased noise of the unit, oil leakage in the oil seals and cuffs, as well as in the joints.

Maintenance
The device of the UAZ 469 front axle, the diagram of which is given above, provides for a number of preventive and adjusting operations during the operation. Among them:
- Periodic tightening of threaded connections.
- Checking the pivots for clearances.
- Correction of bearings.
- Repair of gear engagement points.
- Convergence check.
- Regular lubrication of rubbing parts according to the lubricant specification table.
A visual check of the UAZ 469 front axle device provides for an inspection of the steering knuckles for the integrity and suitability of the adjusting screws, limiting rotary stops, as well as the reliability of the stopper of these elements.
The design diagram of the unit under consideration is designed for the maximum angle of rotation of both wheels in the corresponding positions of the order of 27 degrees. An increase in this indicator indicates deformation of the articulated rotary cams, and this significantly complicates the repair.

Adjustment
The device of the front axle of the UAZ 469, the photo of which is given above, in the factory presupposes adjustment of the pivot pin with pretension. In this case, the same number of shims are installed at the top and bottom of the assembly.
The device of the front axle pivot of the UAZ 469 differs in that special attention must be paid to the tightening mode of these elements. Fixation weakens as a result of the gradual wear of the rubbing parts. Gaps along the axes appear between the pivot ends and the support rings.
Repair
The front 469, the design of which is discussed above, can sometimes require repair. For repair, you will need to remove the part and disassemble it. This process is carried out as follows:
- Pads are put on the rear wheels of the car.
- Nuts and other block mounting systems are unscrewed.
- The rod is released from the bipod, after which the nuts on the shock absorbers and the ball pin are removed.
- The fastening of the front springs with linings is dismantled.
- The front part of the car is lifted by the frame, after which the assembly is dismantled.

The front axle of the UAZ 469, the device described above, requires professional maintenance. But if you have the appropriate skills, you can manipulate this block on your own.
Surely on sale you have met UAZ cars, where car owners proudly talked about military bridges, making a mark-up of several thousand rubles. This topic has been discussed more than once. Some say that such cars are worthy of attention, while others, on the contrary, prefer to ride on civilian bridges. What are they and what are their differences? Let's try to figure it out.
Varieties
On UAZ vehicles, two types of mechanisms are used - with a single-stage main gear, as well as with a final drive. The first rear axle (UAZ) military is installed on cars of a wagon layout, the second - on the cargo-passenger model 3151 (in other words, "Bobik"). The driving mechanisms have a U-shaped design and are installed together with cardan shafts. However, the installation of such elements on cars of the carriage layout (of the "tadpole" type) requires significant technical improvements. This applies to the design of the suspension, bipod thrust, axles. Also, for full-fledged work, a cardan shaft shortened by a centimeter is required.
As for the elements with the final drive, they have differences in the middle part, namely, the smaller differential of the military bridge. UAZ with such a mechanism also differs in a different way of installing the main gear gear. There are few differences. It is only mounted on tapered roller bearings. UAZ, the military bridge of which is considered to be more durable, has a more complex design compared to its civilian counterpart. There is an adjusting ring between the pinion gear and the large bearing ring, as well as a spacer sleeve and spacers. The pinion bearings are clamped with a flange nut.
Bridge device
Where are the final drives located? On UAZ-469 vehicles, the military bridges of which are located at the rear, the transmission itself is located in the crankcases, where the necks are pressed onto the outer parts of the axle shaft casings. The drive gears are mounted on the spline end of the axle shaft, between the roller and ball bearings. The latter is fastened with a retaining ring in the crankcase. There is a special oil deflector between the ball bearing and the final drive housing. The roller mechanism is fixed in the housing with two bolts. The inner ring of the bearing is attached to the axle shaft with a circlip. The driven gear is attached to the final drive flange. The driven shaft rests on the bushing and bearing. By the way, the latter has a left-hand thread. The driven shafts of the rear final drive are connected to the wheel hub using splined flanges.
The transmission housing is molded together with the stub axle housing. The pinion gear is mounted on the spline of the driven cam between roller and ball bearings (take axial loads of the joint).
Peculiarities
On such cars as UAZ "Bukhanka", "Farmer", as well as long modifications of model 3151, civil bridges are installed (in the common people "collective farm"). However, some "bobies" are equipped with military counterparts. These are new models with the index 316, 3159 and the Bars modification, which is distinguished by an increased track. But as a result of this decision, military bridges (UAZ) are not simple here - they are elongated, geared, with a modified "stocking".What is the difference between military bridges and collective farm bridges?
First of all, such a bridge differs from a civil one in the presence of final drives. Thanks to this, the vehicle's ground clearance is increased by 8 centimeters (that is, the gearbox is located higher than the standard one). The main pair has fewer teeth, but they are larger. This design significantly improves reliability. The gear ratio of military bridges is 5.38 (= 2.77 * 1.94 - the gear ratios of the main and final drives, respectively) - more "high-torque", but less "high-speed" than conventional bridges.
The machine becomes more high-torque for ascents, is able to easily carry heavy loads on itself (or on a trailer). However, this mechanism is not designed for speed. The so-called "collective farm" bridges are faster than their military counterparts. And, of course, the differences concern the propeller shaft. If these are military bridges (UAZ), the length of this element is 1 centimeter shorter. Therefore, when replacing or repairing a shaft, it is necessary to specify the bridge for which it is designed. The recommended wheel size is 215 x 90 with a diameter of 15 inches.
Advantages of the UAZ military bridge
So, the first plus is ground clearance. He, unlike civilian models, is 30 centimeters. "Kolkhoz" UAZs have a clearance of 22 centimeters. The second plus is the increased torque. This is a huge plus if you are going to transport large loads or drag a trailer with you. Due to the large size of the teeth, they do not wear out as often as on civilians (applies to the main pair). Also, military bridges (UAZ) are distinguished by a more even distribution of the load between the onboard and main transmission. Well, the last thing that the owner of such bridges can boast of is the presence of a limited slip differential. This is learned when driving off-road (in fact, the UAZ was intended for him). If the car is stuck in the mud with only one side, you will not have slipping, as on civilian bridges (the left wheel moves, but the right one does not).
Cons of a military bridge
Now we will list the shortcomings of this mechanism, because of which disputes arise between the "uazovods". The first drawback is the increased weight. Civilian bridges are lighter, and therefore fuel consumption is lower. Also, there are fewer complex parts in their design, so the "collective farmer" is more maintainable. And spare parts for the "warrior" are more difficult to find (the same gearbox of the military bridge). UAZ with a civil bridge is more comfortable to ride and high-speed. Also, due to the use of spur gears in military analogs, the operation of such a design is more noisy. Also on civilians, you can install a spring suspension and disc brakes. It is impossible to put all this on military bridges (including UAZ-469). Oddly enough, but civilian mechanisms are more unpretentious in service. Take oil, for example - military bridges have a lot more lubrication points.
Owner reviews
Some motorists, in response to the statement “military bridges are better than civilian ones”, agree only 50 percent. As for the increased ground clearance, these centimeters do not offer much of an advantage. Those who need to, lift the suspension and install more "evil" wheels. As a result, the ground clearance can be increased by 1.5-2 times - it all depends on the desire and skills of the car owner. Drivers also complain about increased noise. Still, army bridges make themselves felt, even if the vehicle is used for civilian purposes. And sometimes, to get to your destination (hunting or fishing), you have to listen to this "melody" for several hours. This is especially noticeable on asphalt surfaces. For many, flow and dynamics are important - with military bridges, you can simply forget about these two factors. Reviews from car owners say that the car hardly picks up speed more than 60 kilometers per hour, while fuel consumption increases by 10-15 percent. In terms of maintenance, reviews point to an oil leak problem. It starts at the final drives. Therefore, advice for those who are going to take a UAZ: immediately change the oil. Nobody ever thought about this seemingly simple operation. People buy this car and do not even think about the fact that periodically it is necessary to change the oil in the engine and gearbox, not to mention the bridges. Of course, this is a military machine and it is very difficult to "kill" it, but if you ride for 10 years on one oil in a gearbox, the machine is unlikely to thank you. As for cross-country ability, reviews note the special design of military bridges. They are made in the shape of a ski. Therefore, to get stuck on military bridges, you need to try hard. And they are more durable in terms of resource, due to the use of other teeth. Also, reviews note the absence of locks. You cannot put disc brakes on the UAZ-469. Military bridges "do not digest" them. But, along with this, there is the possibility of installing wheels over 30 inches. If civil bridges are used, it is necessary to strengthen the constant velocity joints, axle shafts and the main pair.About the problem of consumption and not only through the eyes of car owners
With regards to noise: judging by the reviews, this is a very subjective opinion. Someone scolds military bridges for noisy, but for someone it does not matter - "as they made noise before, so now." Regarding fuel consumption - with a properly adjusted intake system, such an UAZ will consume a maximum of 1.5 liters more than its civilian counterpart. In addition, some car owners note the lack of spare parts, since military bridges have not been produced for several decades. If it is possible to find something, it will only be disassembled, and it is not a fact that what was found will be in good condition. On the other hand, the bridge is not a "consumable" like a filter, rubber and oil. And you don't have to buy gears and other spare parts every day.Off road
If your priority is offorud, it is definitely better to put a military bridge. But if you often drive on normal asphalt surface, civilians are definitely chosen for such purposes. It is not in vain that collective farm bridges are installed on all police "bobiks". In urban areas, comfort and dynamics are a priority. Conclusion Thus, the type of bridge is determined by the further purpose of the car - it will simply go hunting and fishing or be prepared for a full-fledged off-road. But it is worth noting that even a civilian UAZ on "stock" tires is able to get through the ford. But you shouldn't use this opportunity on a daily basis: even on civilian bridges one can feel "military echoes" - a frame structure, a rigid spring suspension. So, we found out how military bridges (UAZ) are arranged, what are their advantages and disadvantages compared to civil ones. As you can see, you need to initially know for what purposes it will be used.Price
The price tag, to put it mildly, is very serious - if you take the new ones produced by Bars (excellent, by the way, Russian-made bridges), then the purchase of a complete new set (front and back) will cost 140,000 rubles. Plus, the installation will result in a decent amount. They differ from the usual with a wider track (1600mm), and also in that the front axle goes under the springs. As people note, it will be softer and more comfortable to ride on such bridges. Therefore, it is better to immediately look for a car on the warriors, since there are more than enough ads on Avito. There you can also find just bridges for 30-50k rubles, here you really need to look at the condition, you can take a cheaper one, in excellent condition from conservation, or you can get more expensive, rusty ones. All the same, during installation, they will need to be configured, sorted out. For work - for the installation of 1 bridge, the price tag is 5-7 thousand rubles.Diagram (device) of a military bridge
Drive axles with final drives. The middle part of the driving axles with final drives differs from the above-described bridges in the smaller size of the differential and the cantilever installation of the driving gear of the main drive on two tapered roller bearings 5 and 7 (Fig. 1). Rice. 1 Rear axle of the car UAZ-3151 1 - crankcase cover 2 - differential bearing 3, 13 and 49 - adjusting shims 4 and 23 - sealing gaskets; 5 and 7 bearings of the drive gear, 6 - an adjusting ring, 8 and 42 - cuffs, 9 - a flange. 10 - nut, 11 - dirt deflector. 12 - support washer, 14 - spacer sleeve, 15 - adjusting ring for the position of the drive gear, 16 - drive gear, 17 - satellite, 18 and 57 - half-shafts; 19 - final drive housing; 20 and 29 - oil deflectors, 21 - ball bearing, 22 and 26 - retaining rings, 24 - final drive housing cover, 25 - roller bearing, 27 - brake shield, 28 - brake drum, 30 - wheel bolt, 31 - trunnion , 32 - hub bearing, 33 - gasket, 34 - lock washer, 35 - drive flange, 36 - nut and locknut of the hub bearings, 37 - bearing thrust washer, 38 - bushing; 39 - the driven shaft of the final drive, 40 - thrust rings of bearings, 41 - gaskets; 43 - driven shaft bearing, 44 - driven final drive gear, 45 - driven shaft bearing mounting nut, 46 and 50 - drain plugs, 47 - final drive gear, 48 and 56 - satellite boxes, 51 - crankcase, 52 - washer half-axle gears, 53 - half-axle gear, 54 - satellites axle, 55 - driven gear of the main drive Between the end of the drive gear and the inner ring of the large bearing, an adjusting ring 15 of the drive gear is installed, and between the inner rings of the bearings there is a spacer sleeve 14, an adjusting ring 6 and adjusting gaskets 13. The bearings of the drive gear are tightened with the flange mounting nut 10. The final drives of the rear driving axle are located in the crankcases, which are pressed by their necks onto the outer ends of the half-axle housings and secured with electric rivets. The pinion gear 47 is installed at the spline end of the half-shaft 48 between the ball 21 and roller 25 bearings. The ball bearing is secured by a retaining ring 22 in the final drive housing. An oil deflector 20 is located between the crankcase and the ball bearing. The roller bearing is installed in a removable housing, which is attached to the crankcase drain with two bolts. The inner ring of the roller bearing is fixed on the axle shaft by a retaining ring 26. The driven gear 44 of the final drive is centered on the shoulder of the driven shaft 39 and is bolted to its flange. The driven shaft rests on the bushing 38 and the roller bearing 43, which is fixed to the shaft by a nut 45, which is punched out after being tightened into the shaft groove. The driven shafts of the right-hand side drives and the bearing retaining nuts have a left-hand thread. To distinguish the nuts with a left-hand thread, they have an annular groove, and the driven shafts have a blind hole dia. 3 mm at the end of the shaft. With the wheel hubs, the driven shafts of the rear final drives are connected by splined flanges 35. The final drives of the front drive axle of the UAZ are located in the pivot pins (Fig. 2 bridge diagram) Rice. 2 Swivel pin of the front axle of the UAZ-3151 vehicle 1 - rubber cuff in a metal casing, 2 - ball bearing, 3 - constant velocity hinge, 4 - gaskets, 5 - grease nipple, 6 - king pin, 7 - king pin pad, 8 - pivot pin housing, 9 - king pin bushing, 10 - ball bearing, 11 - final drive shaft, 12 - hub, 13 - air flange, 14 - clutch, 15 - retainer ball spring, 16 - protective cap, 17 - clutch bolt, 18 - trunnion, 19 - lock nut, 20 - support washer, 21 - drive gear, 22 - locking pin, 23 - thrust washer, 24 - collar, 25 - support washer, 26 - axle shaft casing, 27 - rotation limit bolt, 28 - wheel rotation limit stop, 29 - the lever of the pivot pin, I ... III, and - the same as in fig. 112 Final drive housings are cast in one piece with pivot housings. The drive gear is installed on the splines of the driven knuckle of the hinge between the ball and roller bearings and is secured together with the roller bearing with a nut 19, which, after tightening, is expanded into the groove of the shaft. The ball bearing is installed in the journal housing in a cage with an outer shoulder that takes axial loads of the hinge through the bearing. At the outer ends of the driven shafts of the front final drives, devices are installed that allow you to connect or disconnect, if necessary, the shafts with the hubs of the front wheels.UAZ on military bridges (video)